before and after

Before & After: The Contrasting Color Kitchen Remodel

1H2A9747-Edit.jpg

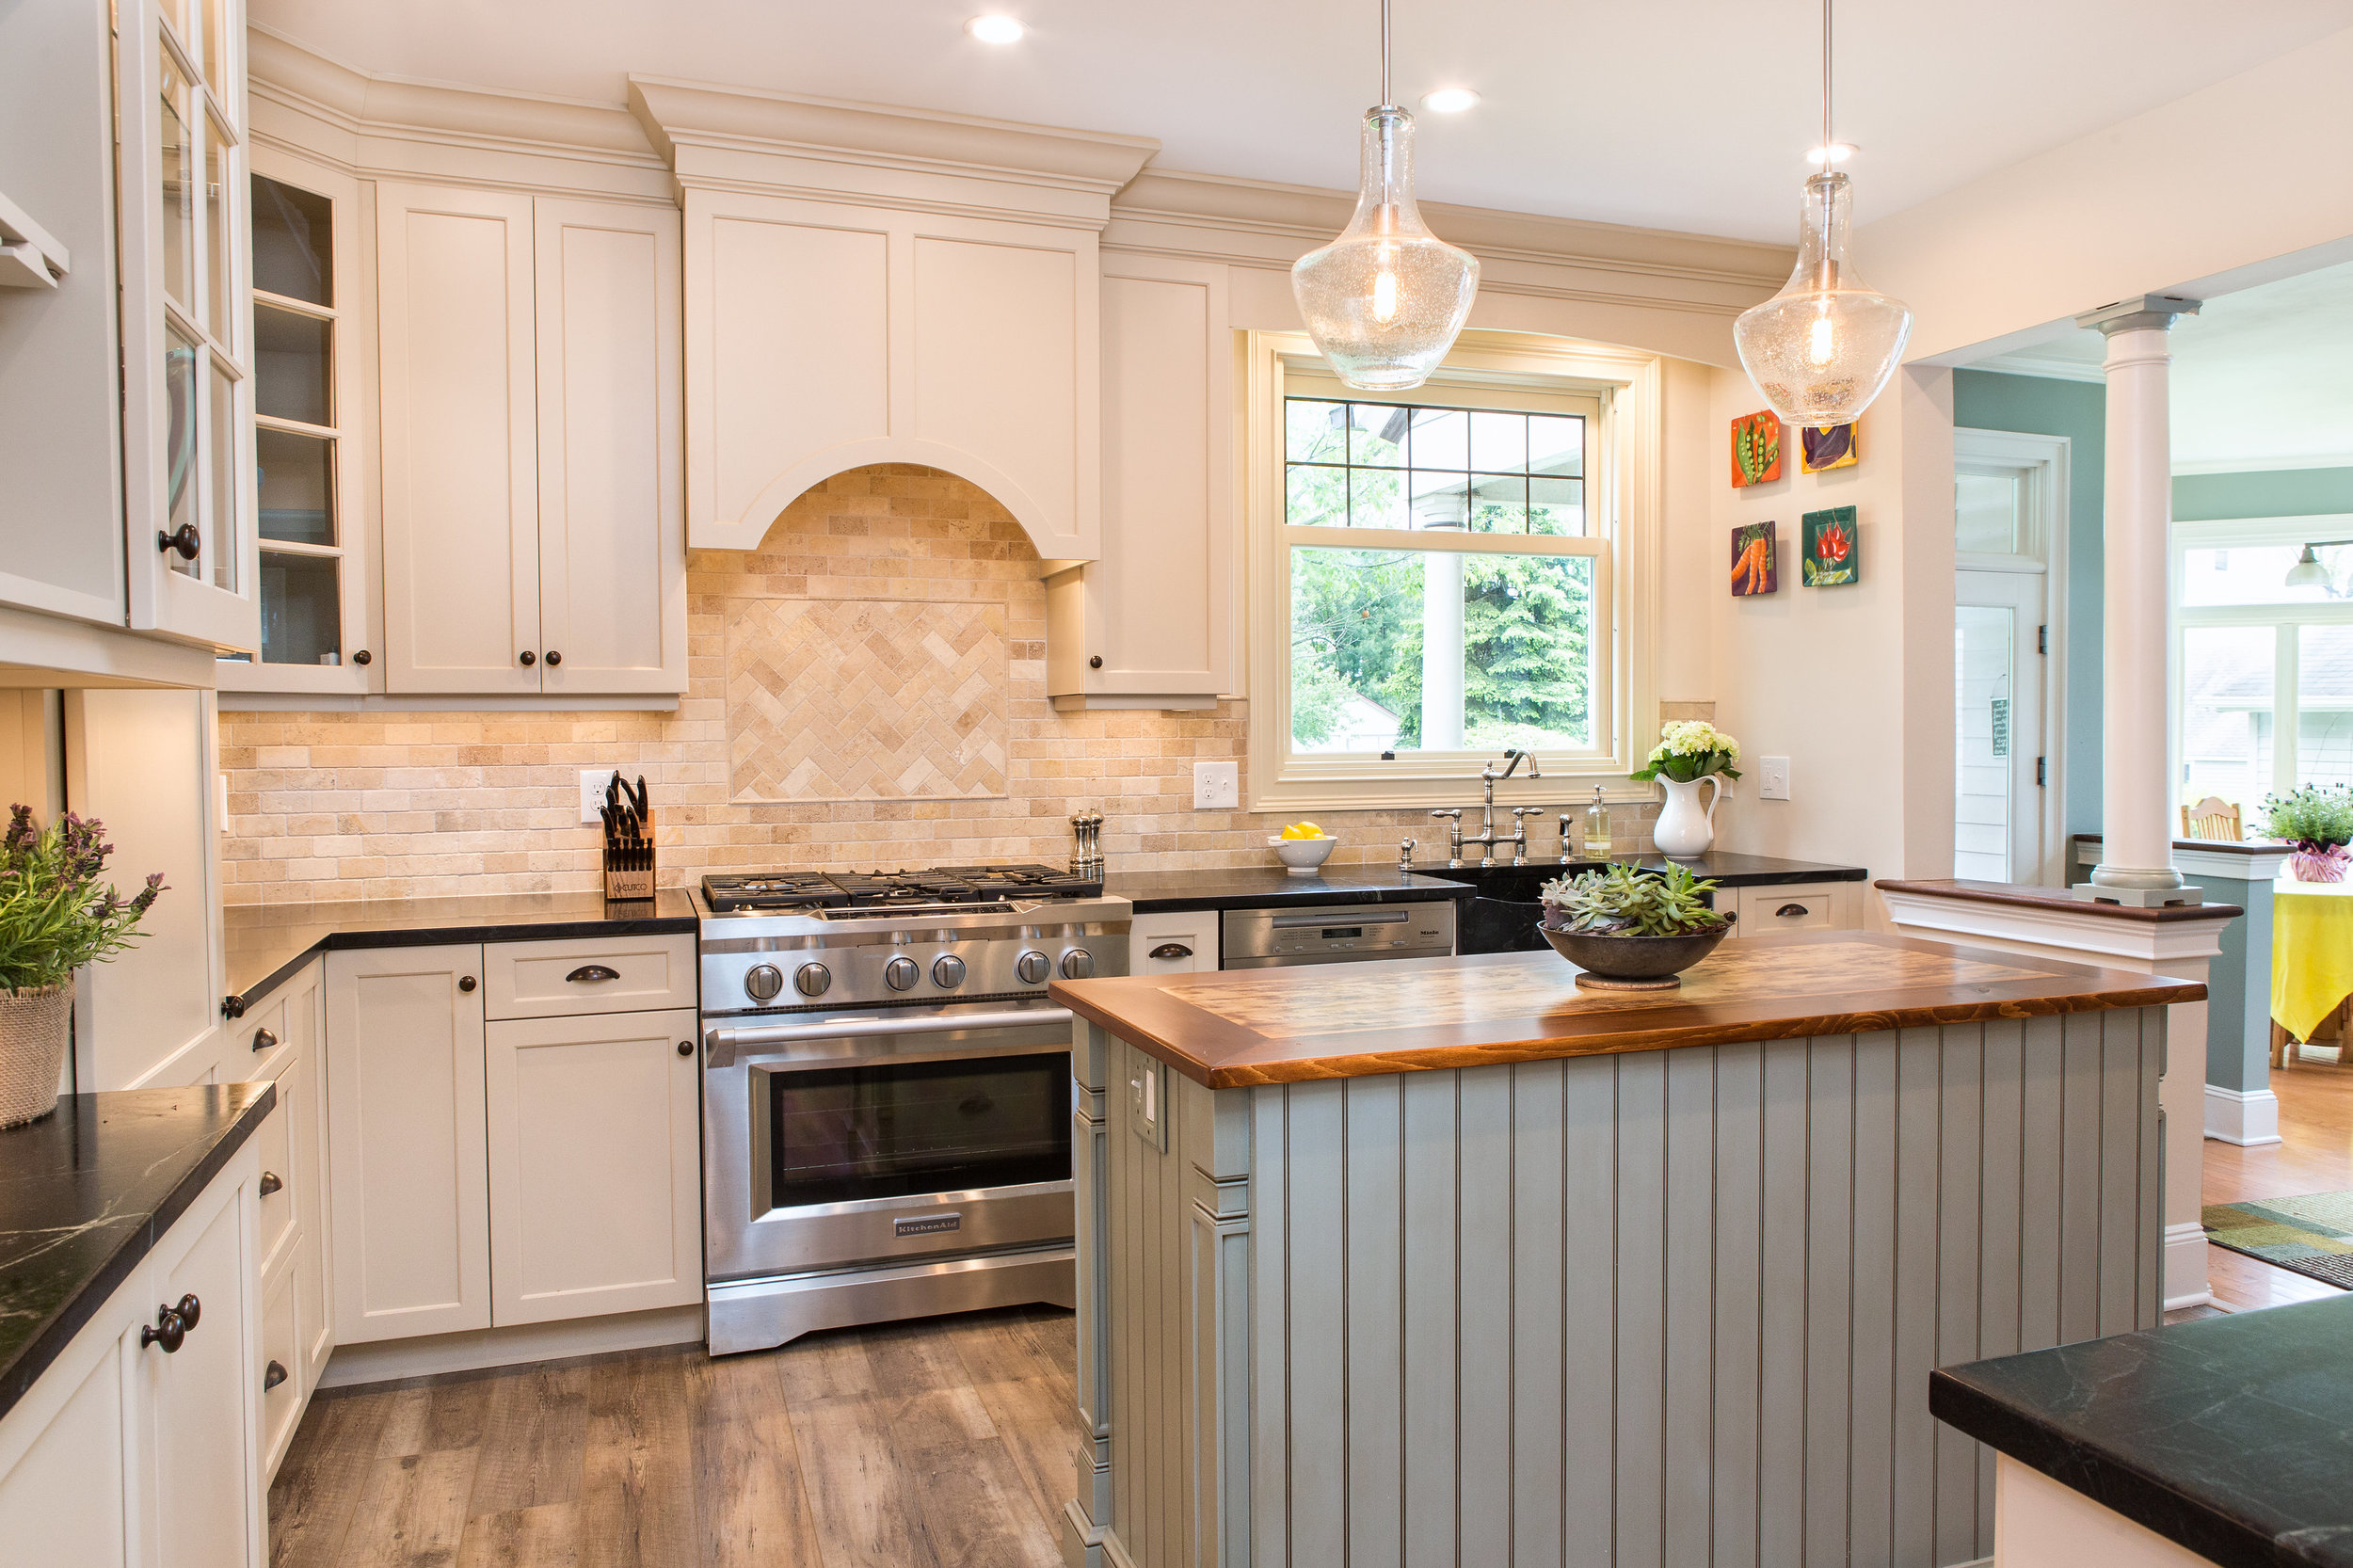
Over the years we have designed and remodeled hundreds (if not, thousands) of kitchens.  Every client and kitchen are different, which makes for a very interesting job working as a kitchen designer! But every once in a while, a kitchen comes along that really makes you stop, think, and appreciate the beauty of transformation.  One of the most rewarding experiences is creating a space that puts a smile on the homeowner’s face every day.

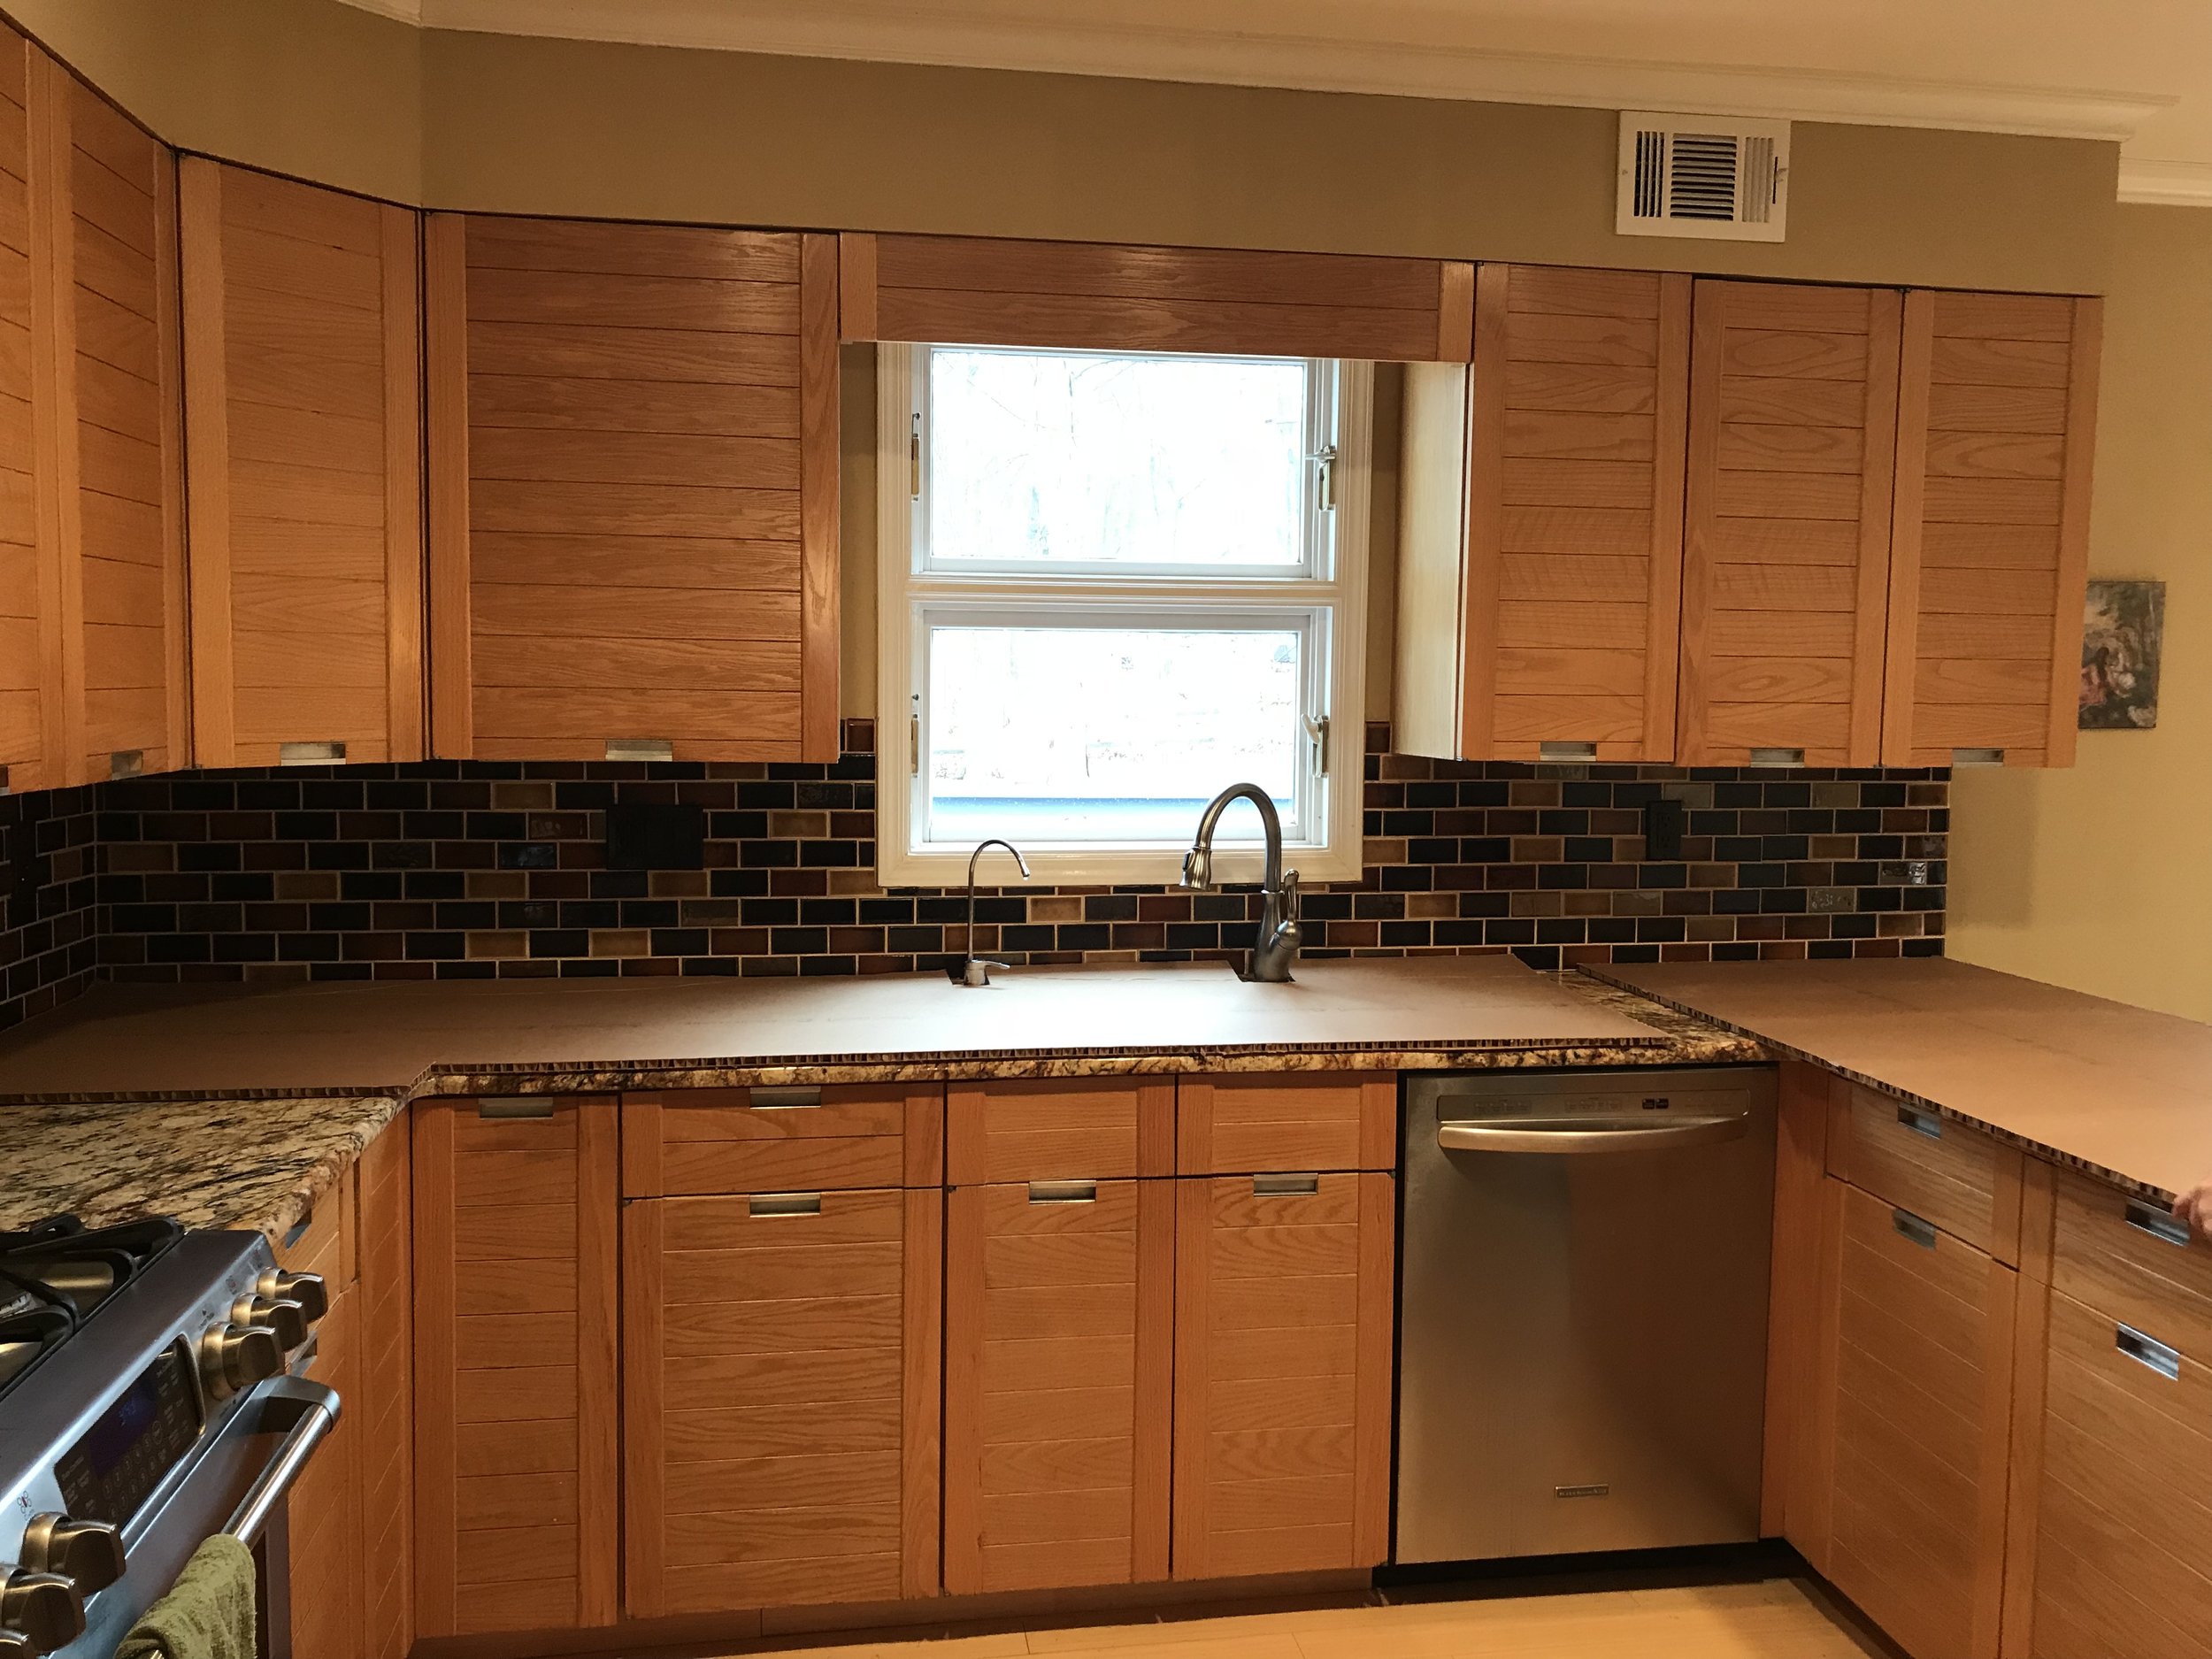
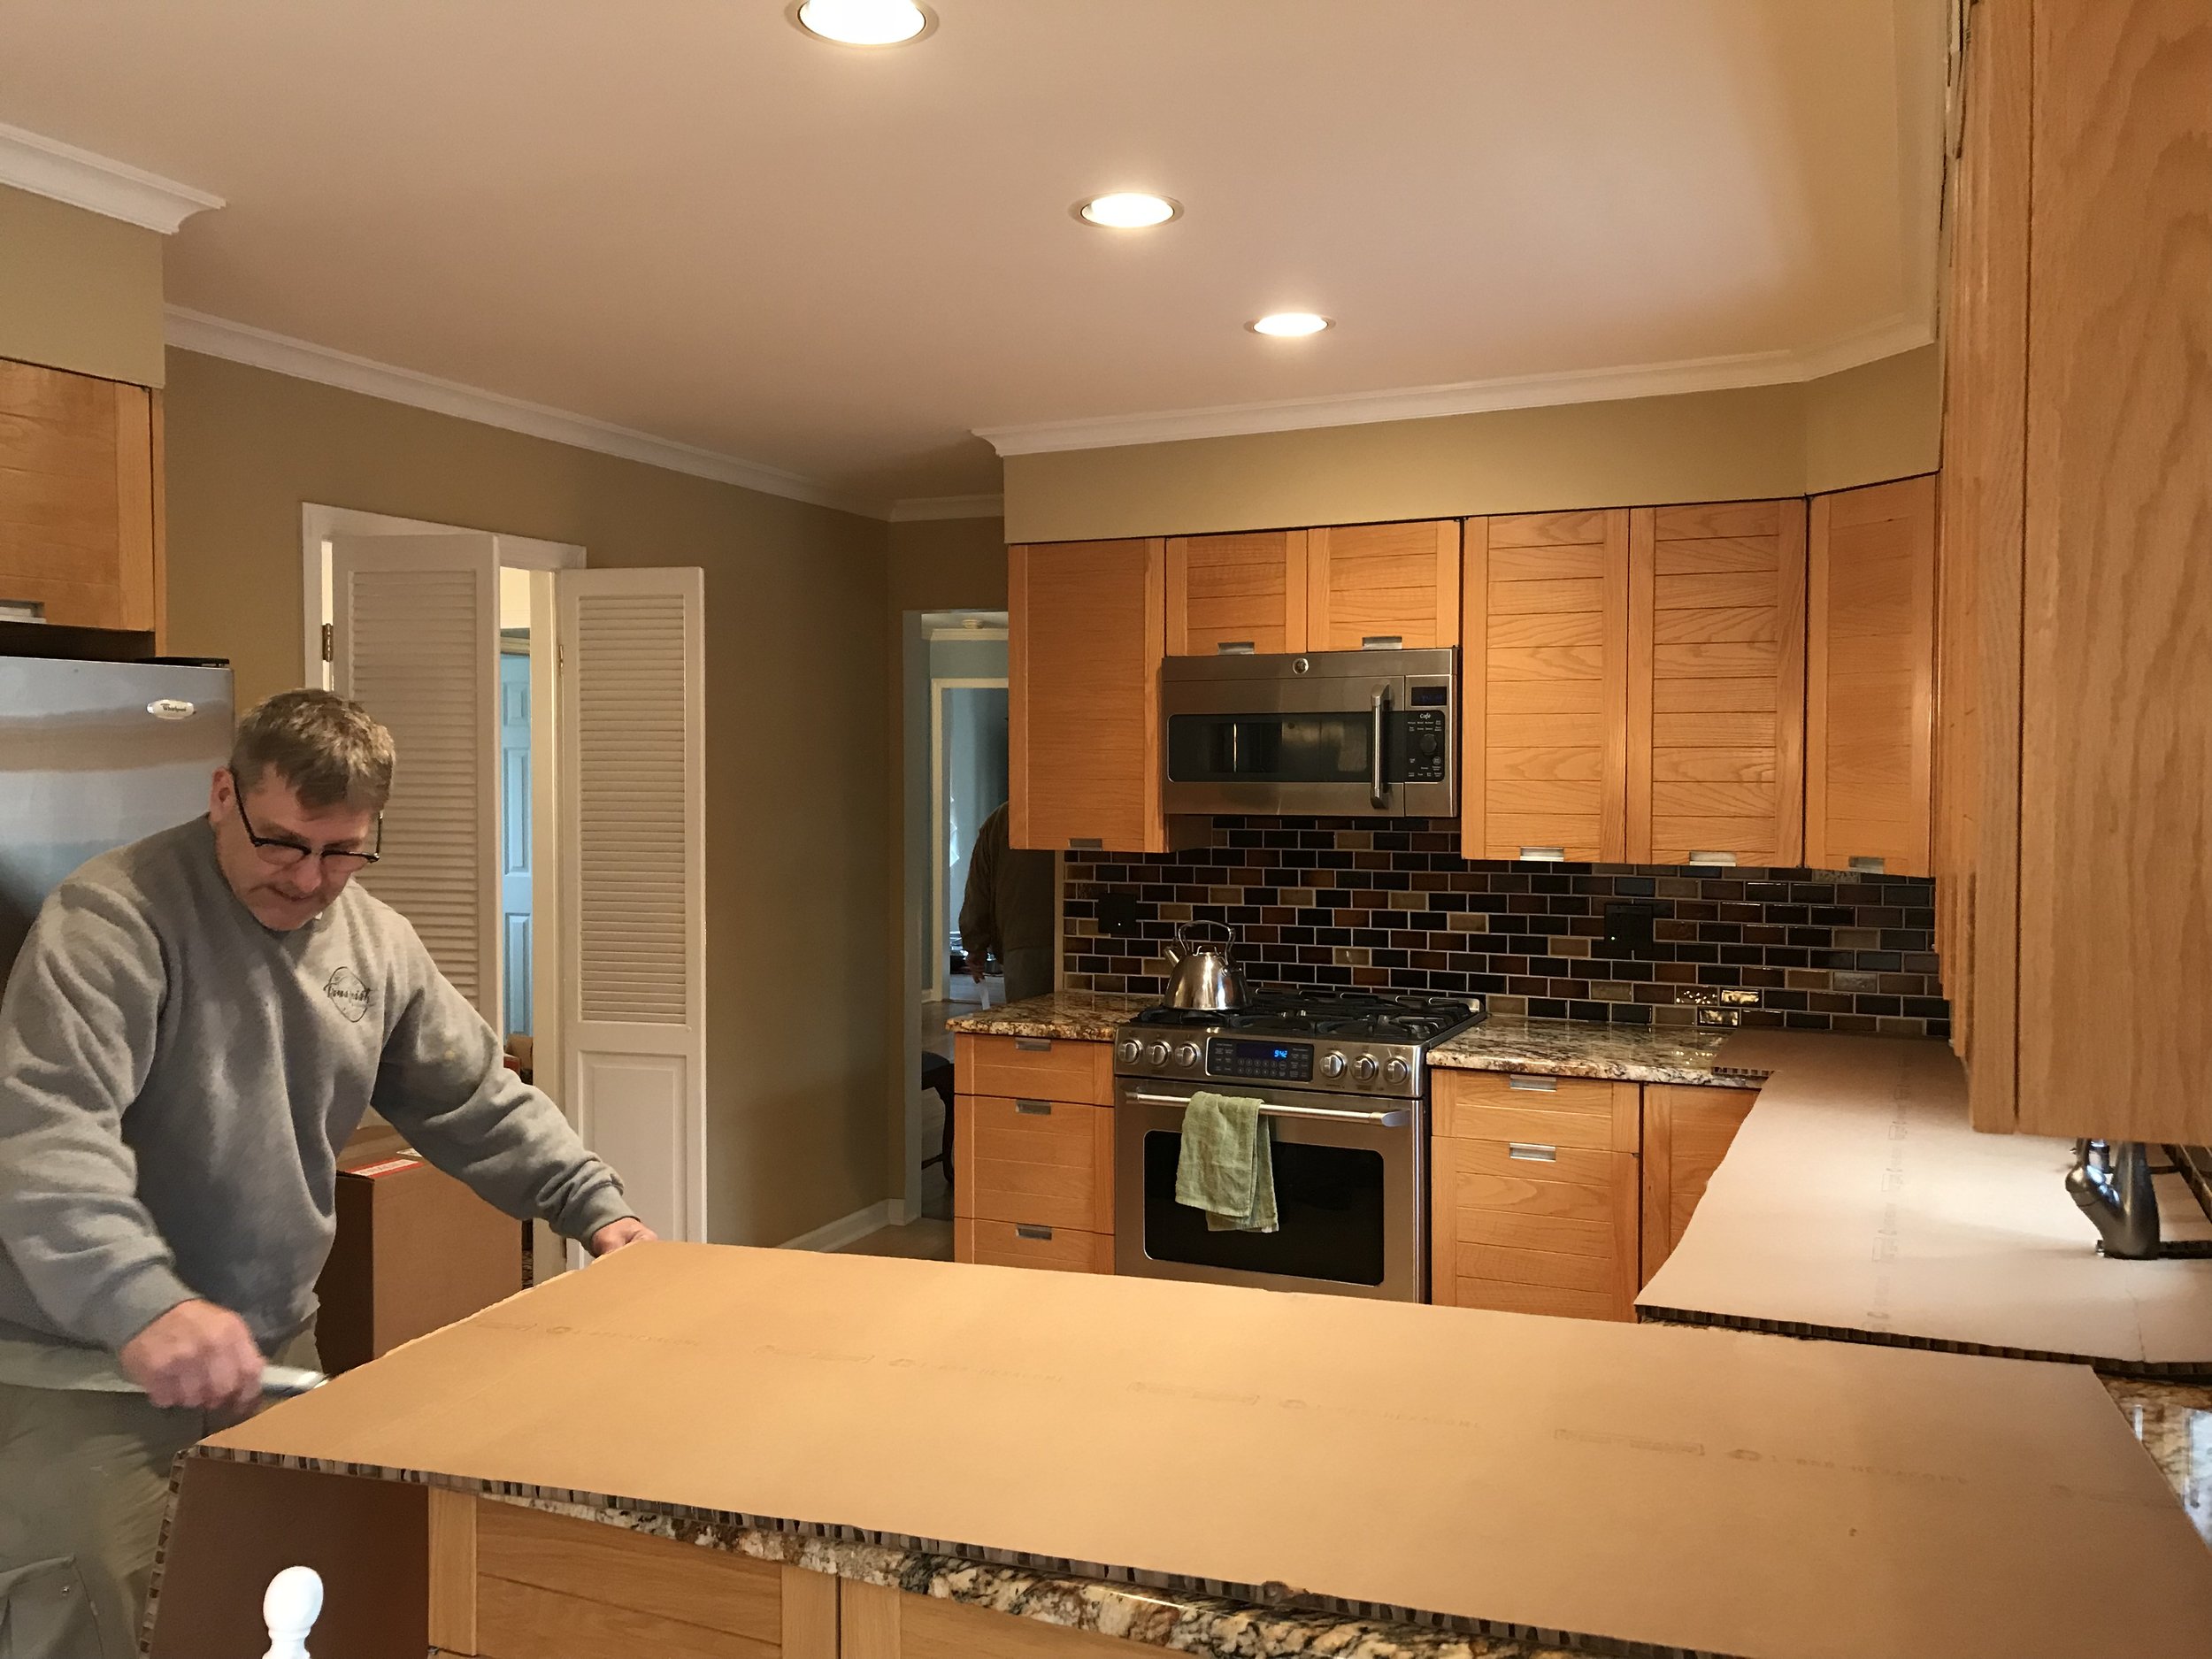
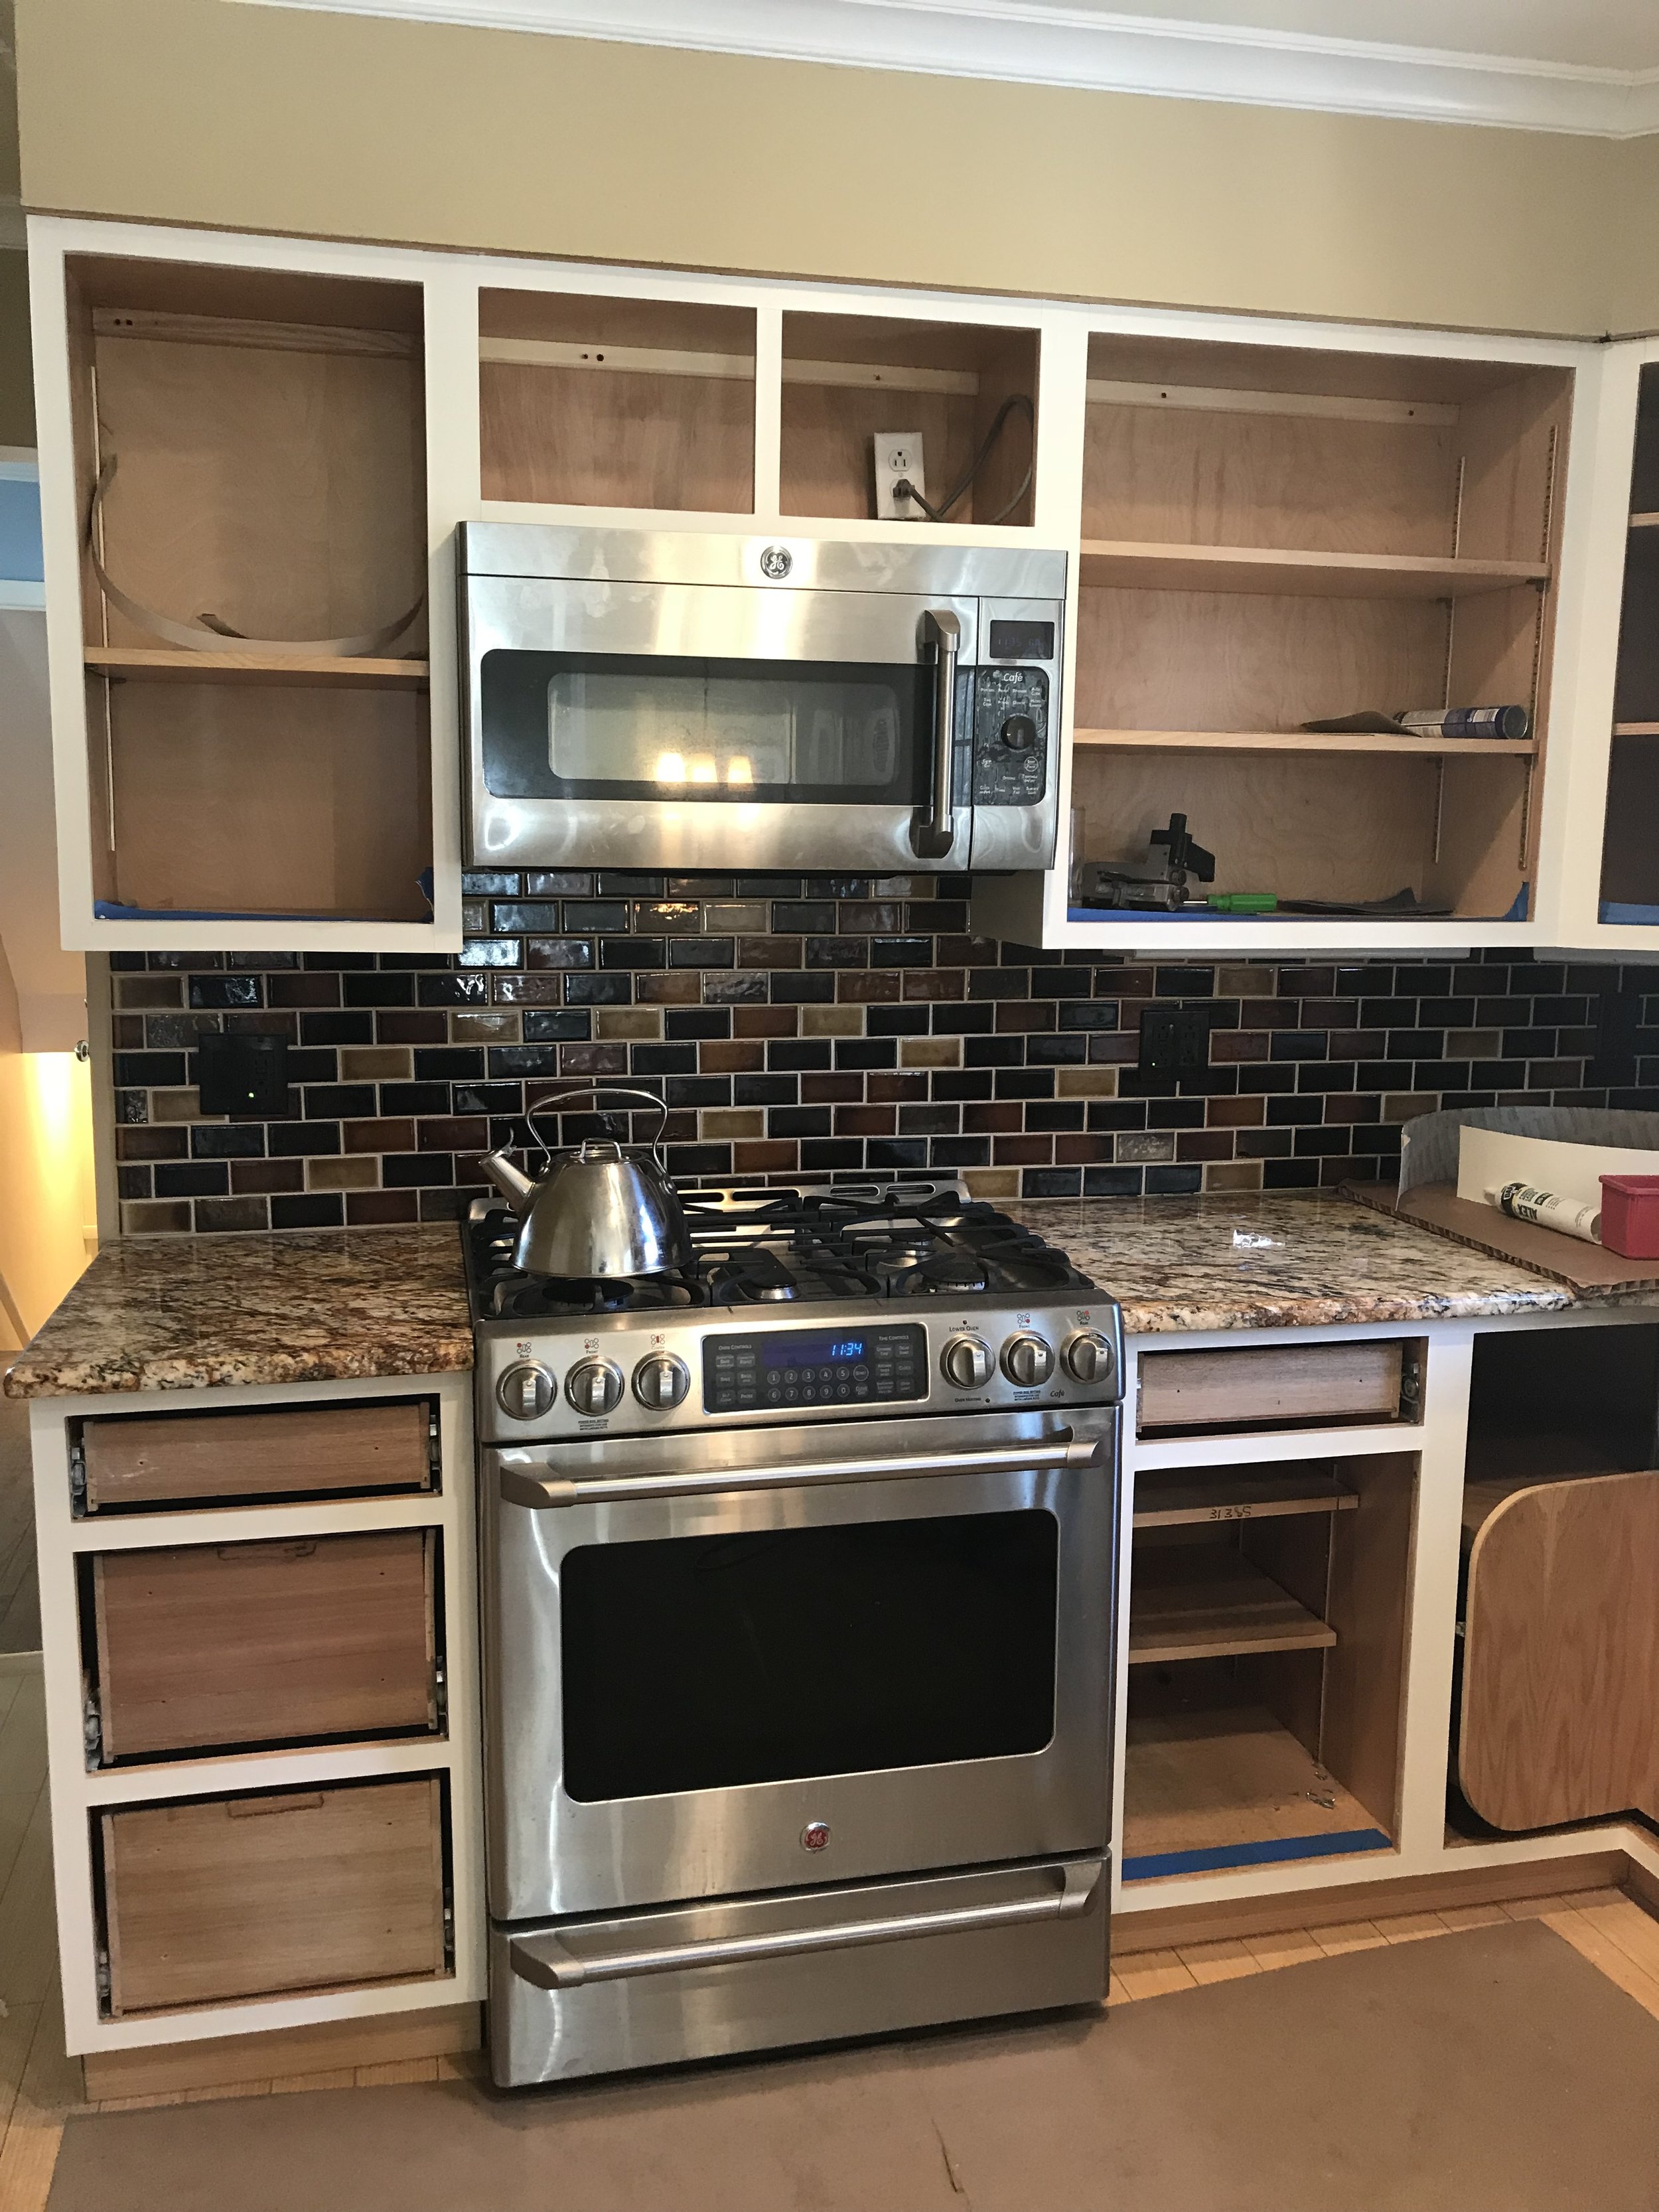
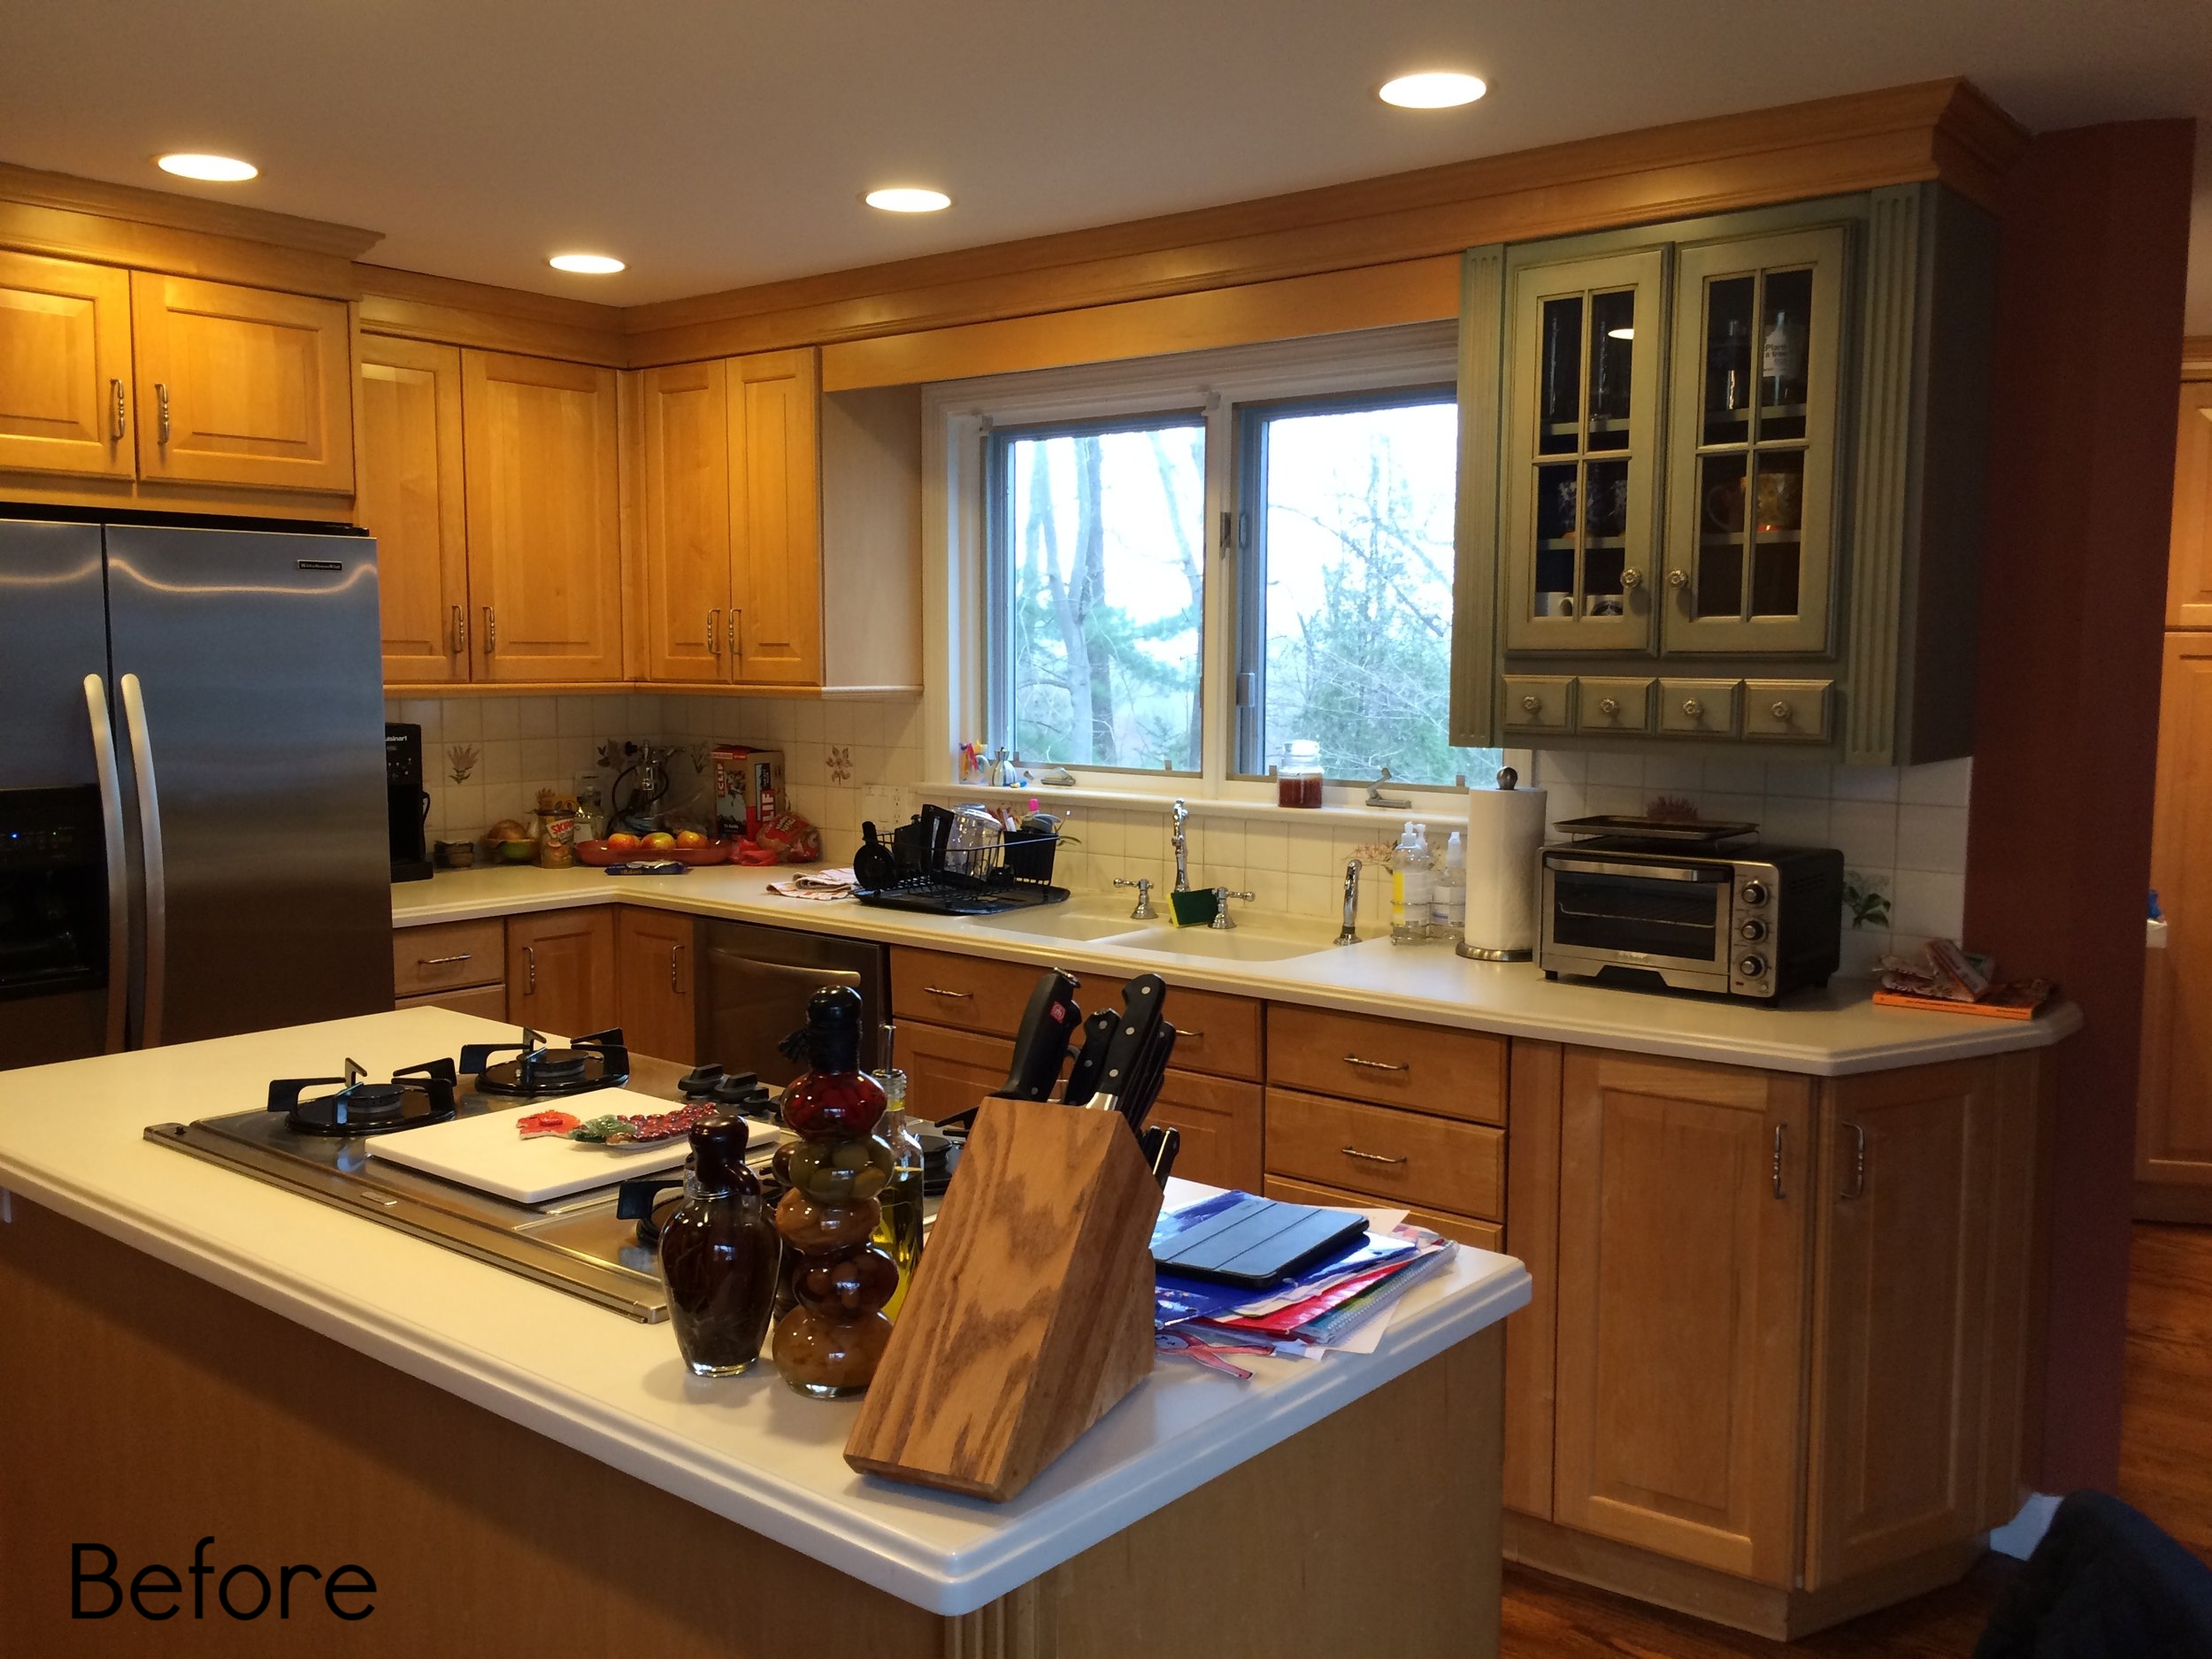
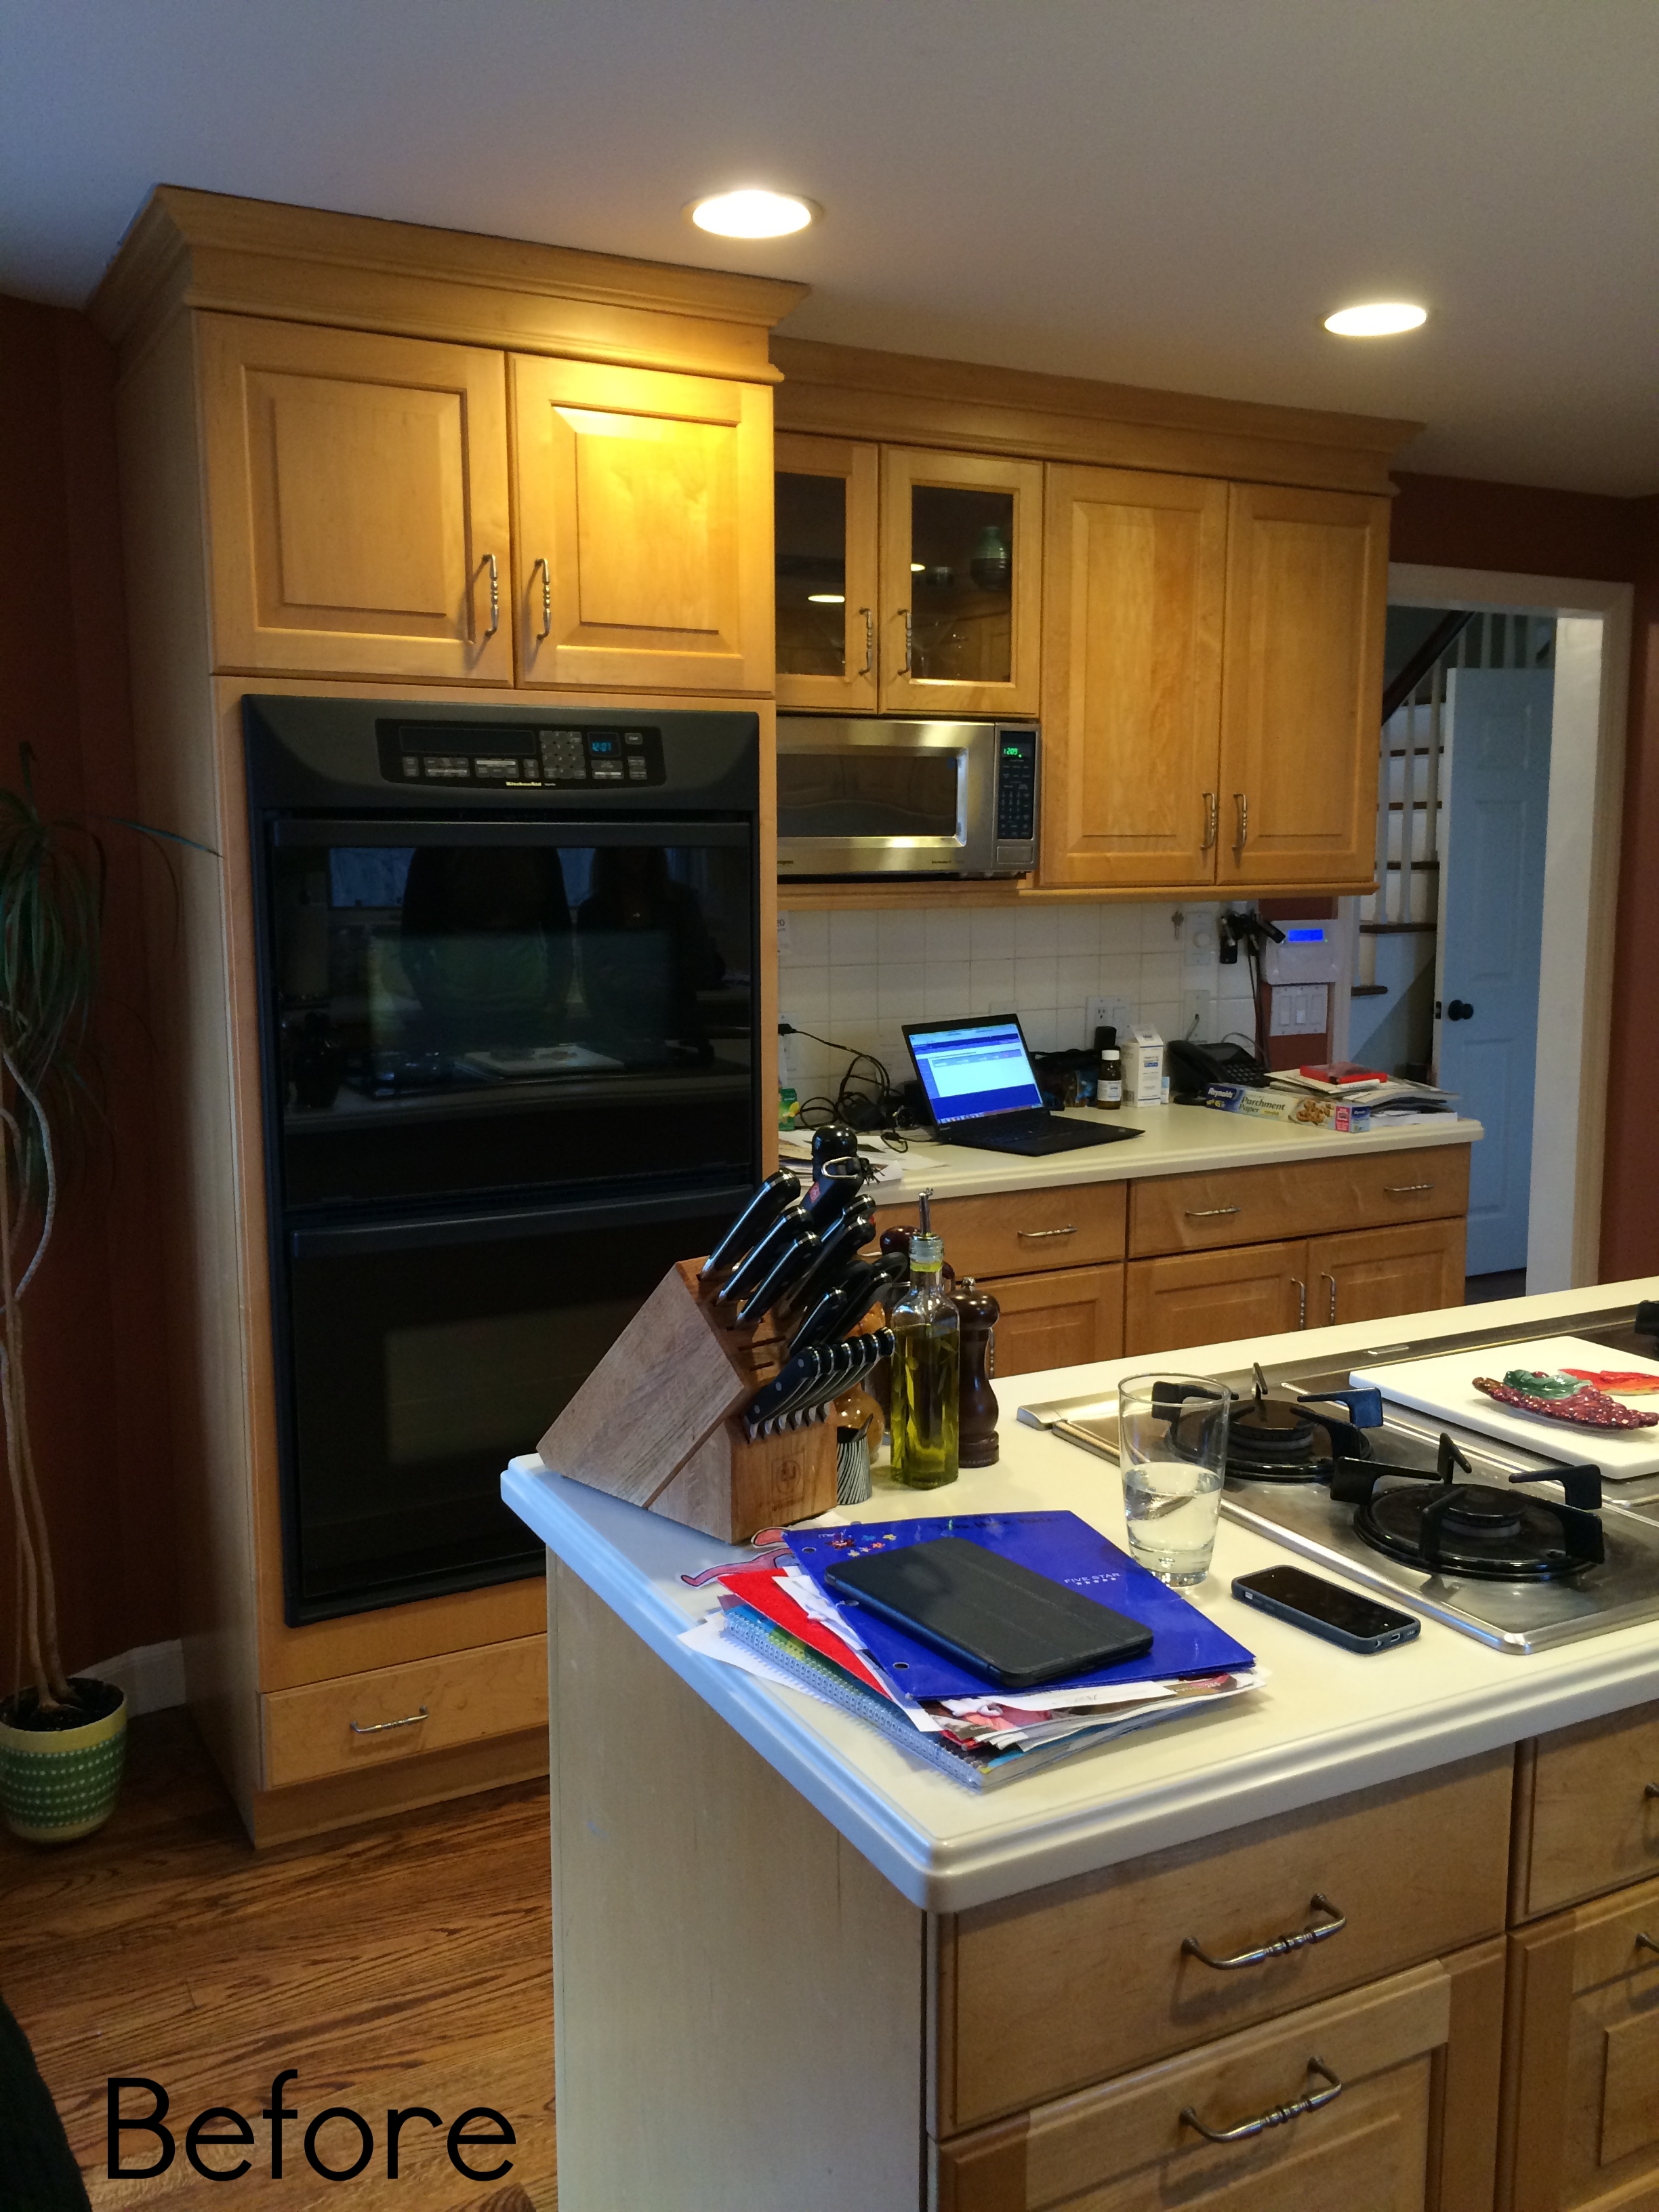
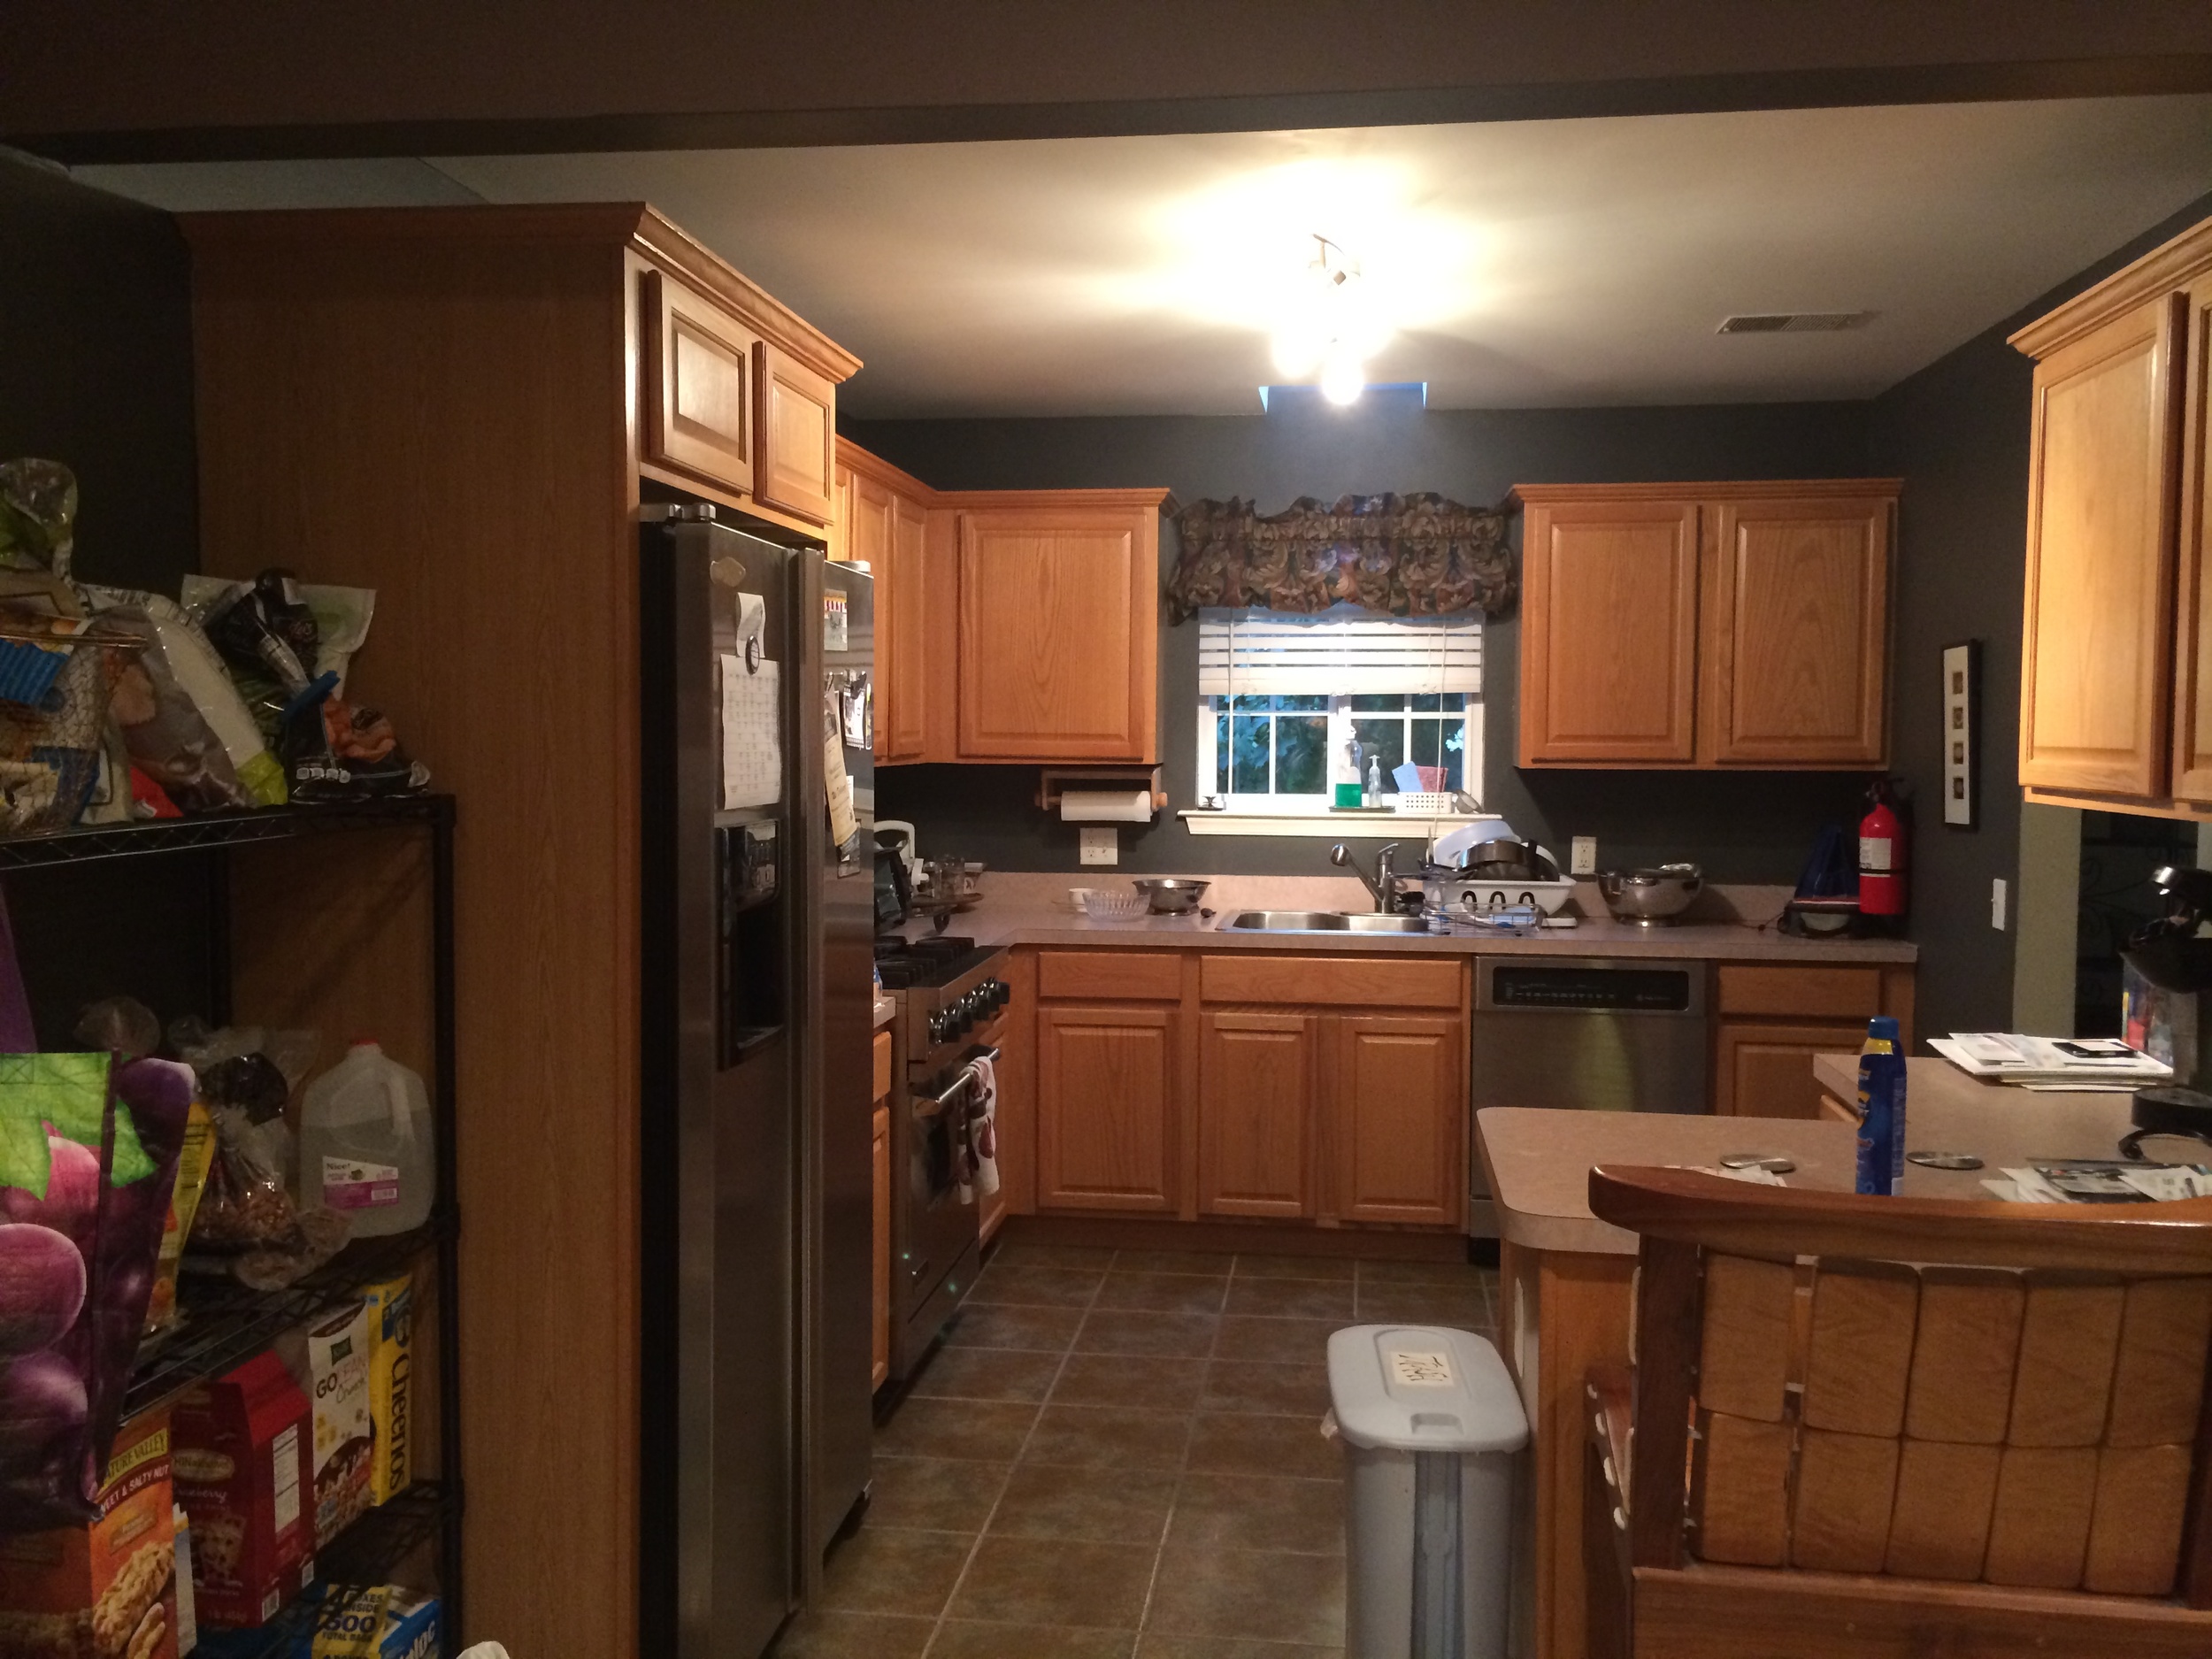
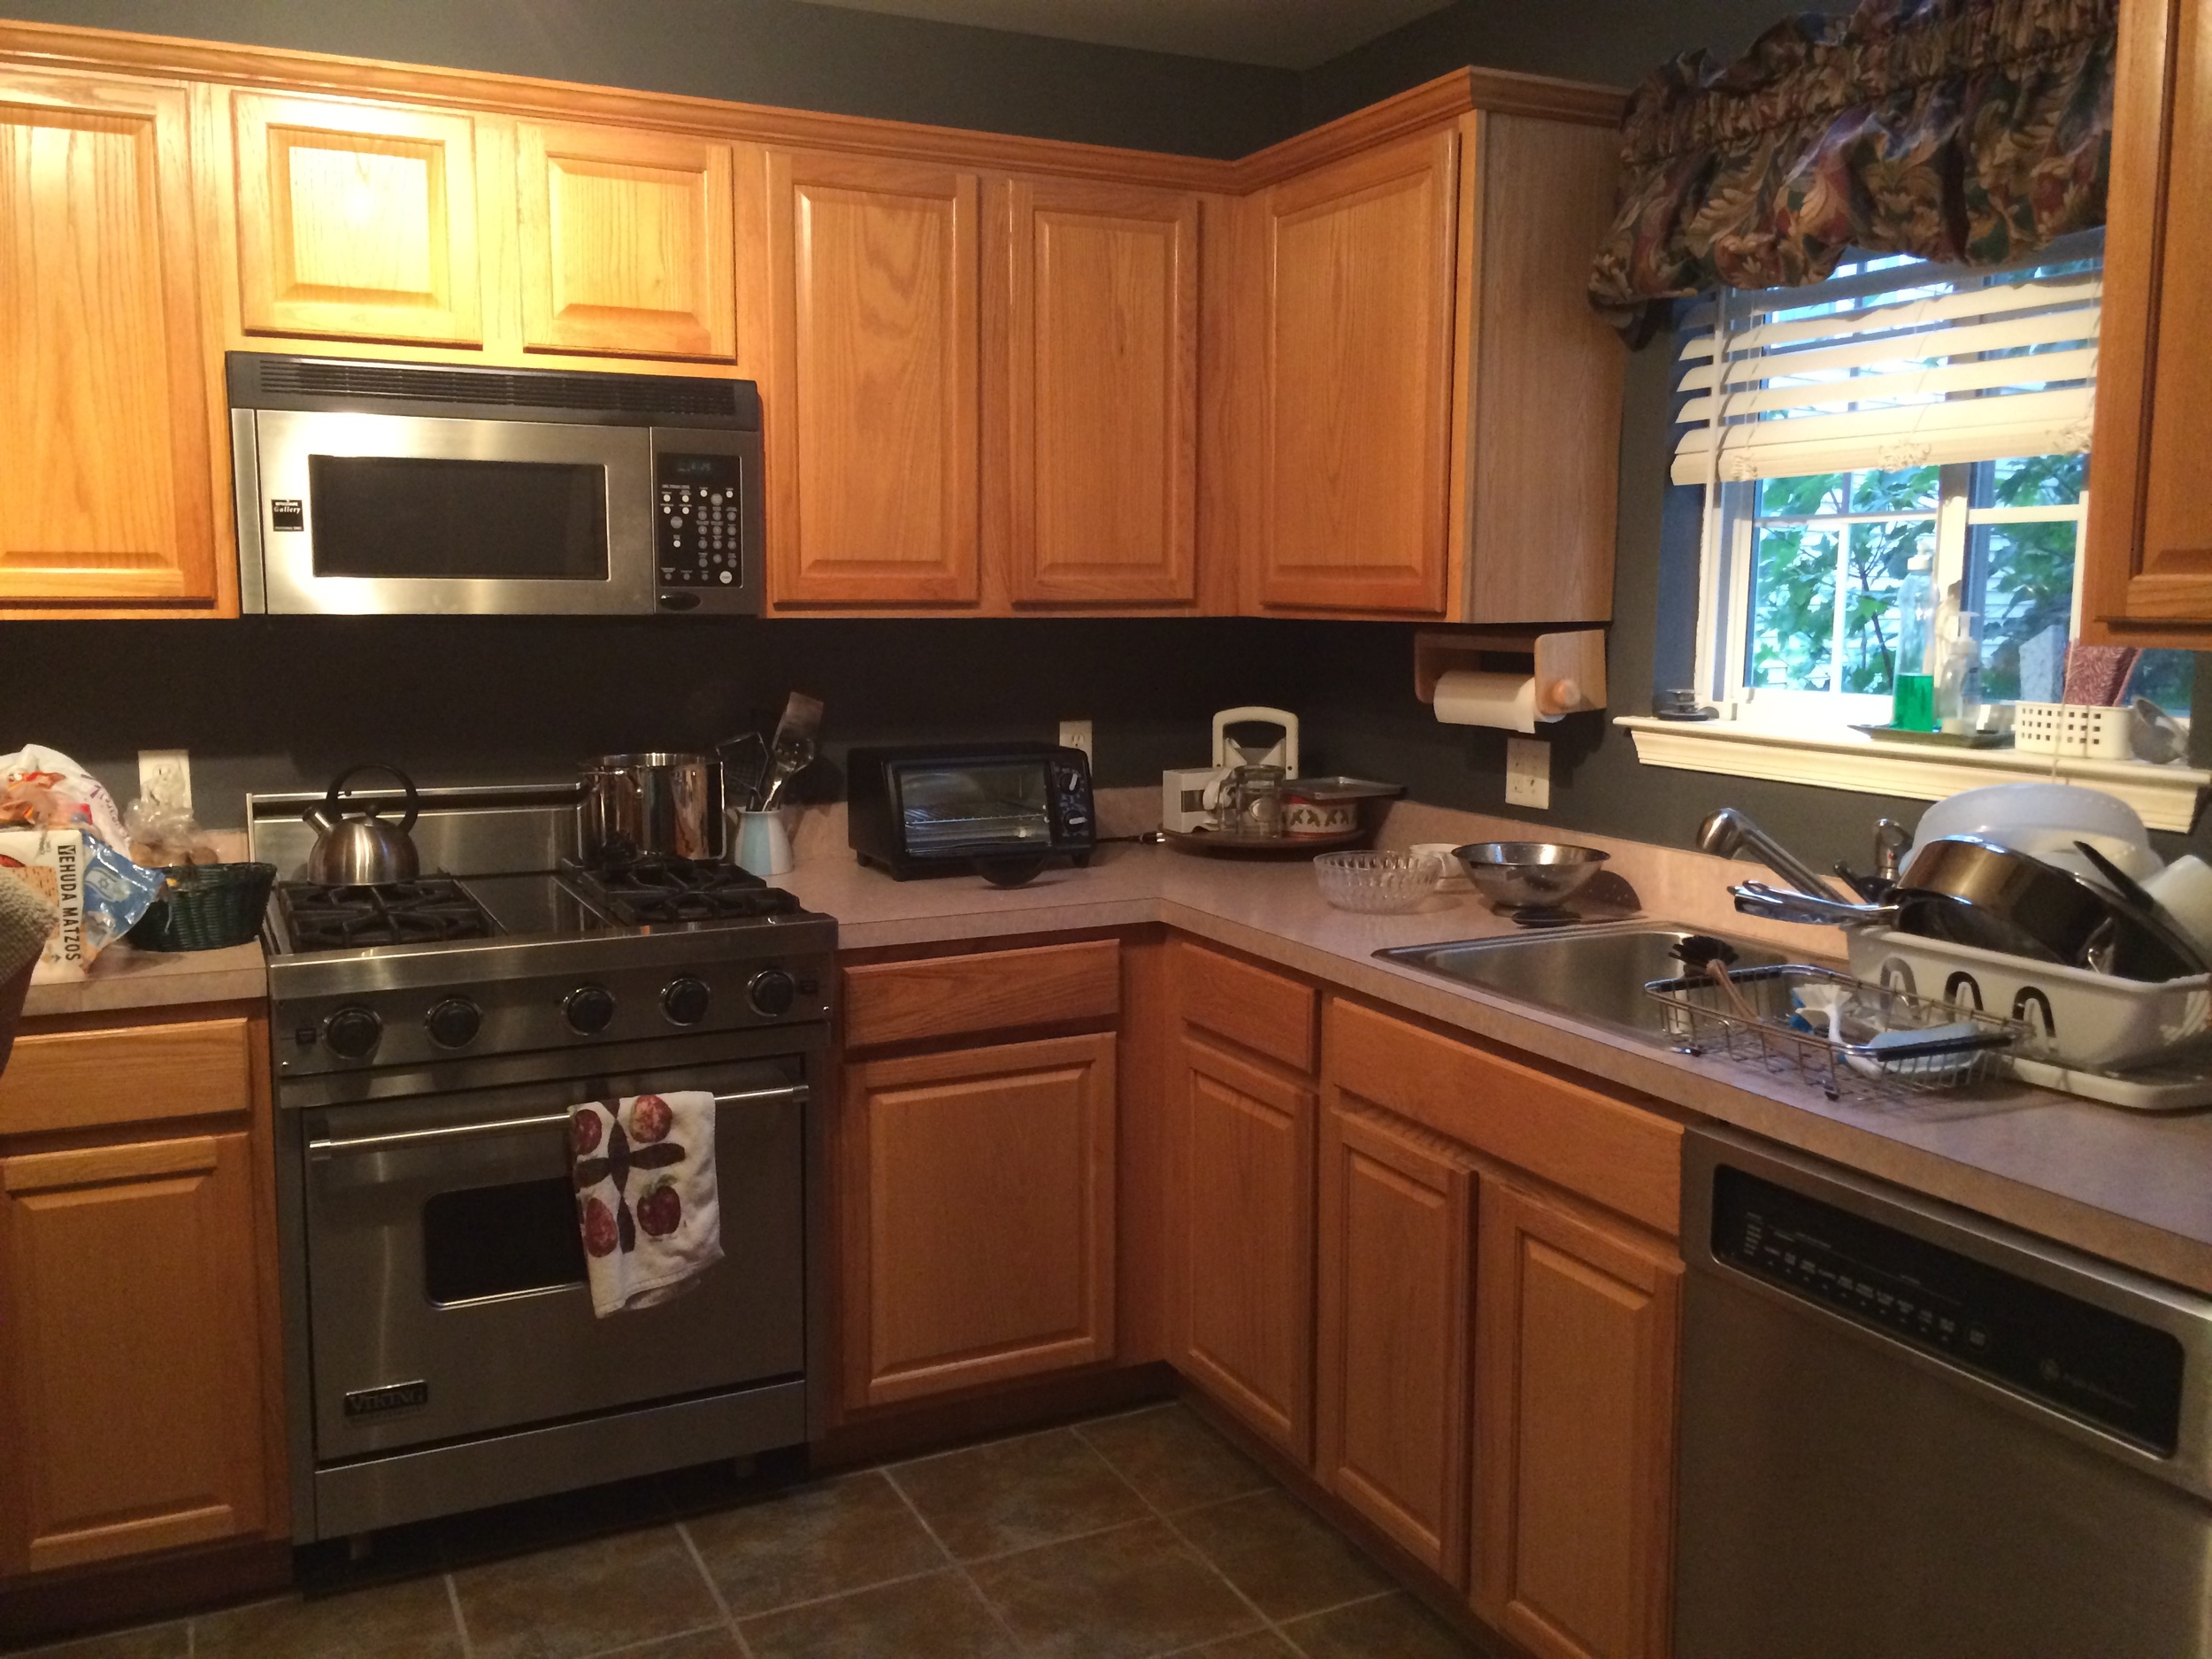
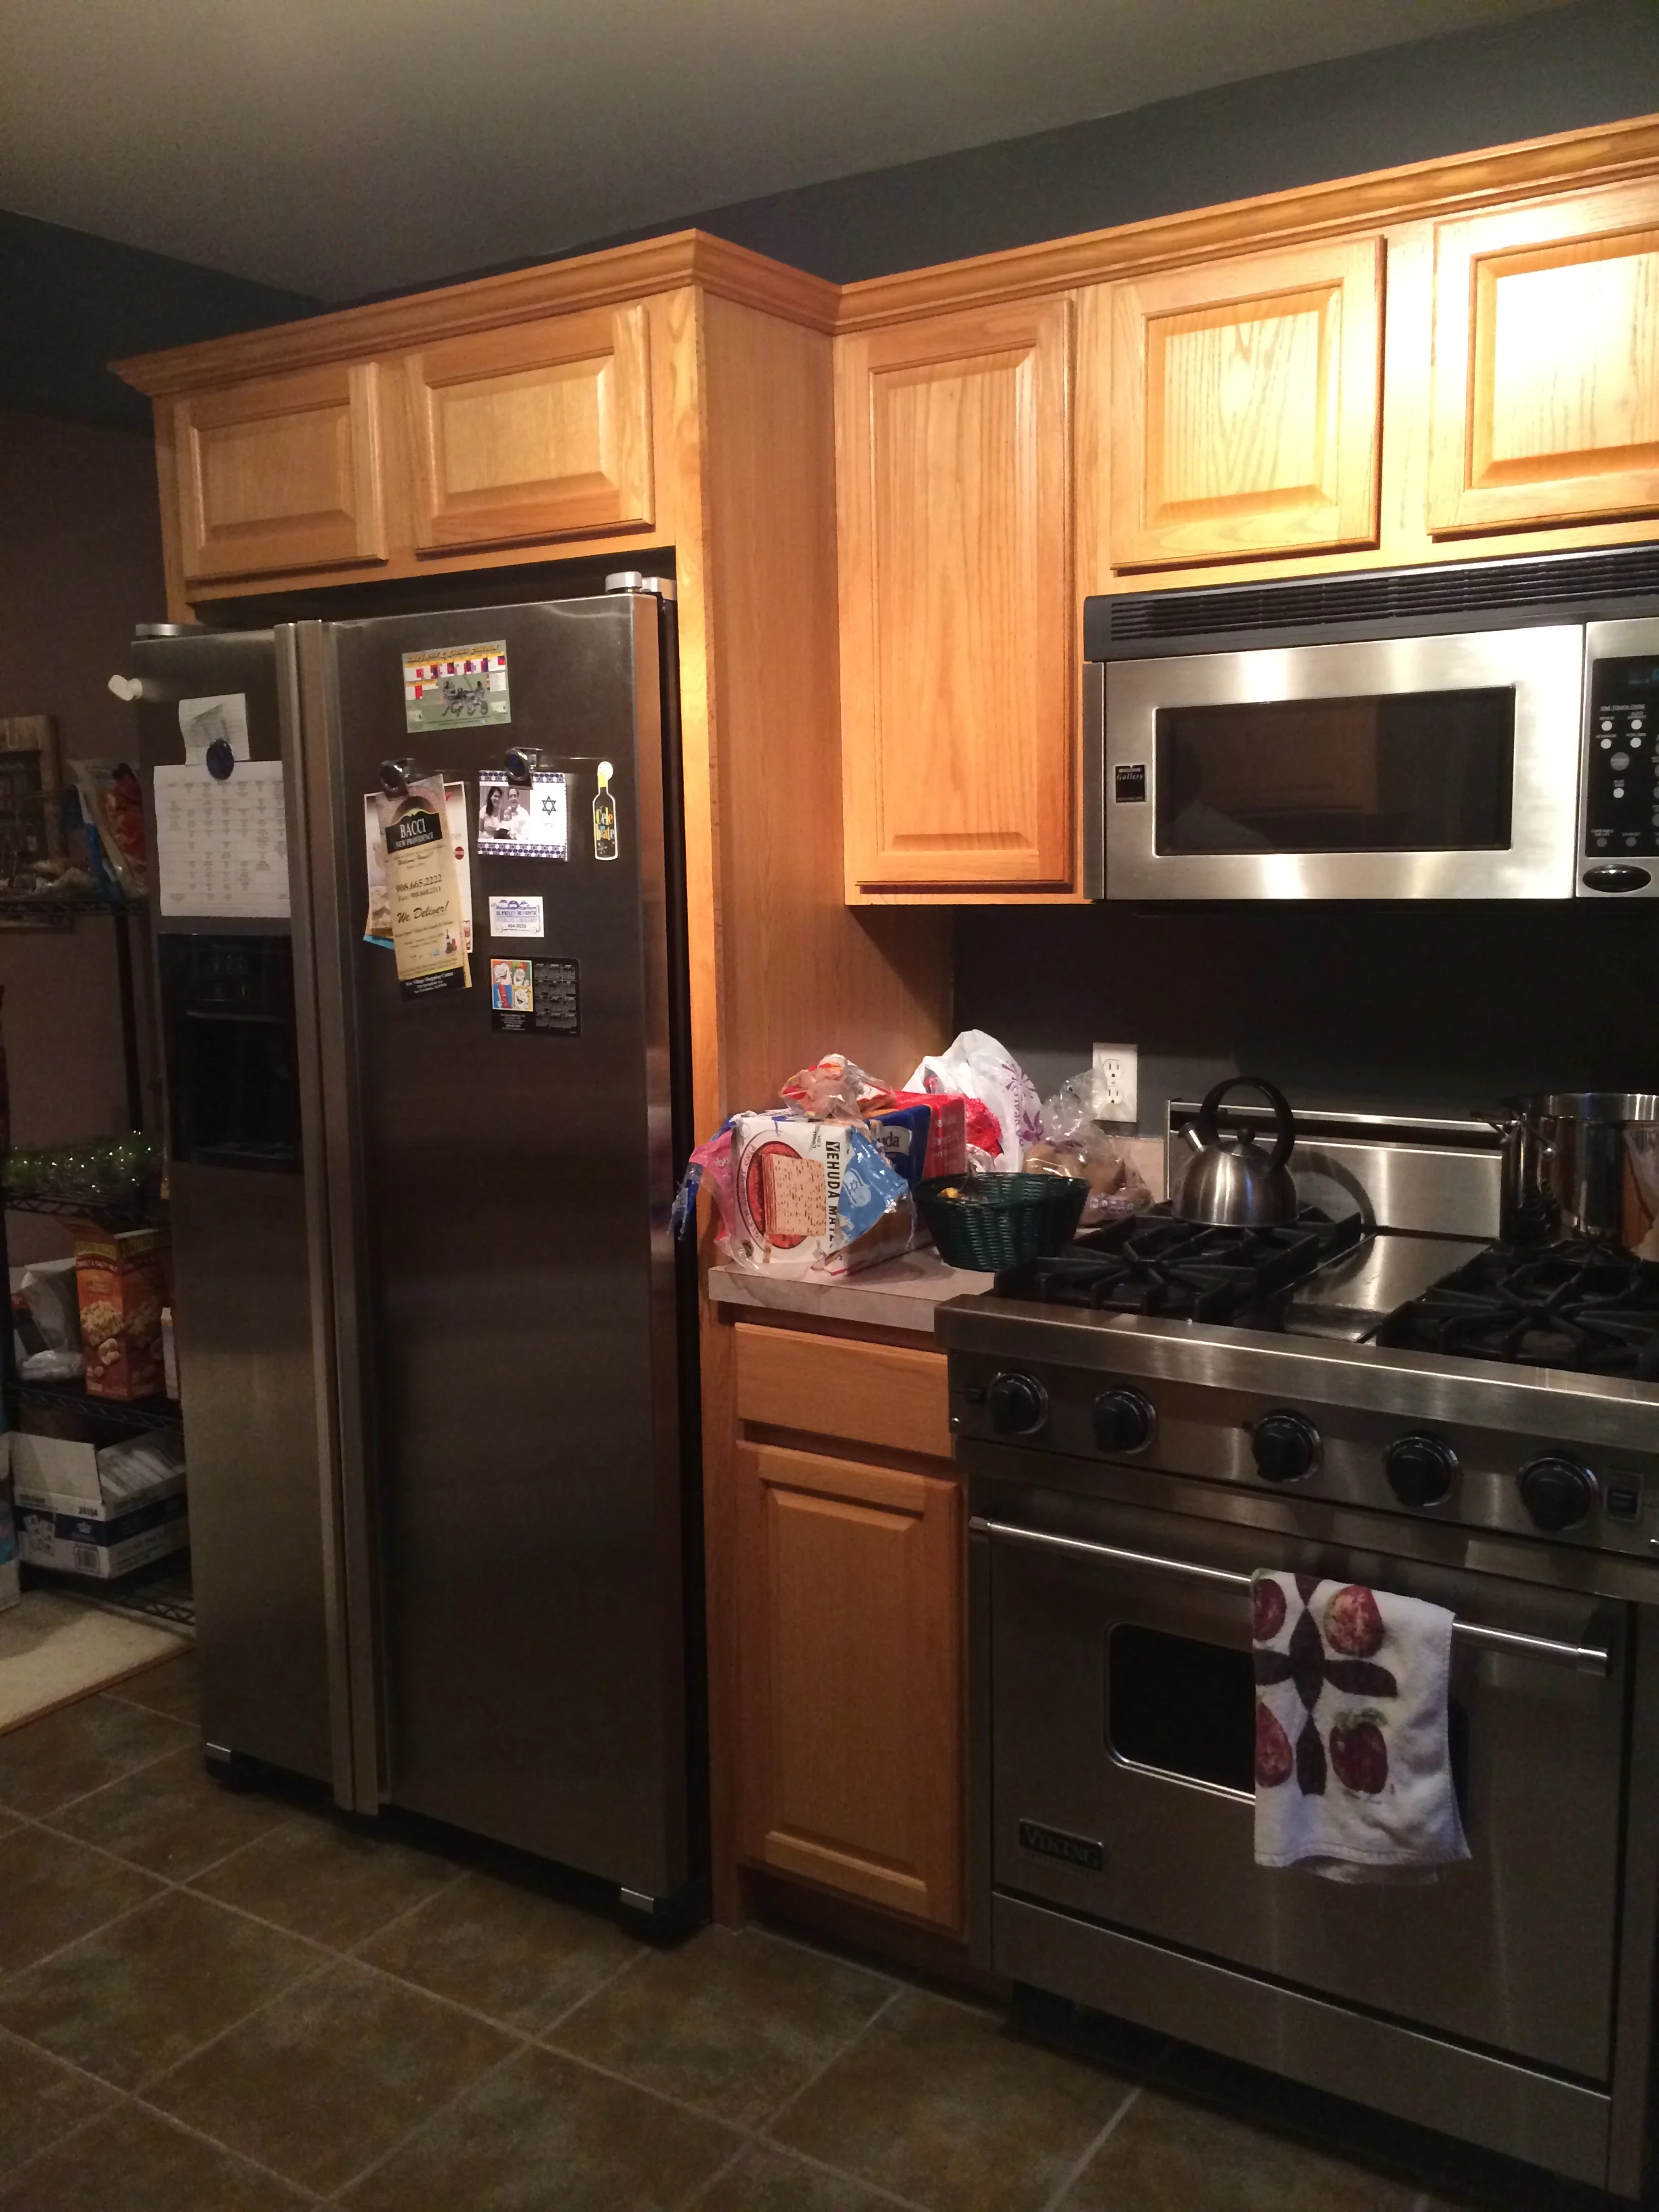
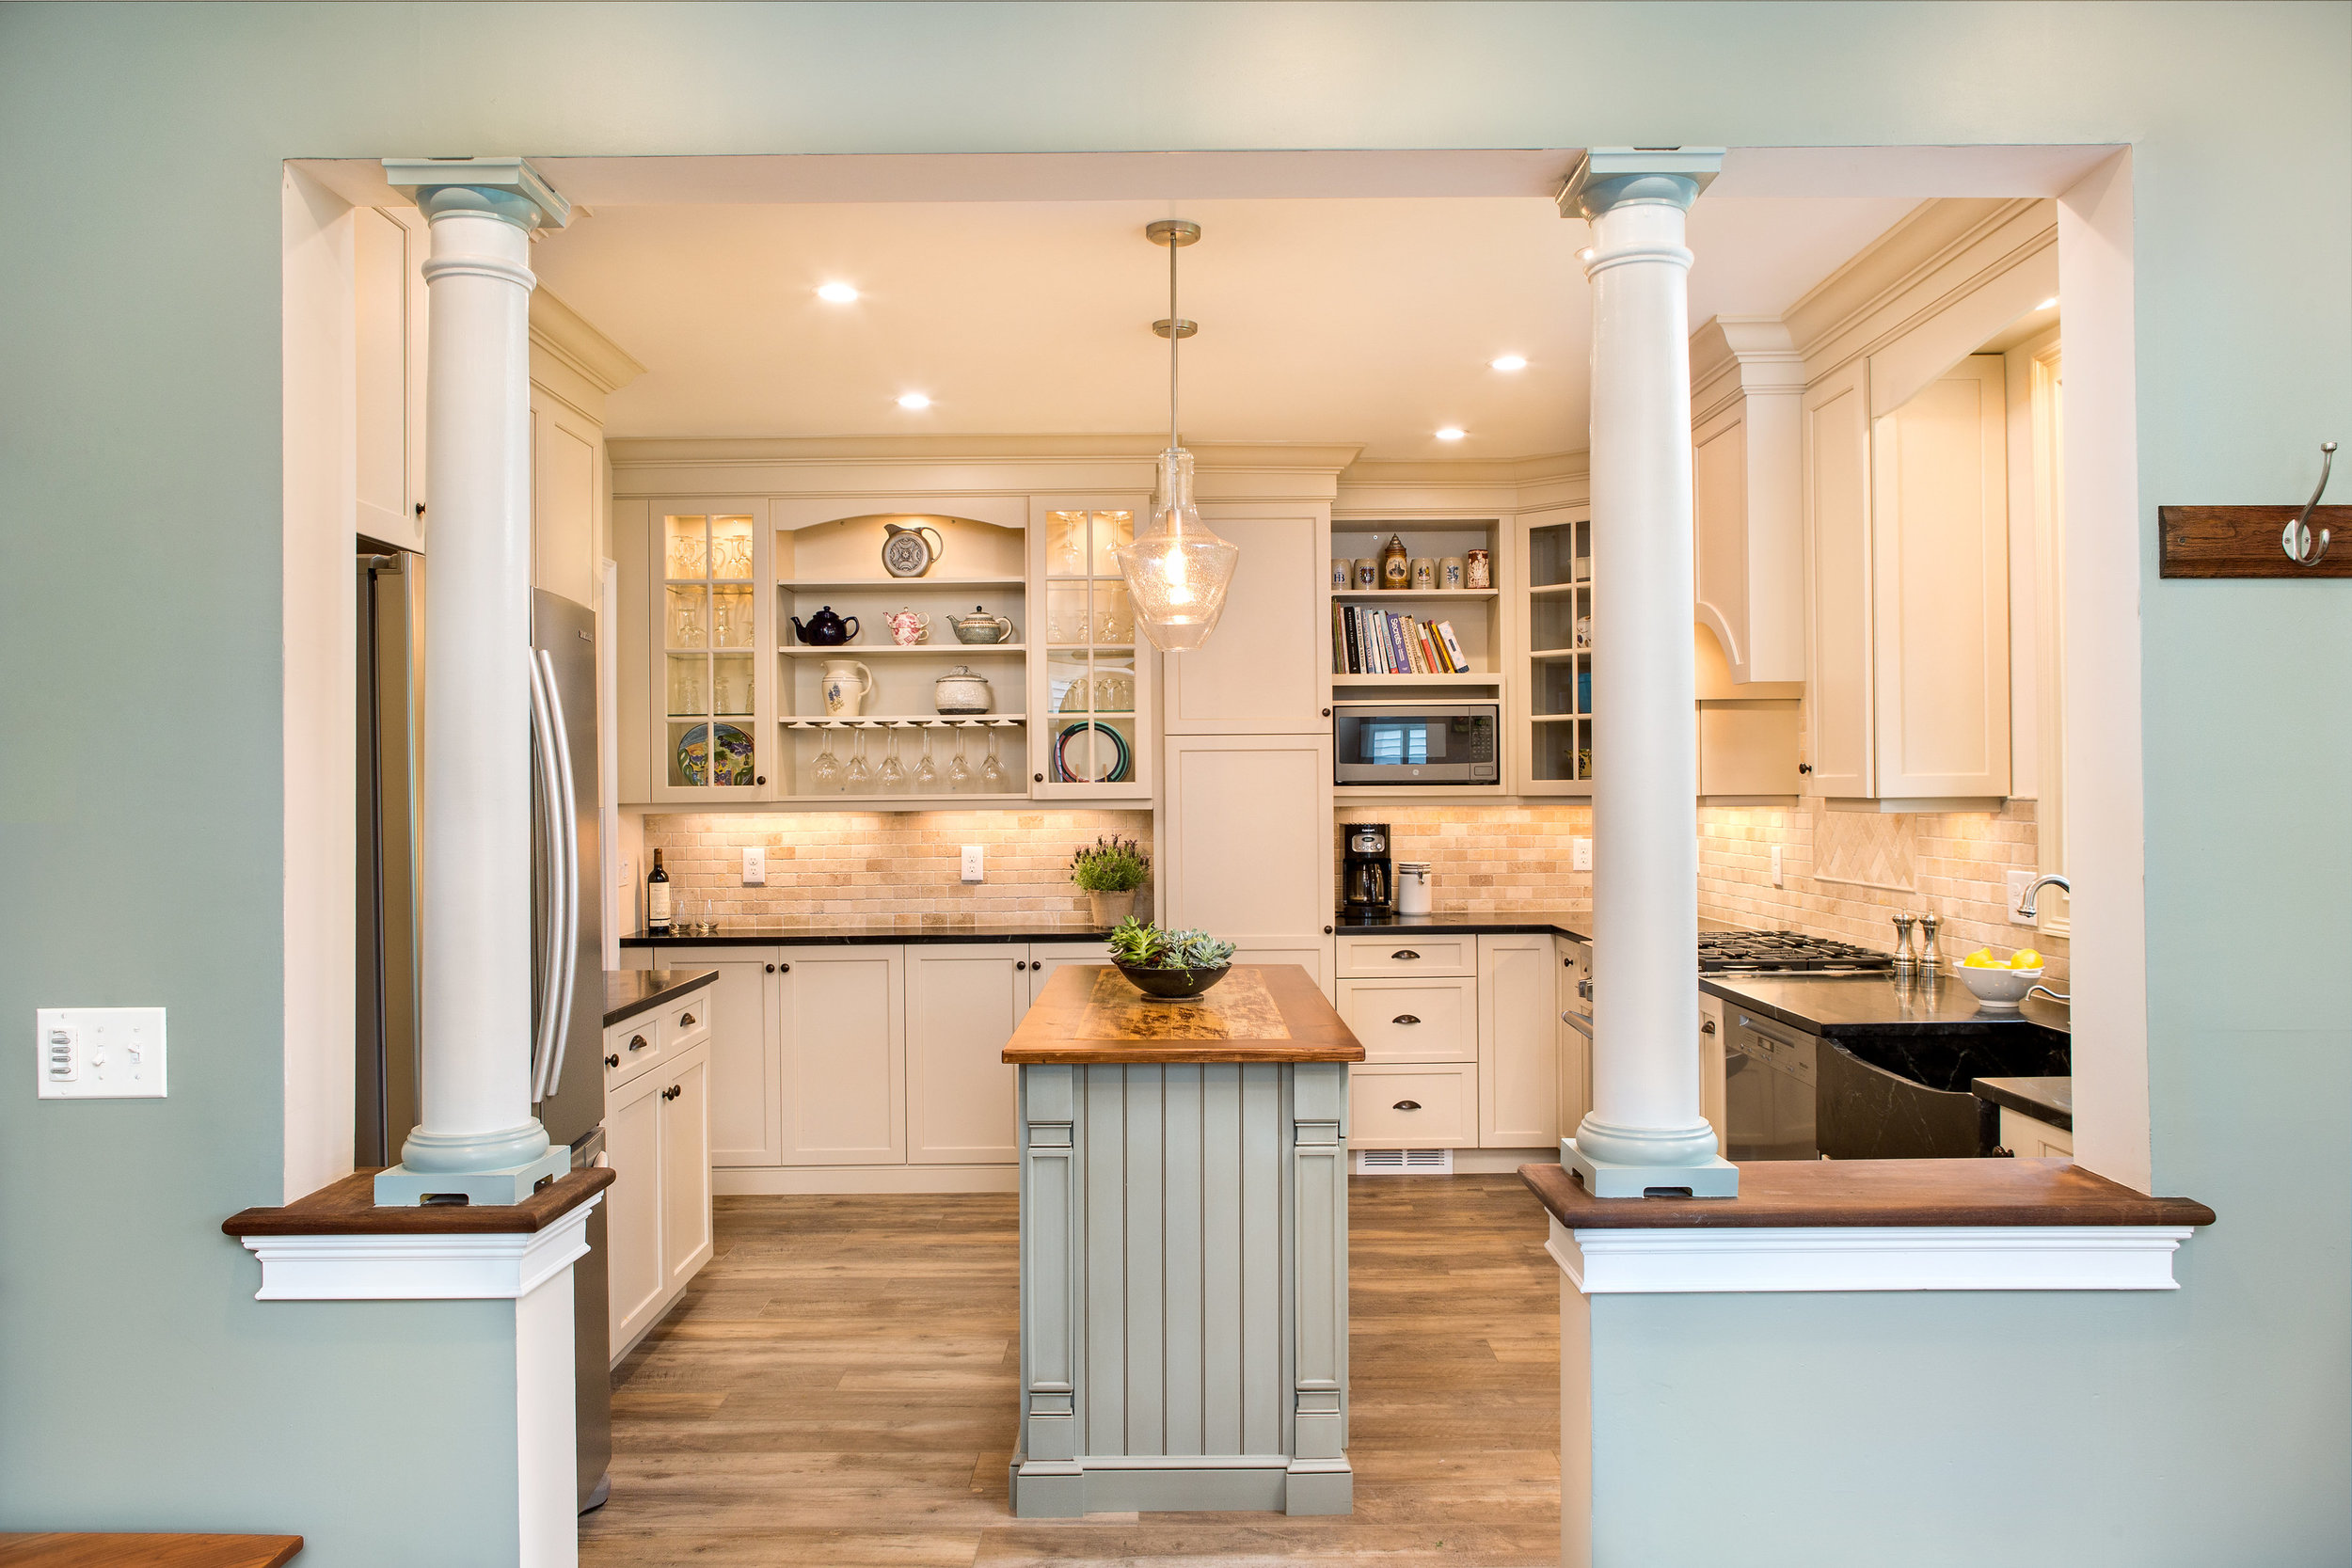
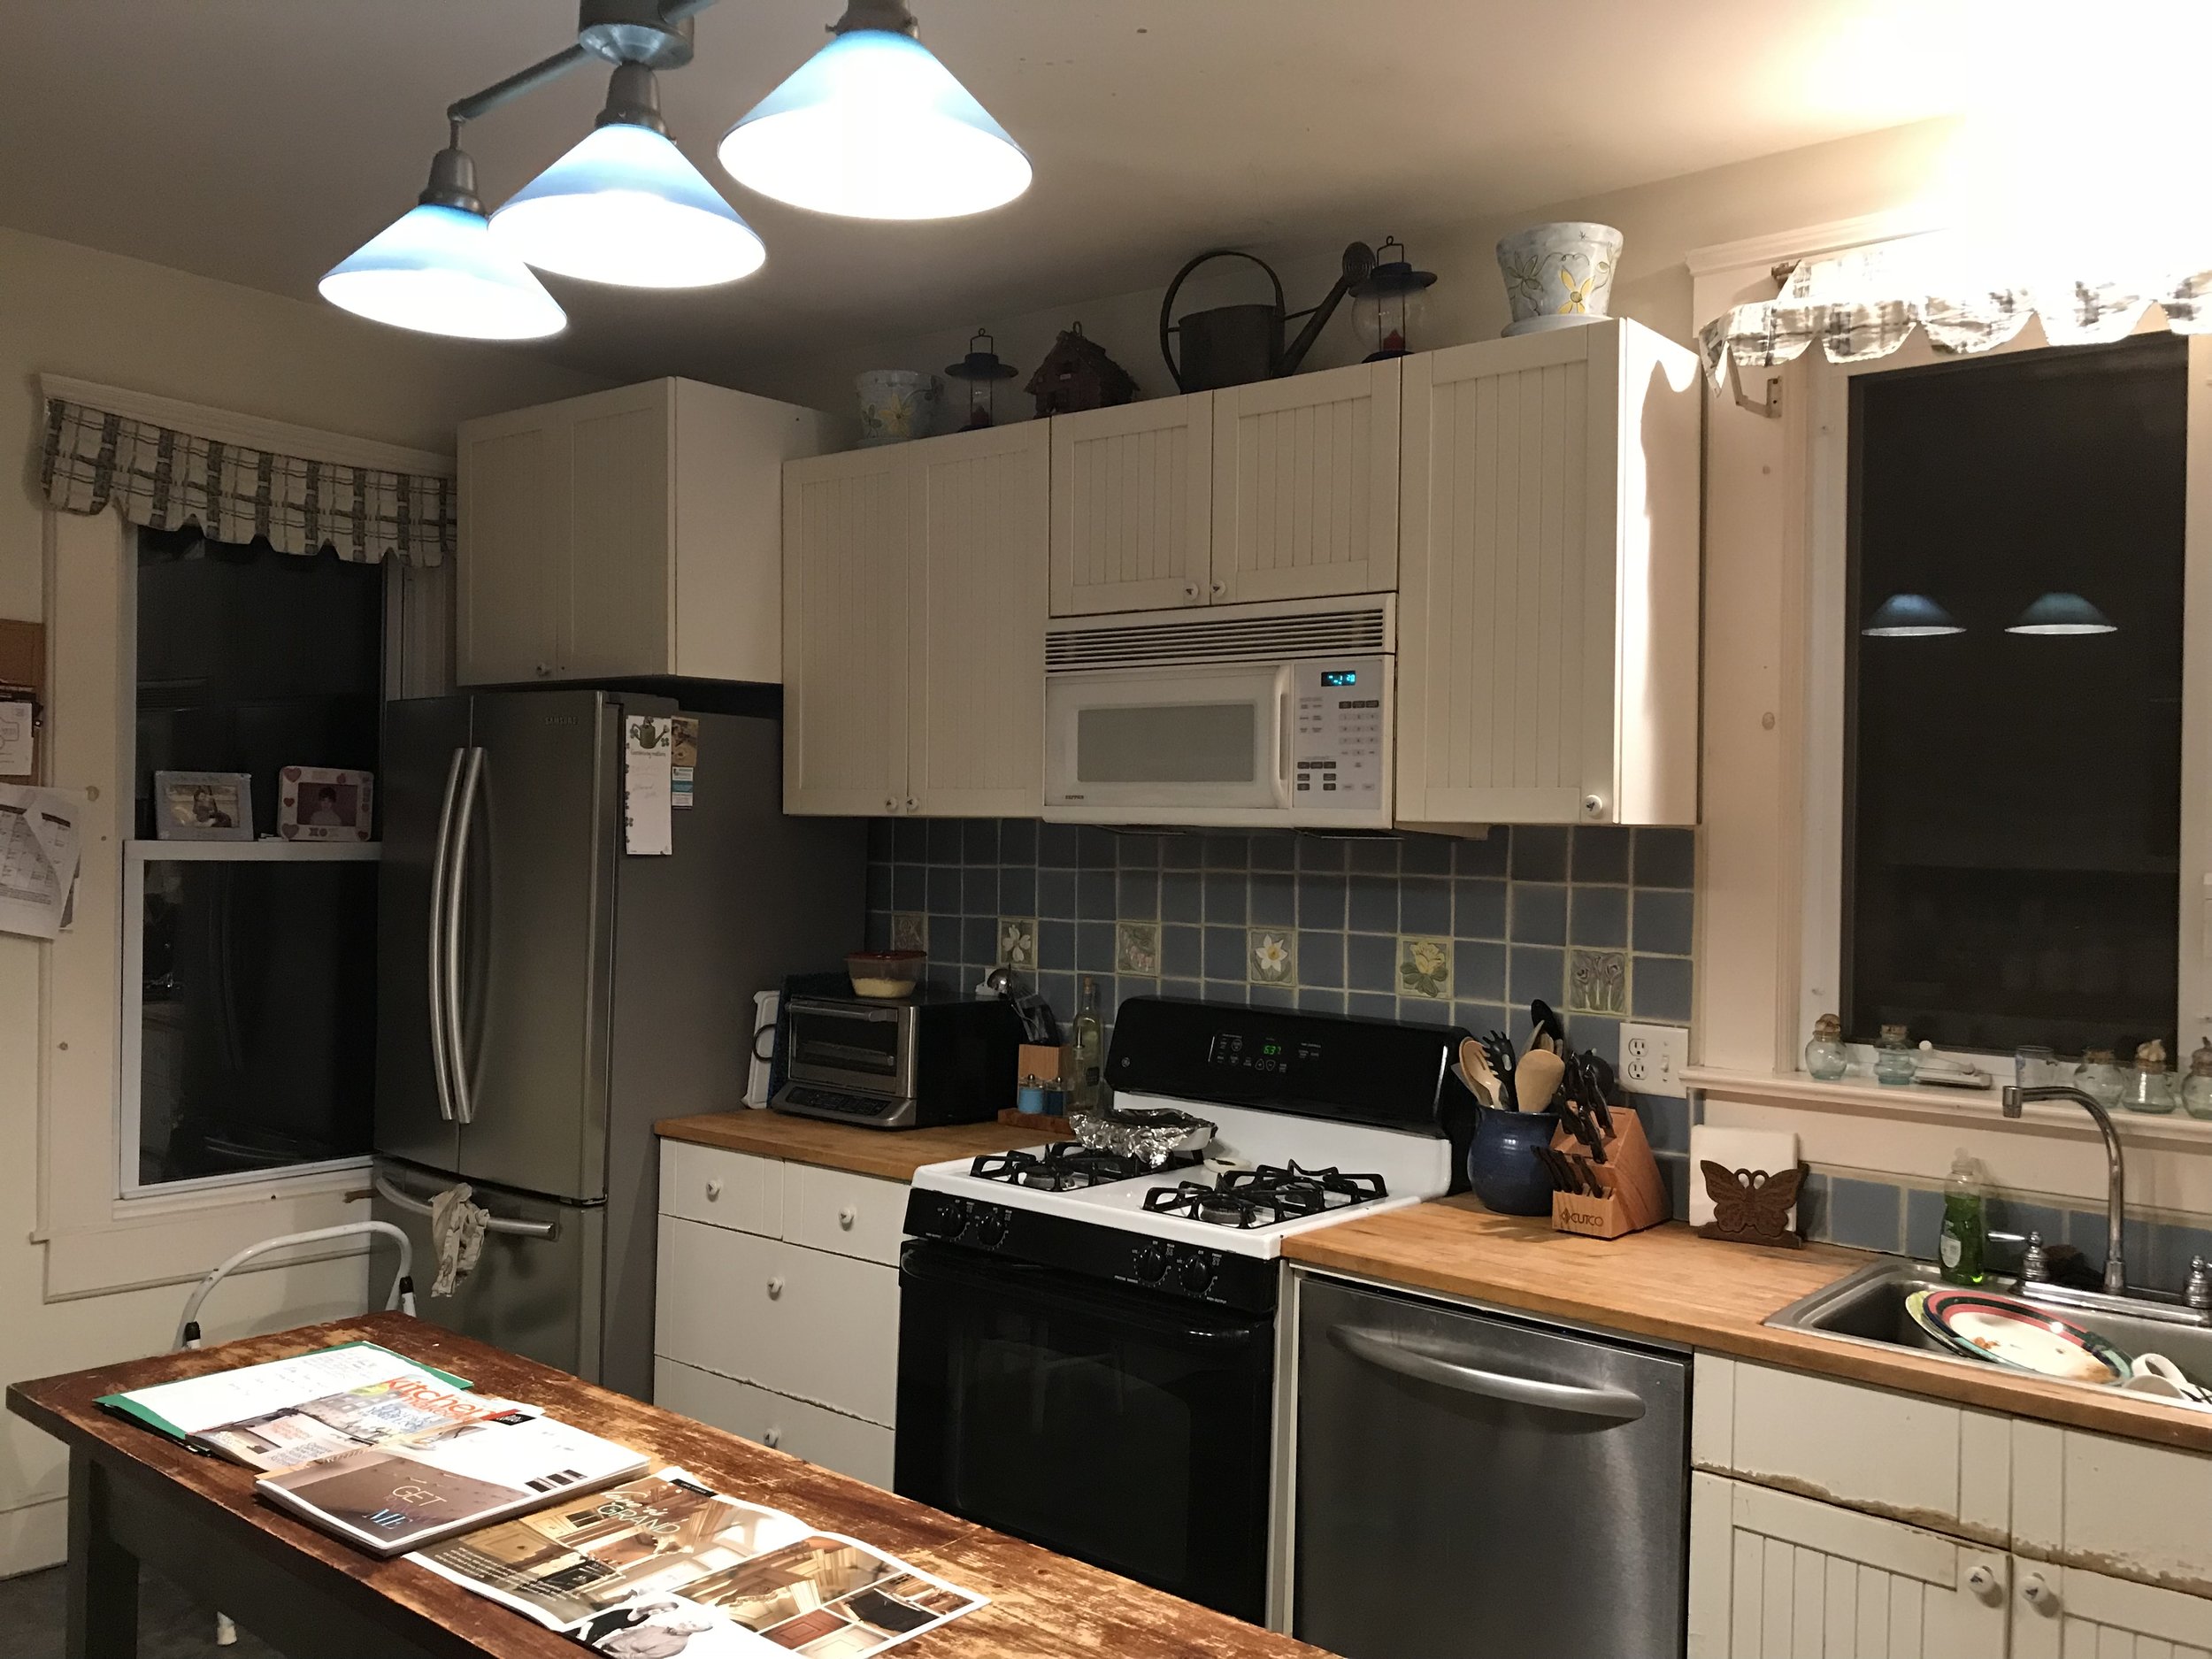
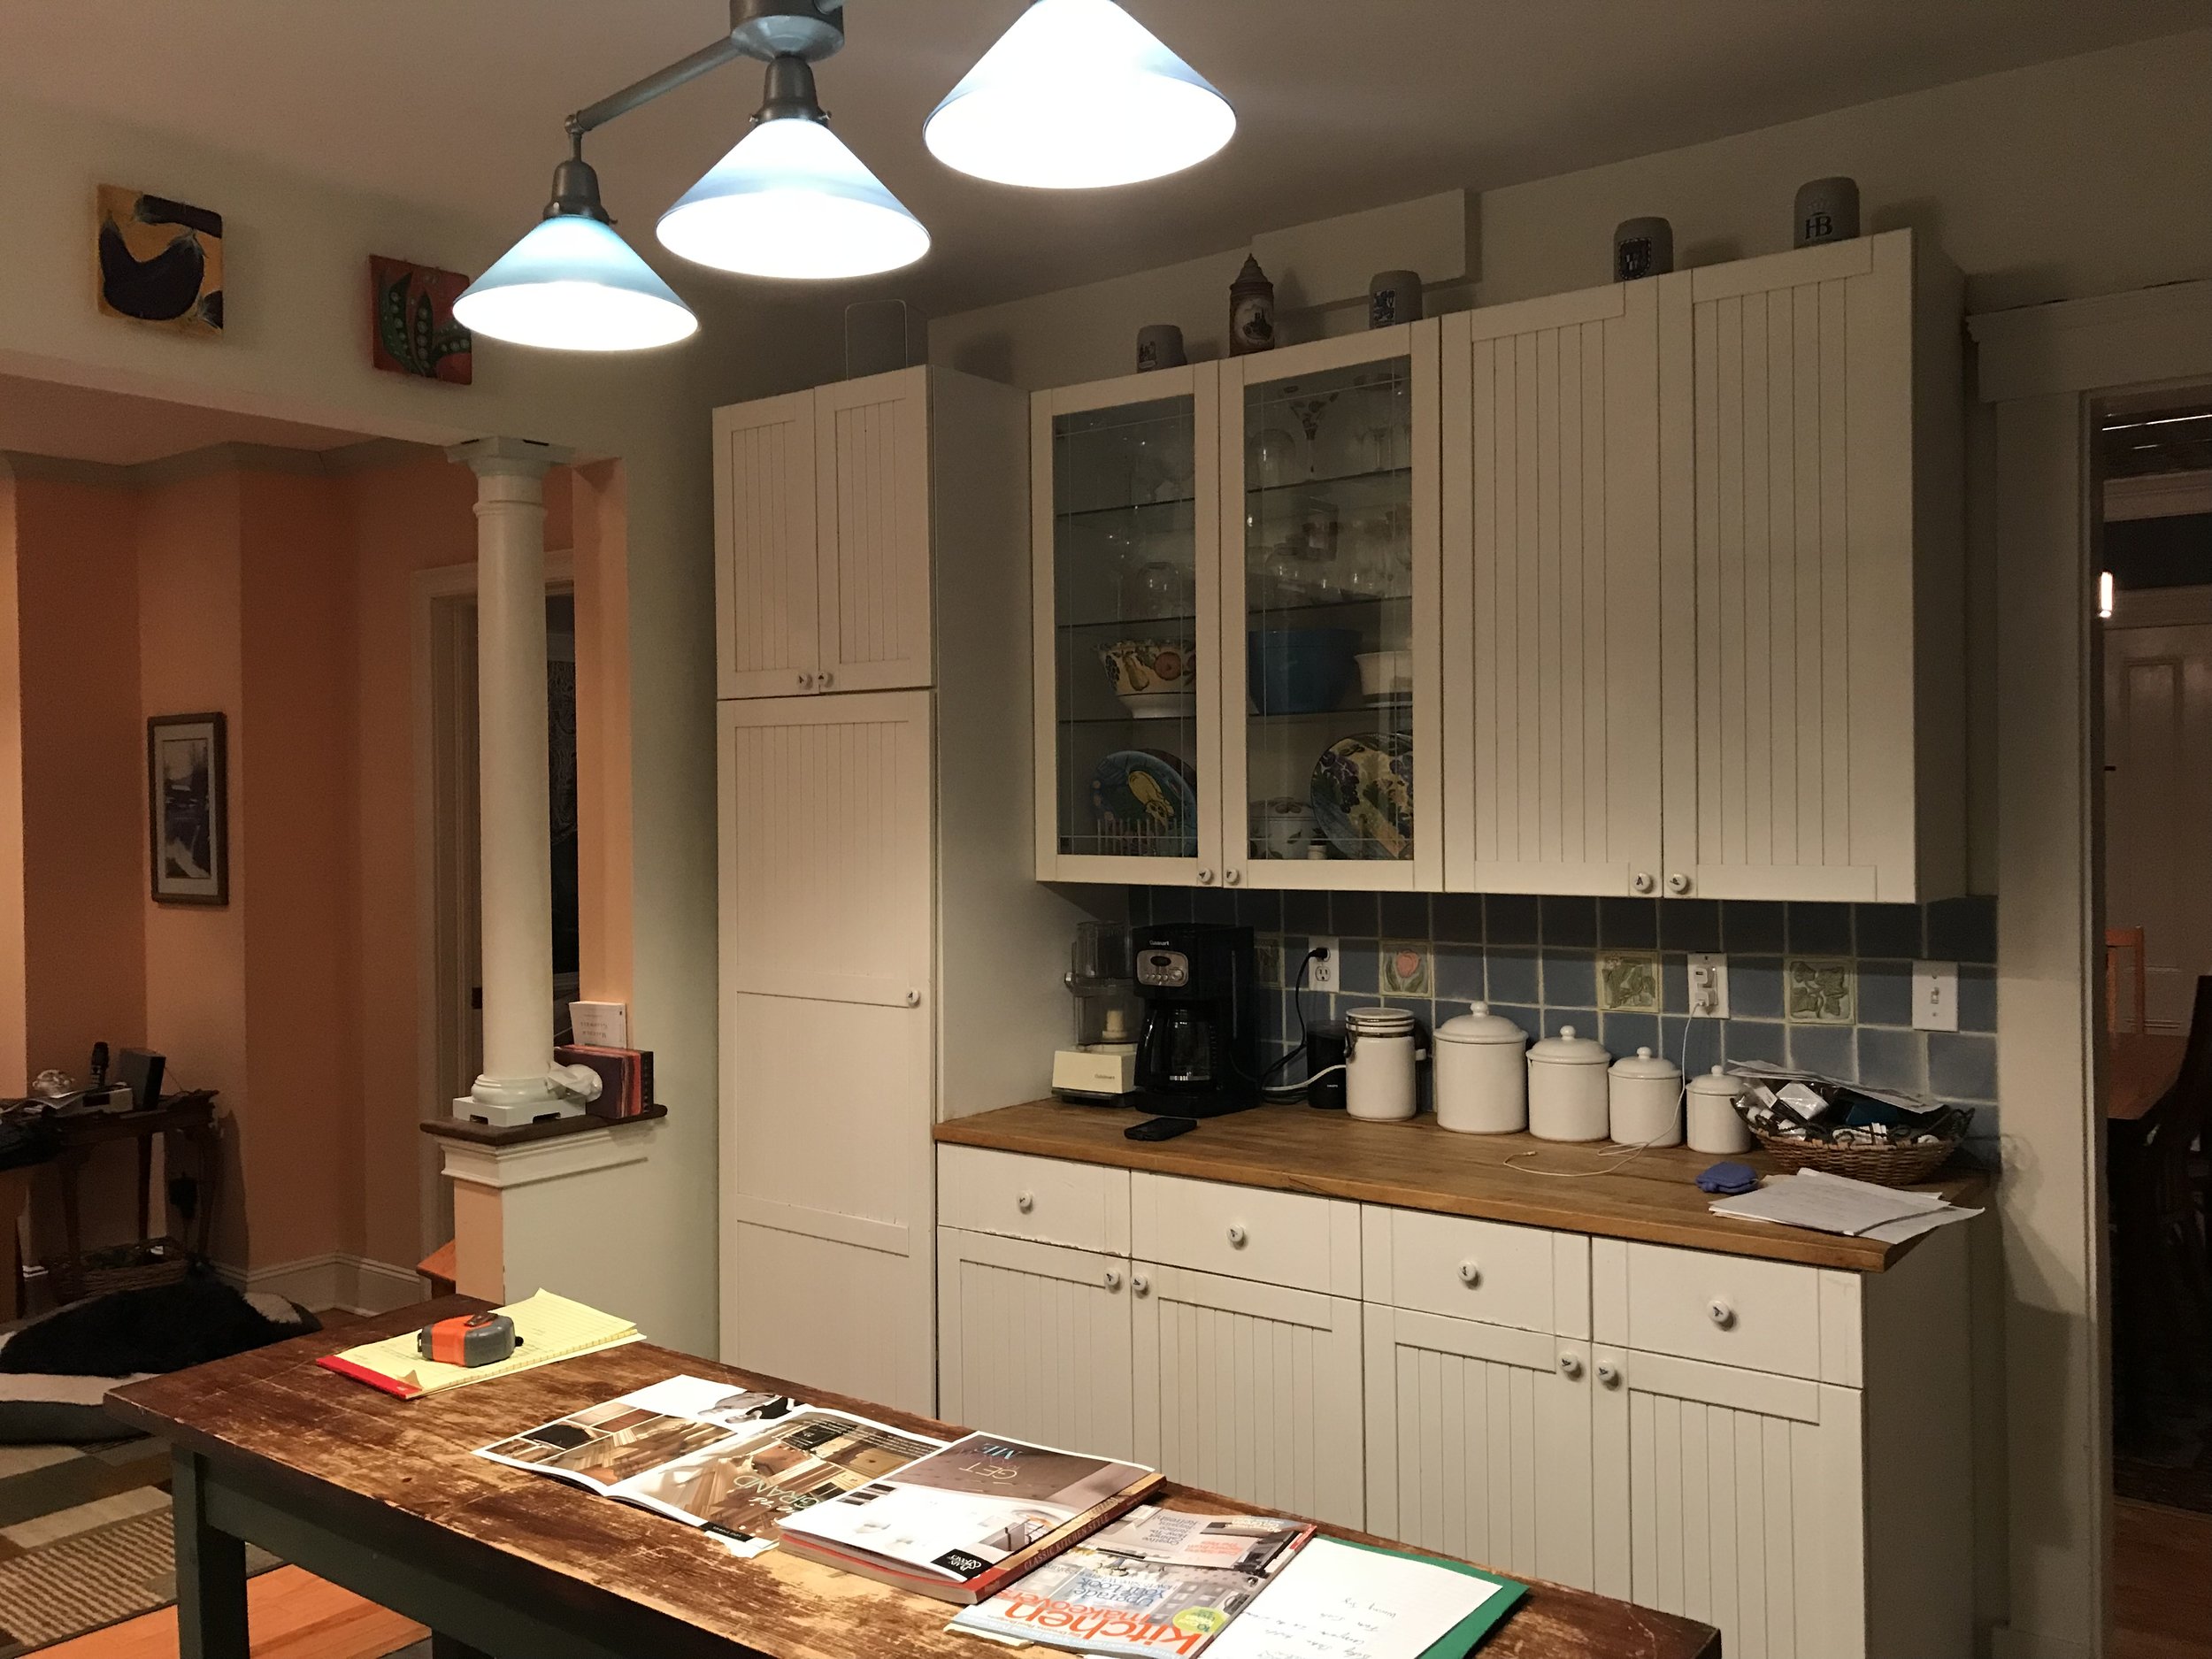
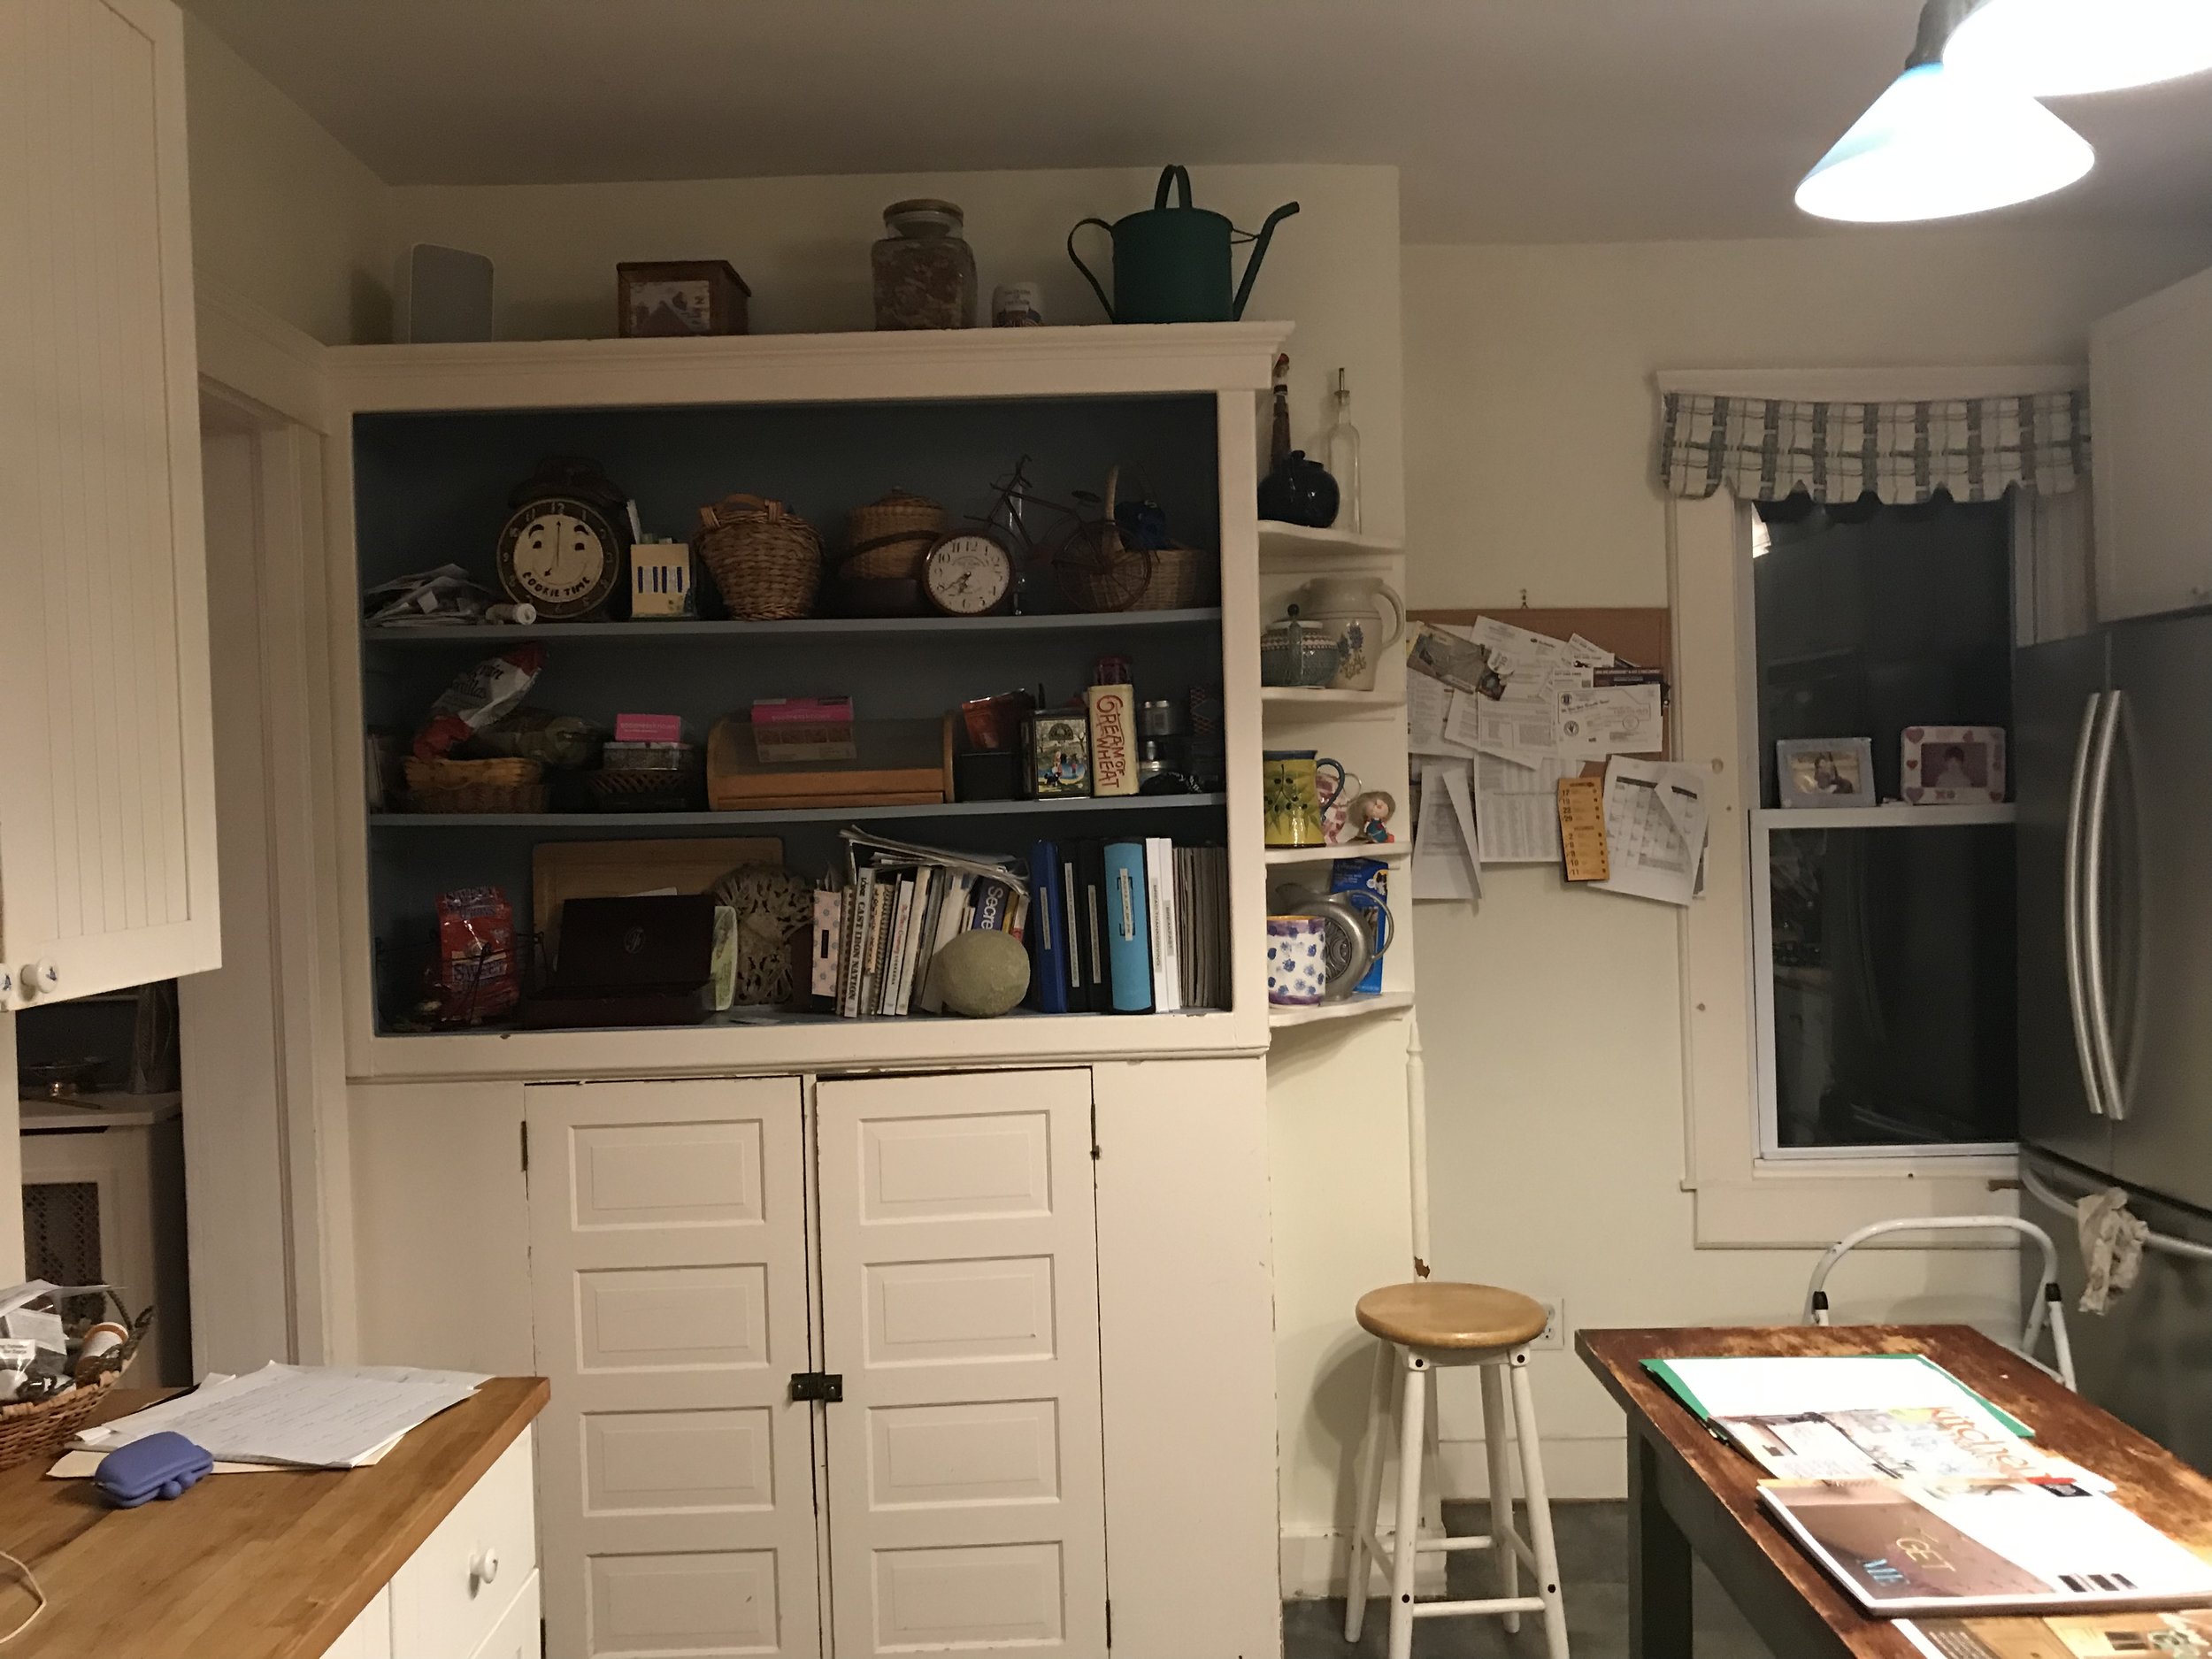
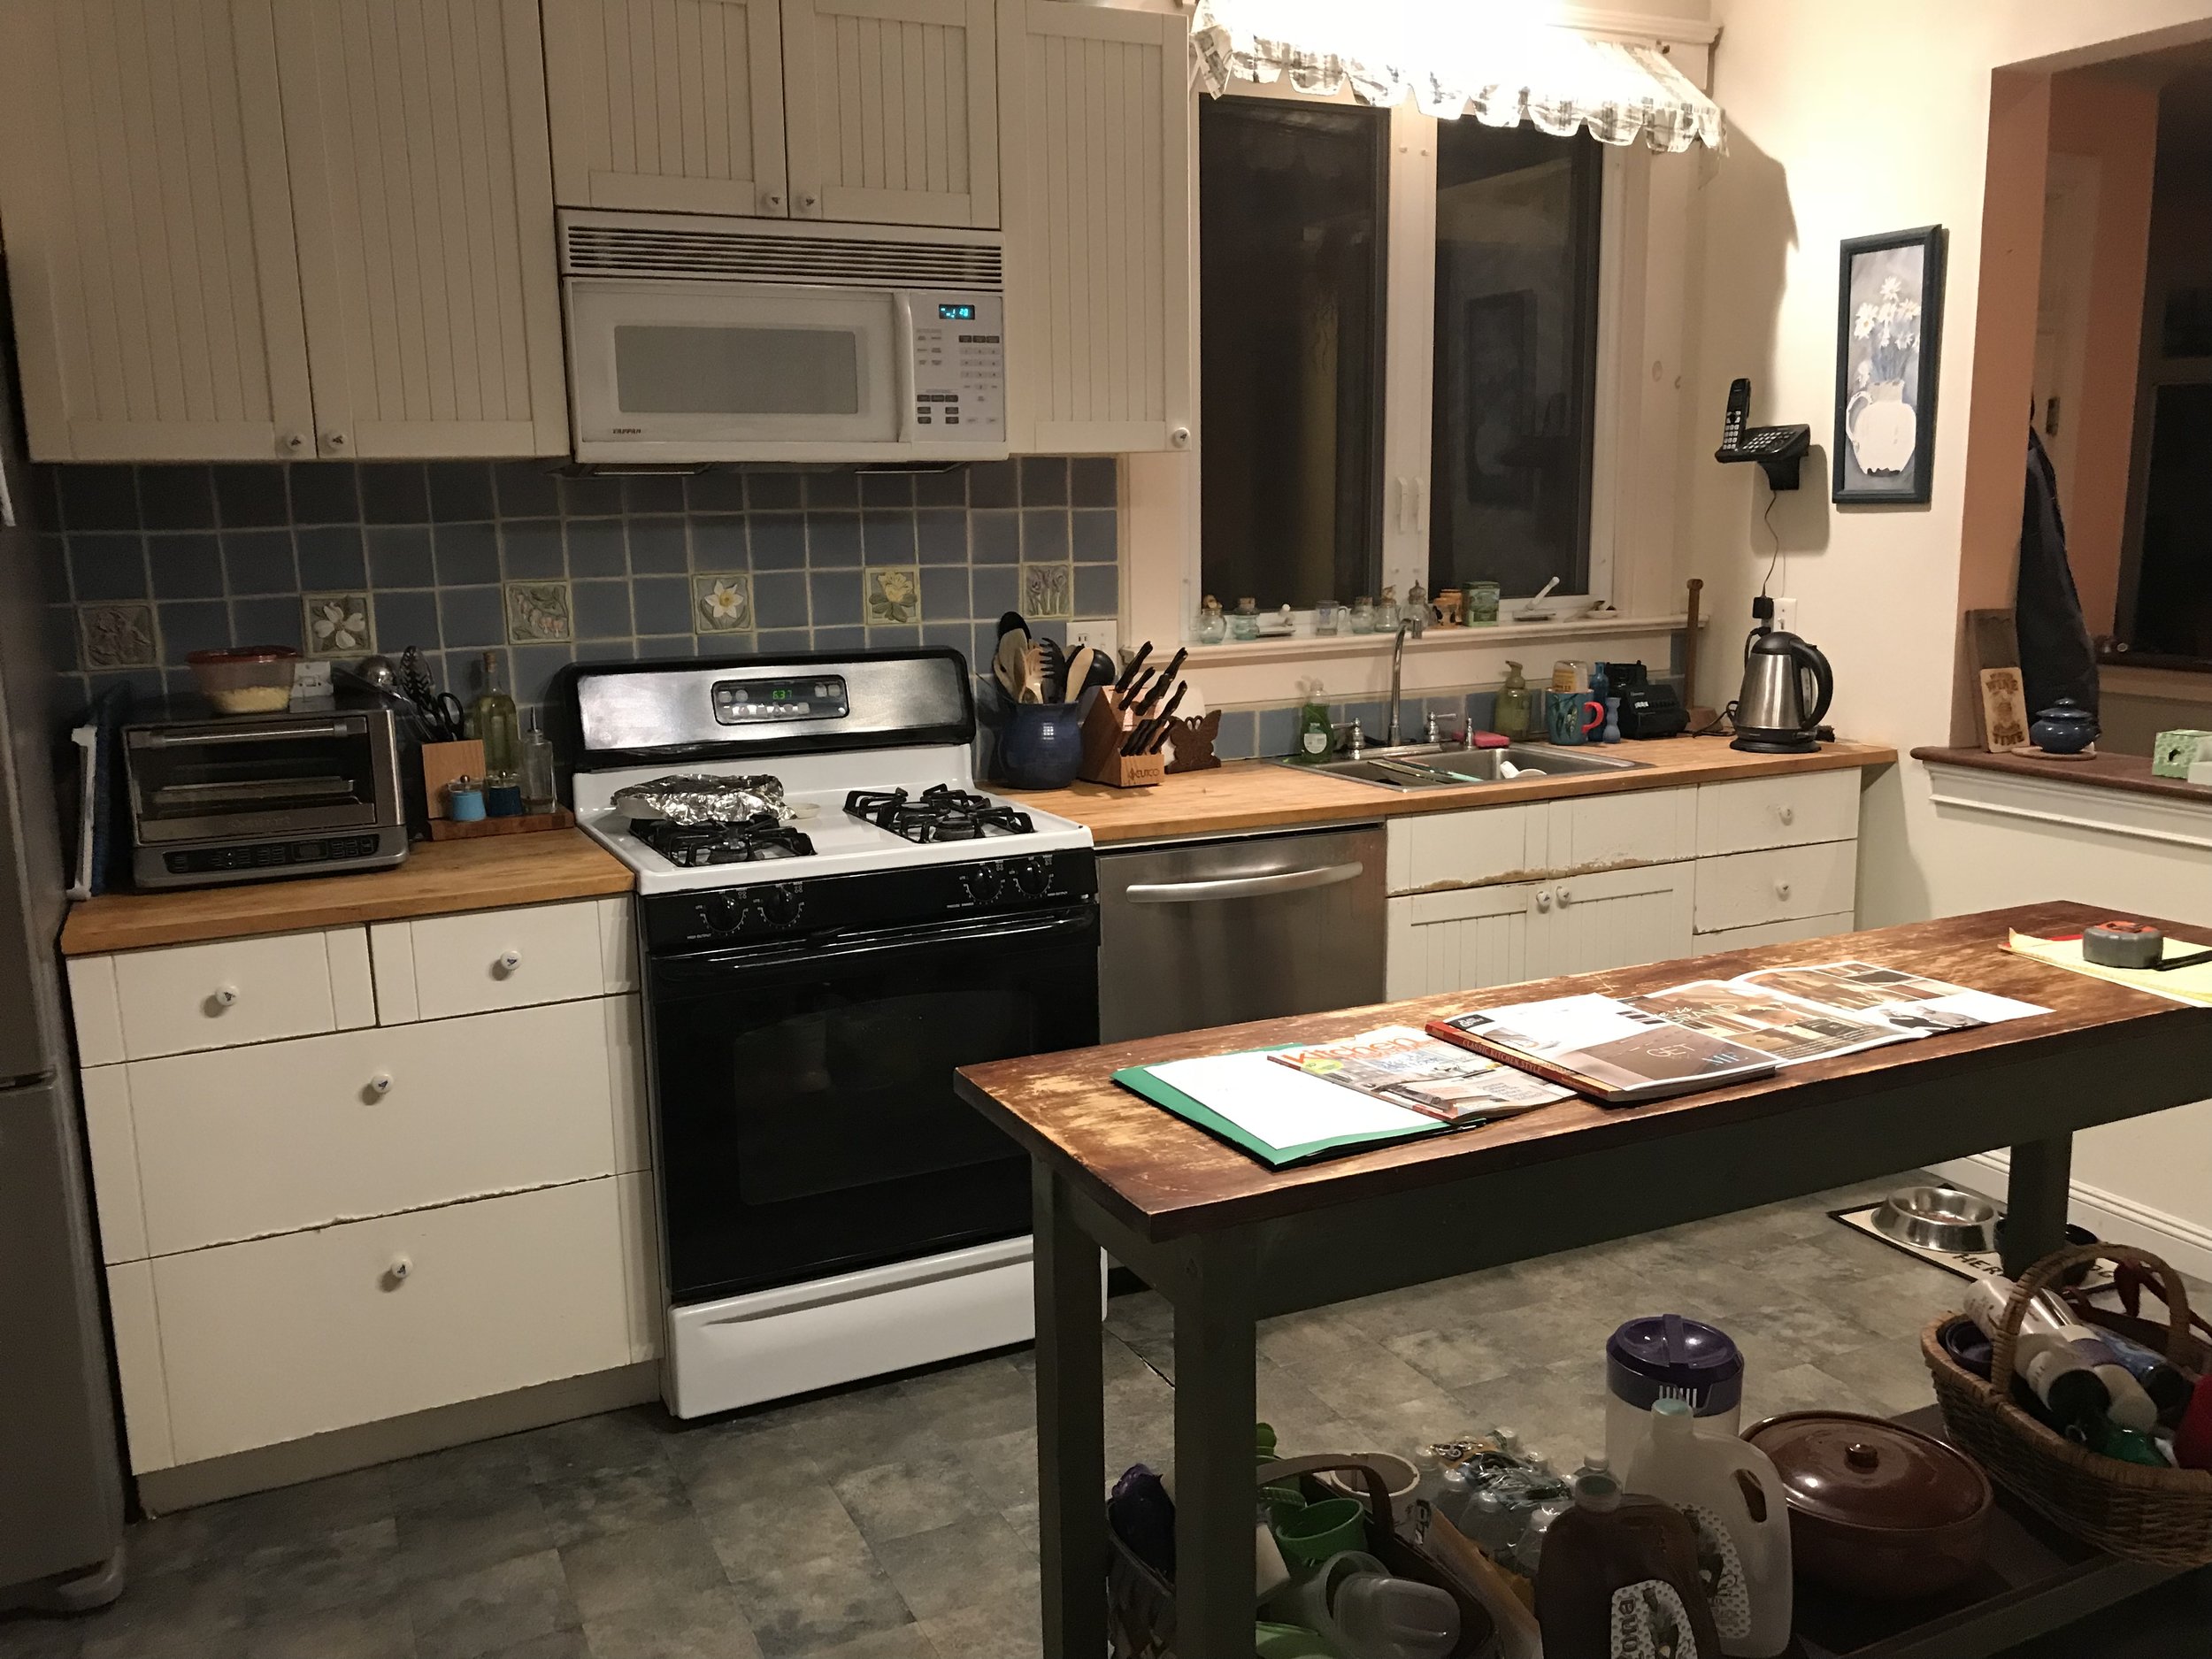
This project is one of the ones that makes us smile.  This kitchen was long over due for an update.  The homeowners work hard every day and enjoy having a space to come home to cook in at the end of a long day.  Their existing kitchen was lacking in storage space, function, and aesthetics.  The space definitely didn’t stand up to the elegant and traditional style of the old Victorian home.  Most notably, the layout of the kitchen also felt disjointed with oddly placed windows and valuable space that wasn’t being used properly.  Working within an existing space can be challenging, but seeing this kitchen for the first time felt like a good opportunity to push the limits a bit with the layout in order to show the homeowner’s the potential of their space.

Anyone who cooks often knows how important a well-organized kitchen is.  Not only does it make your time in the space more enjoyable, but also more efficient.  When designing this kitchen with the homeowners, we largely focused on the placement of the cabinetry and their individual function in relation to one another.  Below are some of the key wants and needs incorporated into the new kitchen:

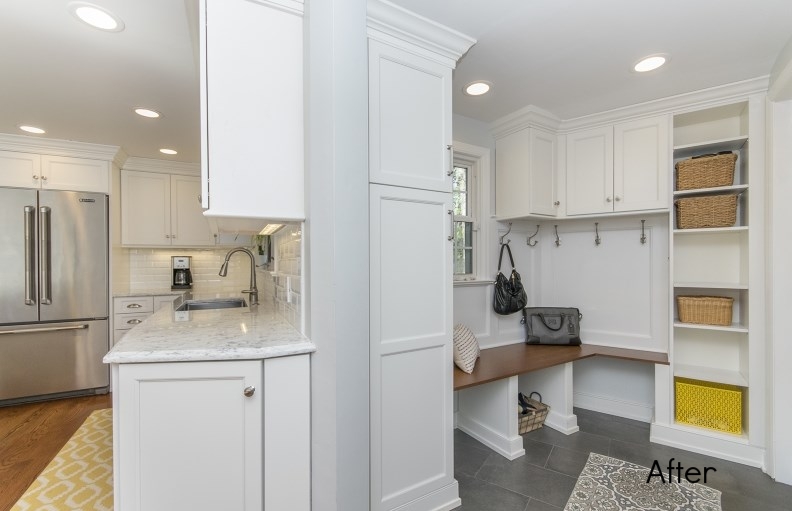
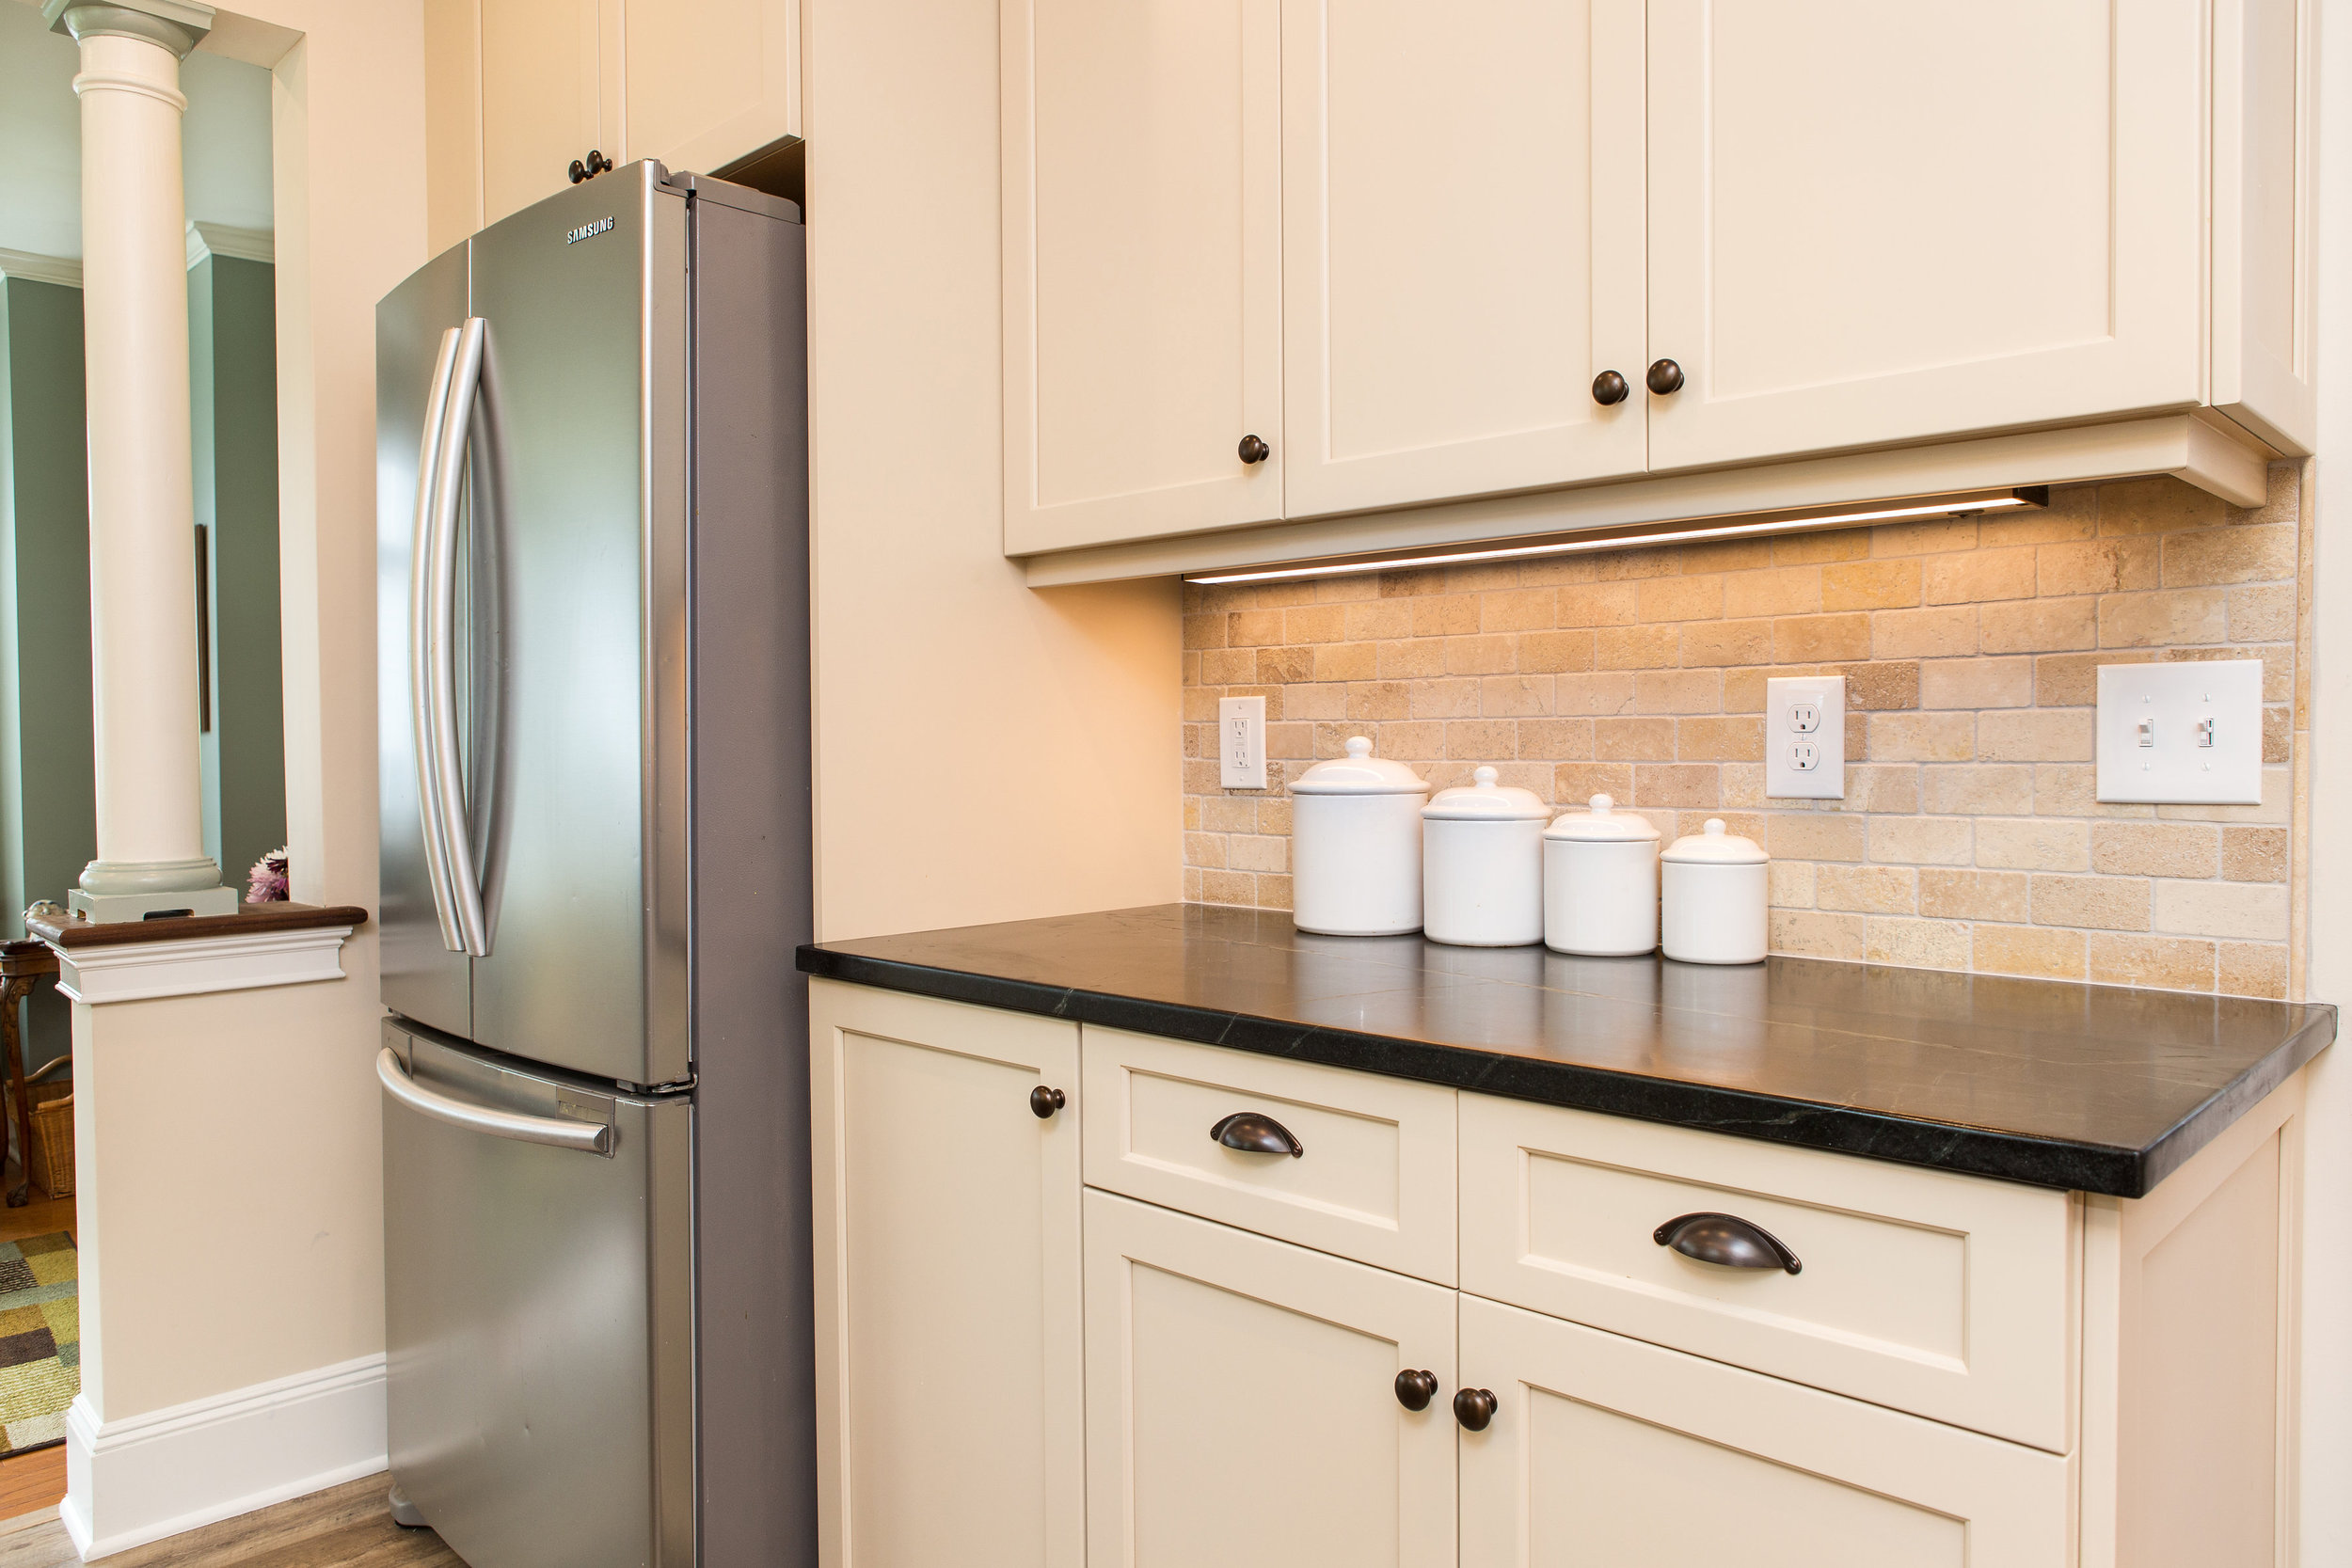
  • Adequate Pantry Space with Functional Storage

The homeowners were used to having a pantry cabinet in their existing kitchen, so this was something they couldn’t sacrifice in the new design.


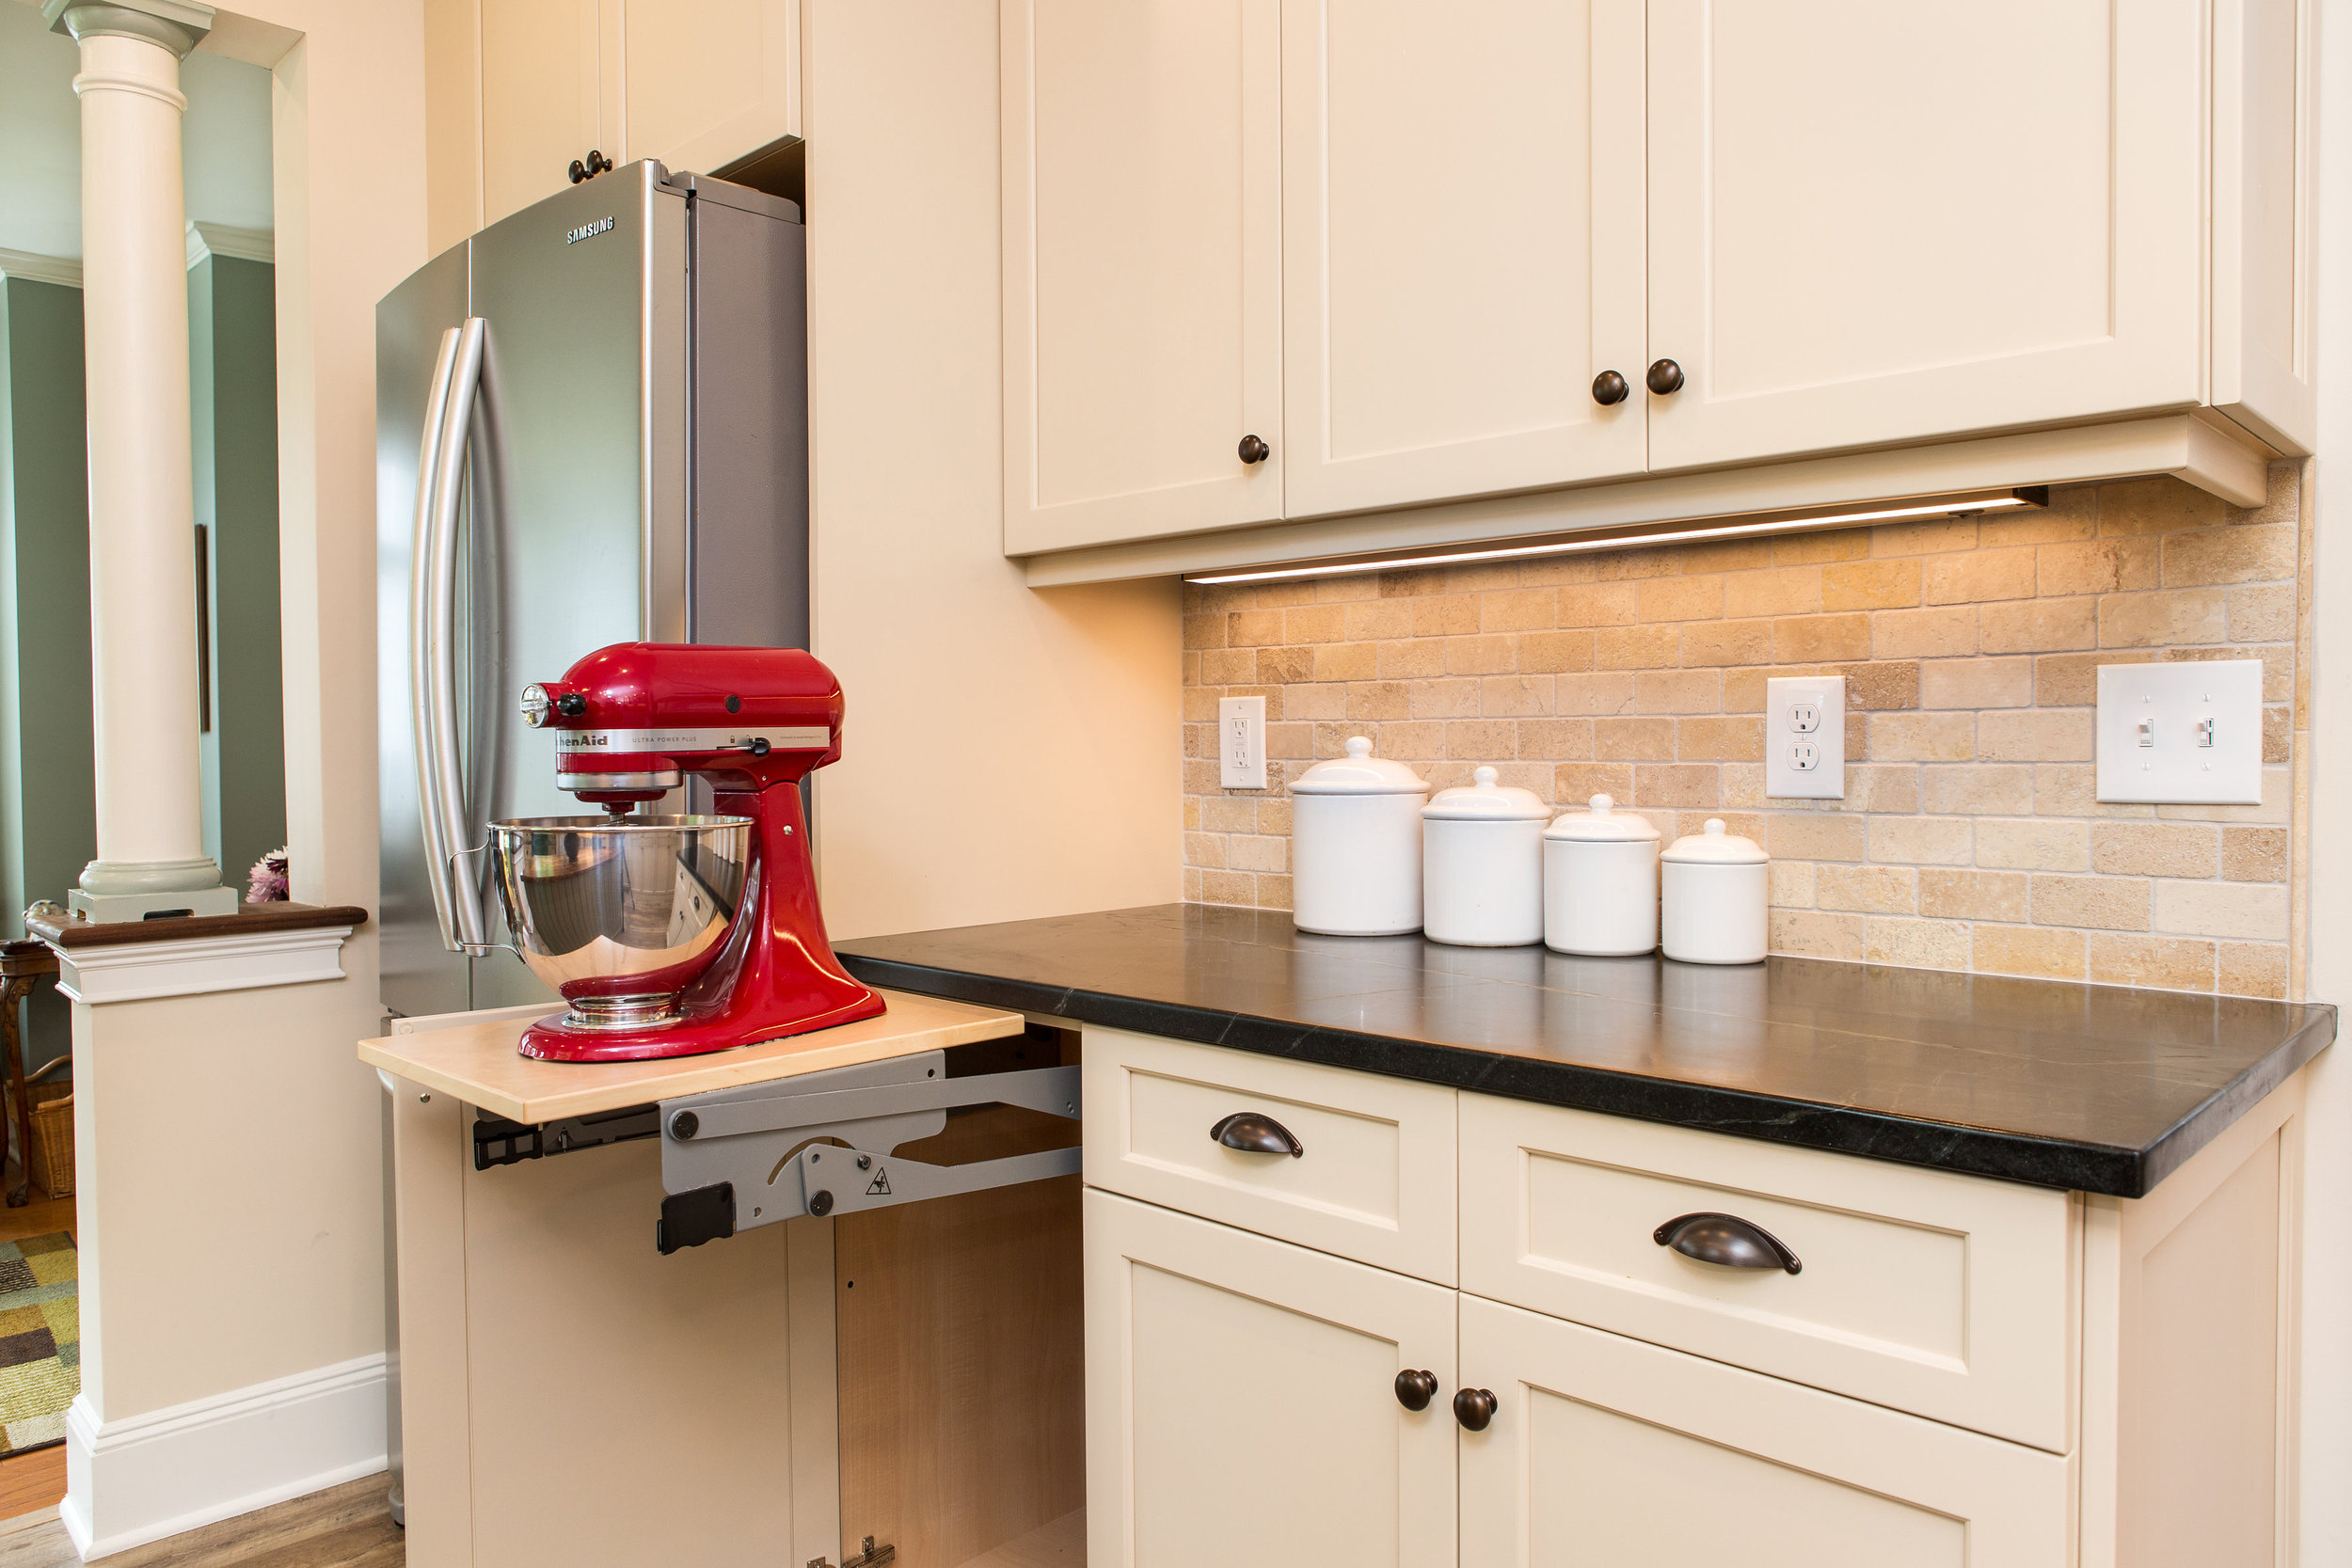
  • Base Mixer Lift for Stand Mixer

For someone that bakes often, a Kitchenaid Stand Mixer is a must.  They are very heavy and can be difficult to store, so most people typically leave them on the counter (taking up valuable space).  The solution here was to dedicate a cabinet with a mixer lift and outlet inside the cabinet.  This way the mixer is easily accessible when needed and can be hidden when not in use.


  • Area for Baking

A designated section for baking (not within the main working triangle of the kitchen), was important to the homeowner.  This area also includes the Base Mixer Lift and additional storage for baking sheets, mixing bowls, etc.
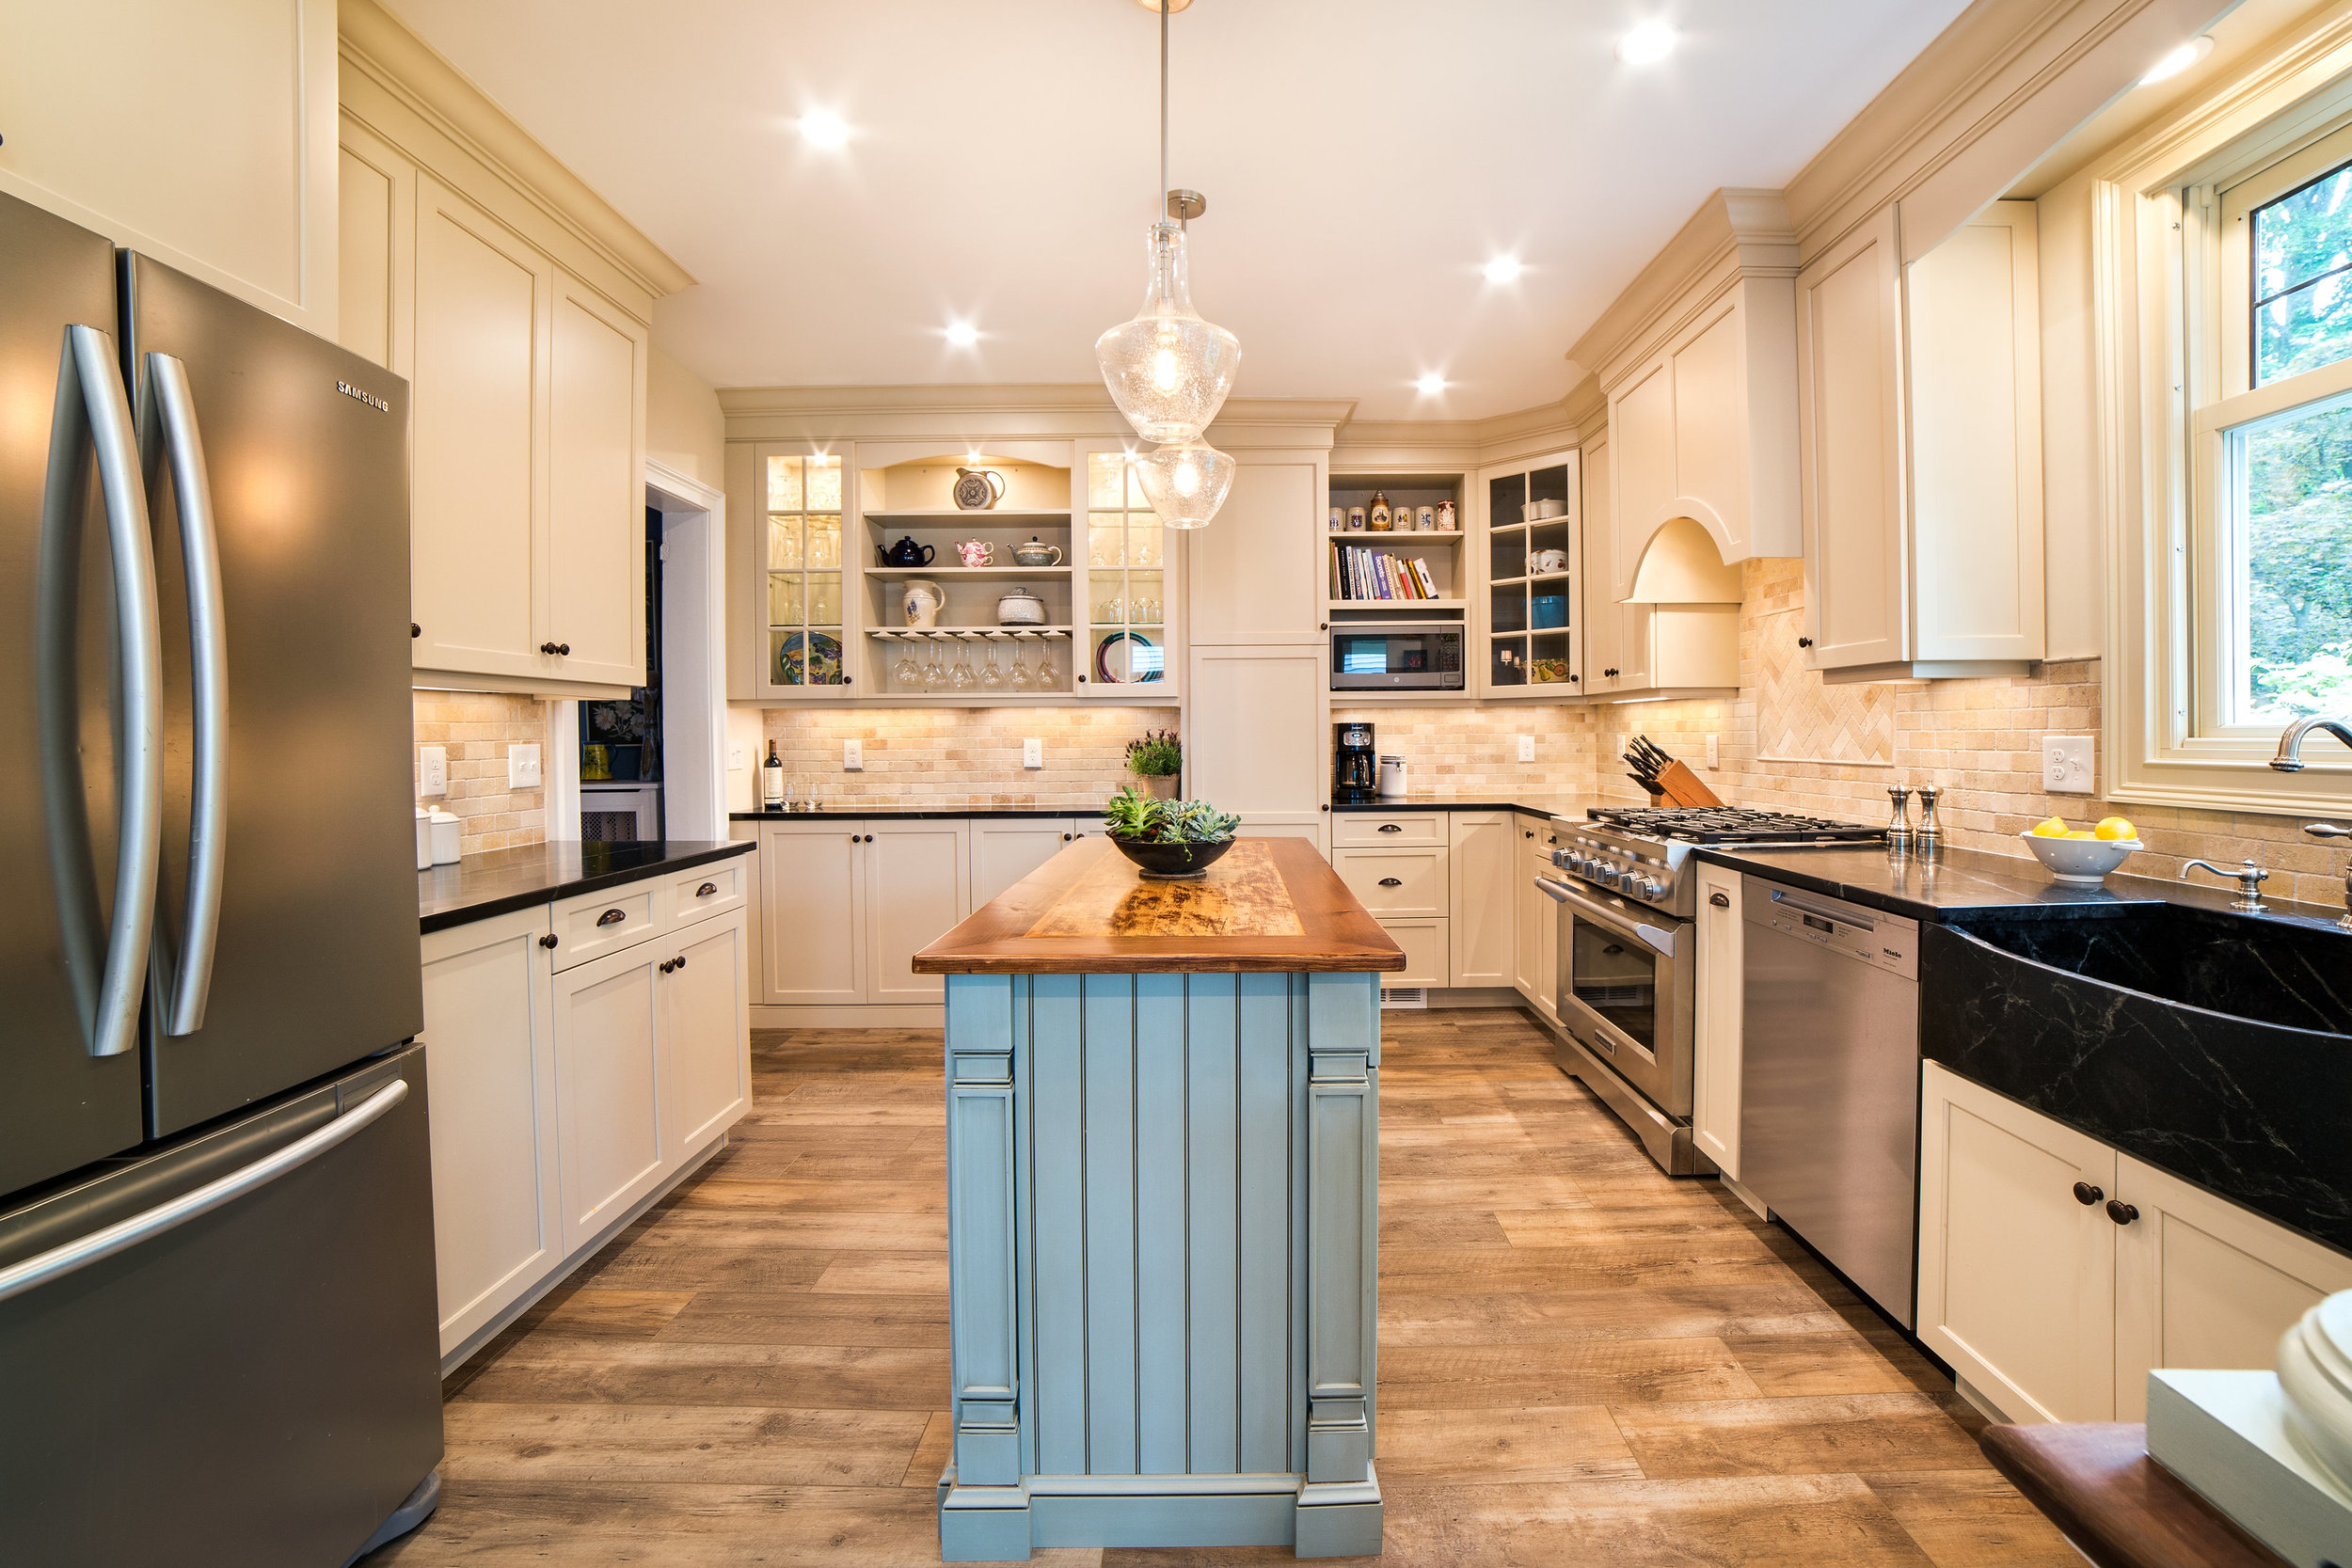
 

  • Island with Storage

The existing island was more of a table/furniture piece that lacked closed storage.  In a smaller space, maximizing storage is typically at the top of the list.  A drawer cabinet and trash pullout were used to create the island, along with simple detailing and a contrasting color.


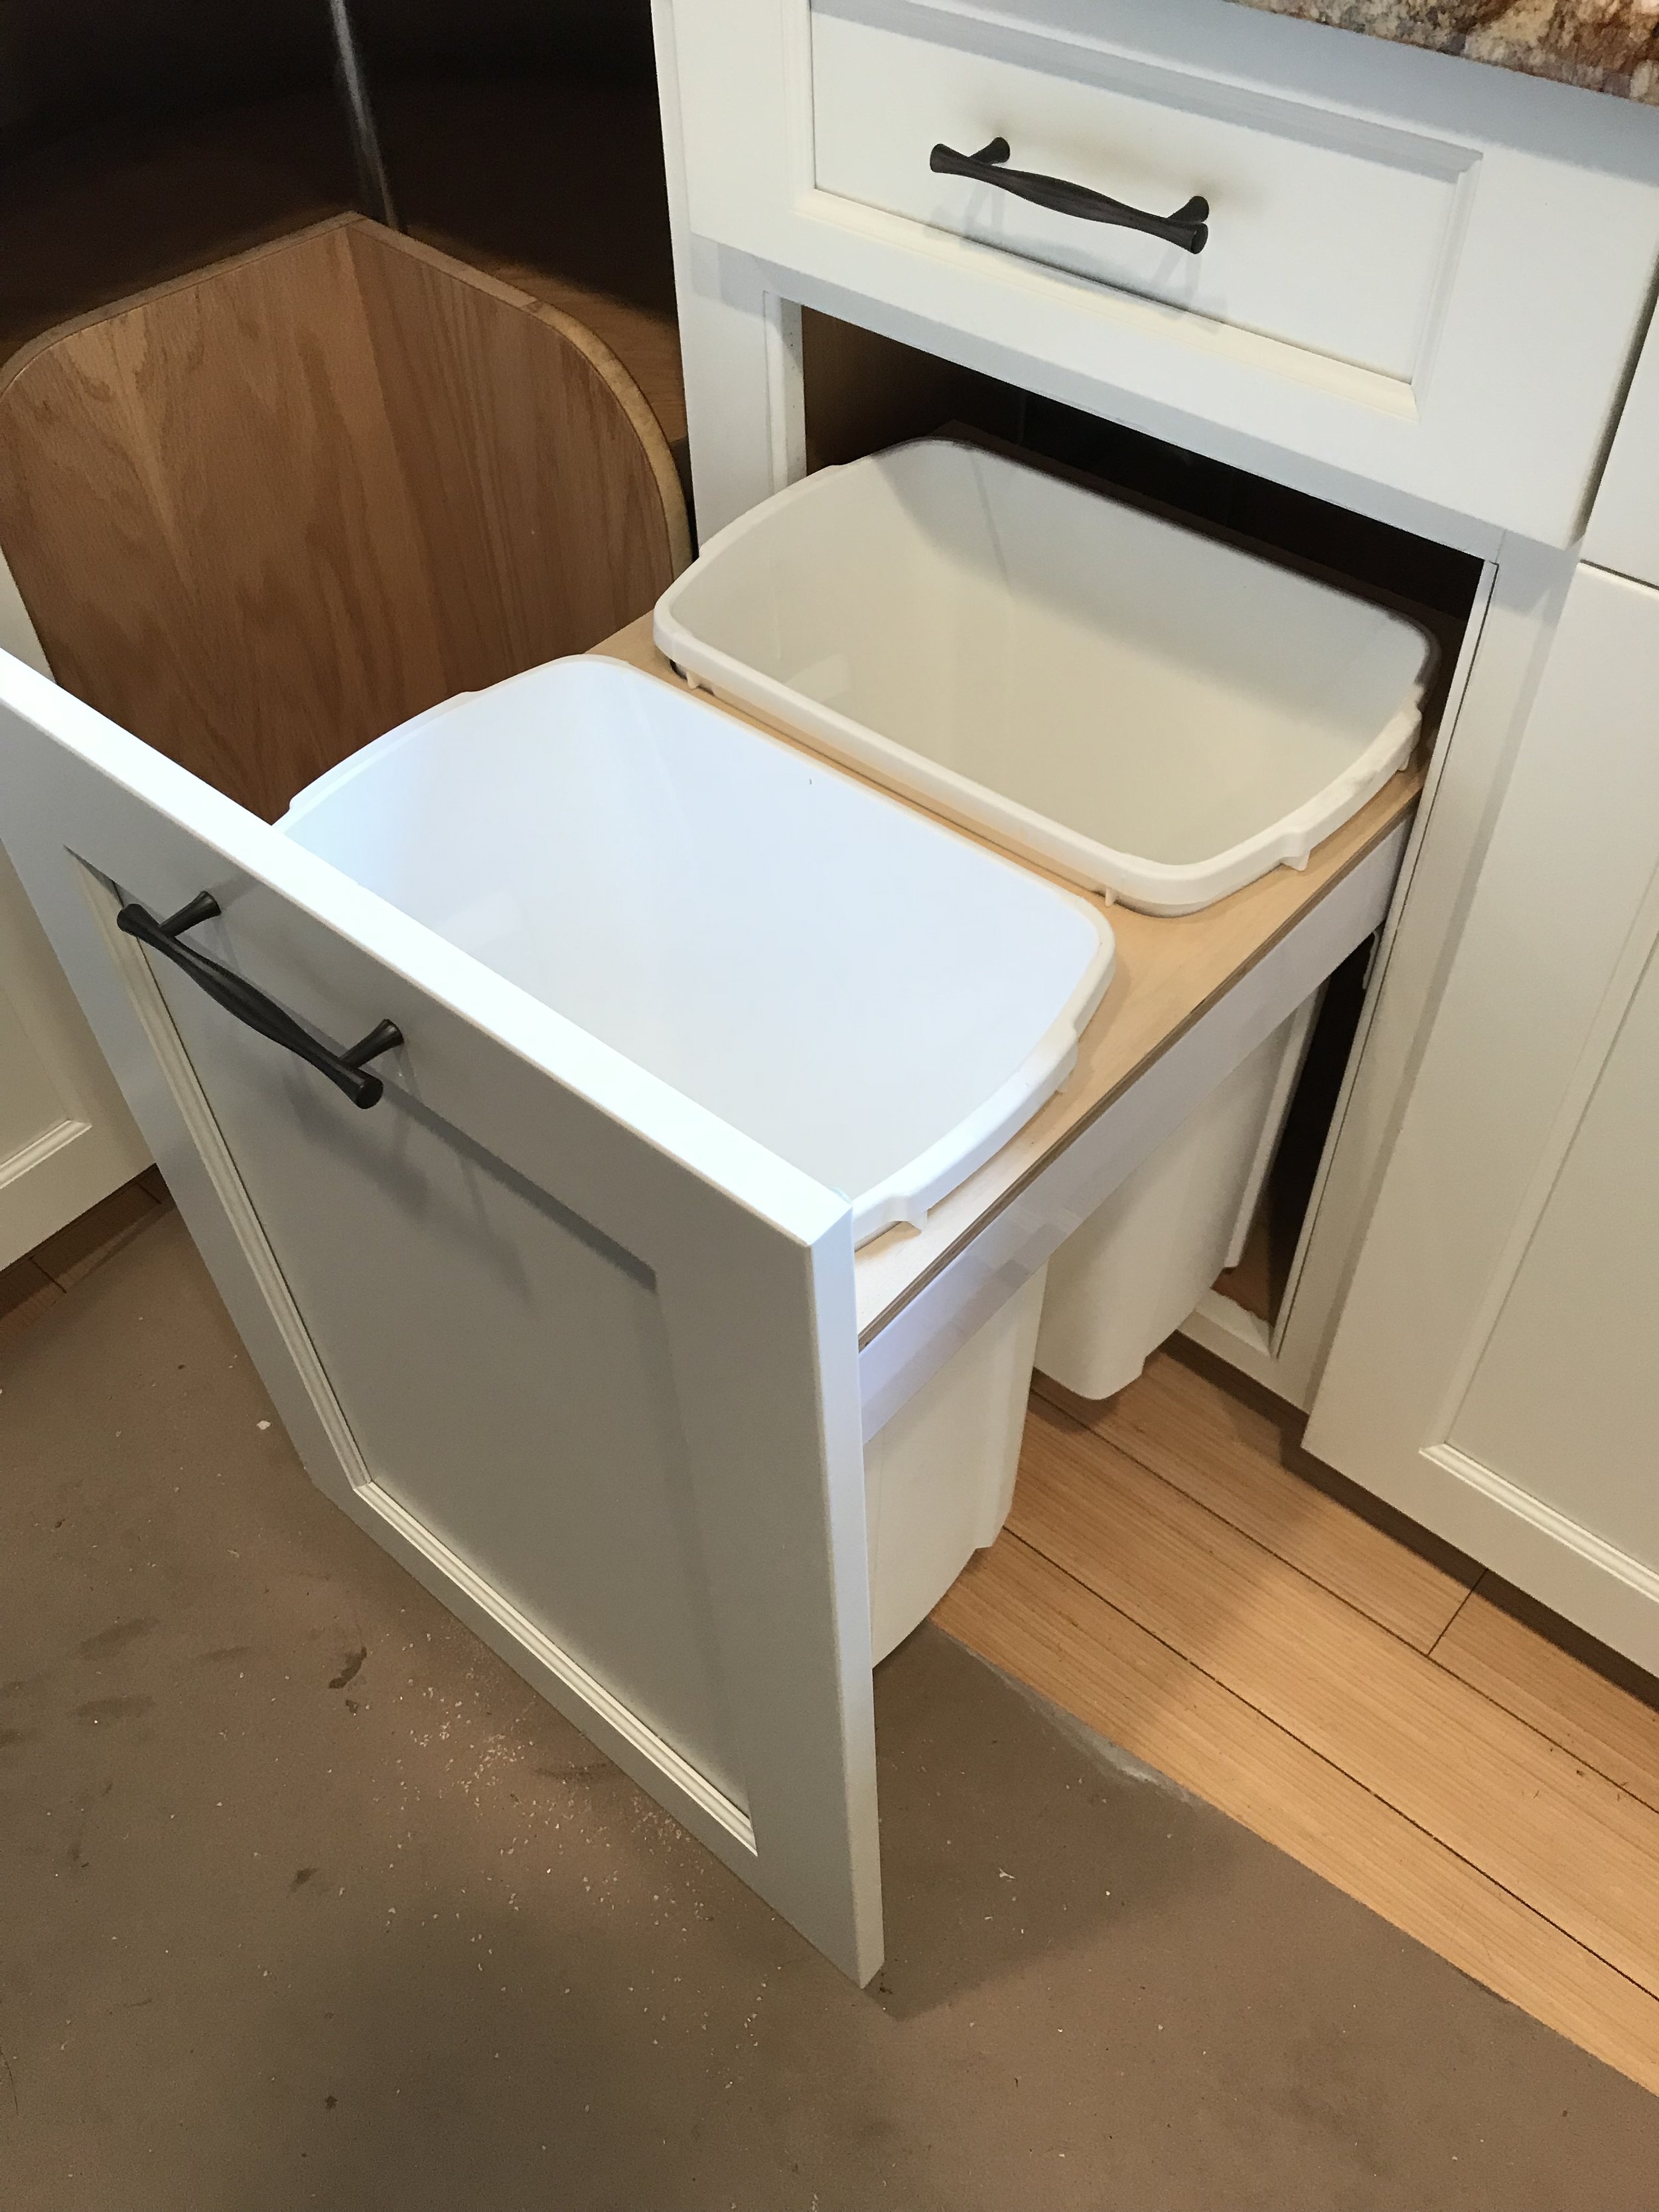
  • Cabinet for Trash/Recycling/Composting

A trash/recycling pullout is a no-brainer in kitchen design, but the composting request is a new one gaining popularity.  We were able to find a pullout with 2 large bins (trash/recycling), and two small bins with lids (composting).  This was included in the island as mentioned above.


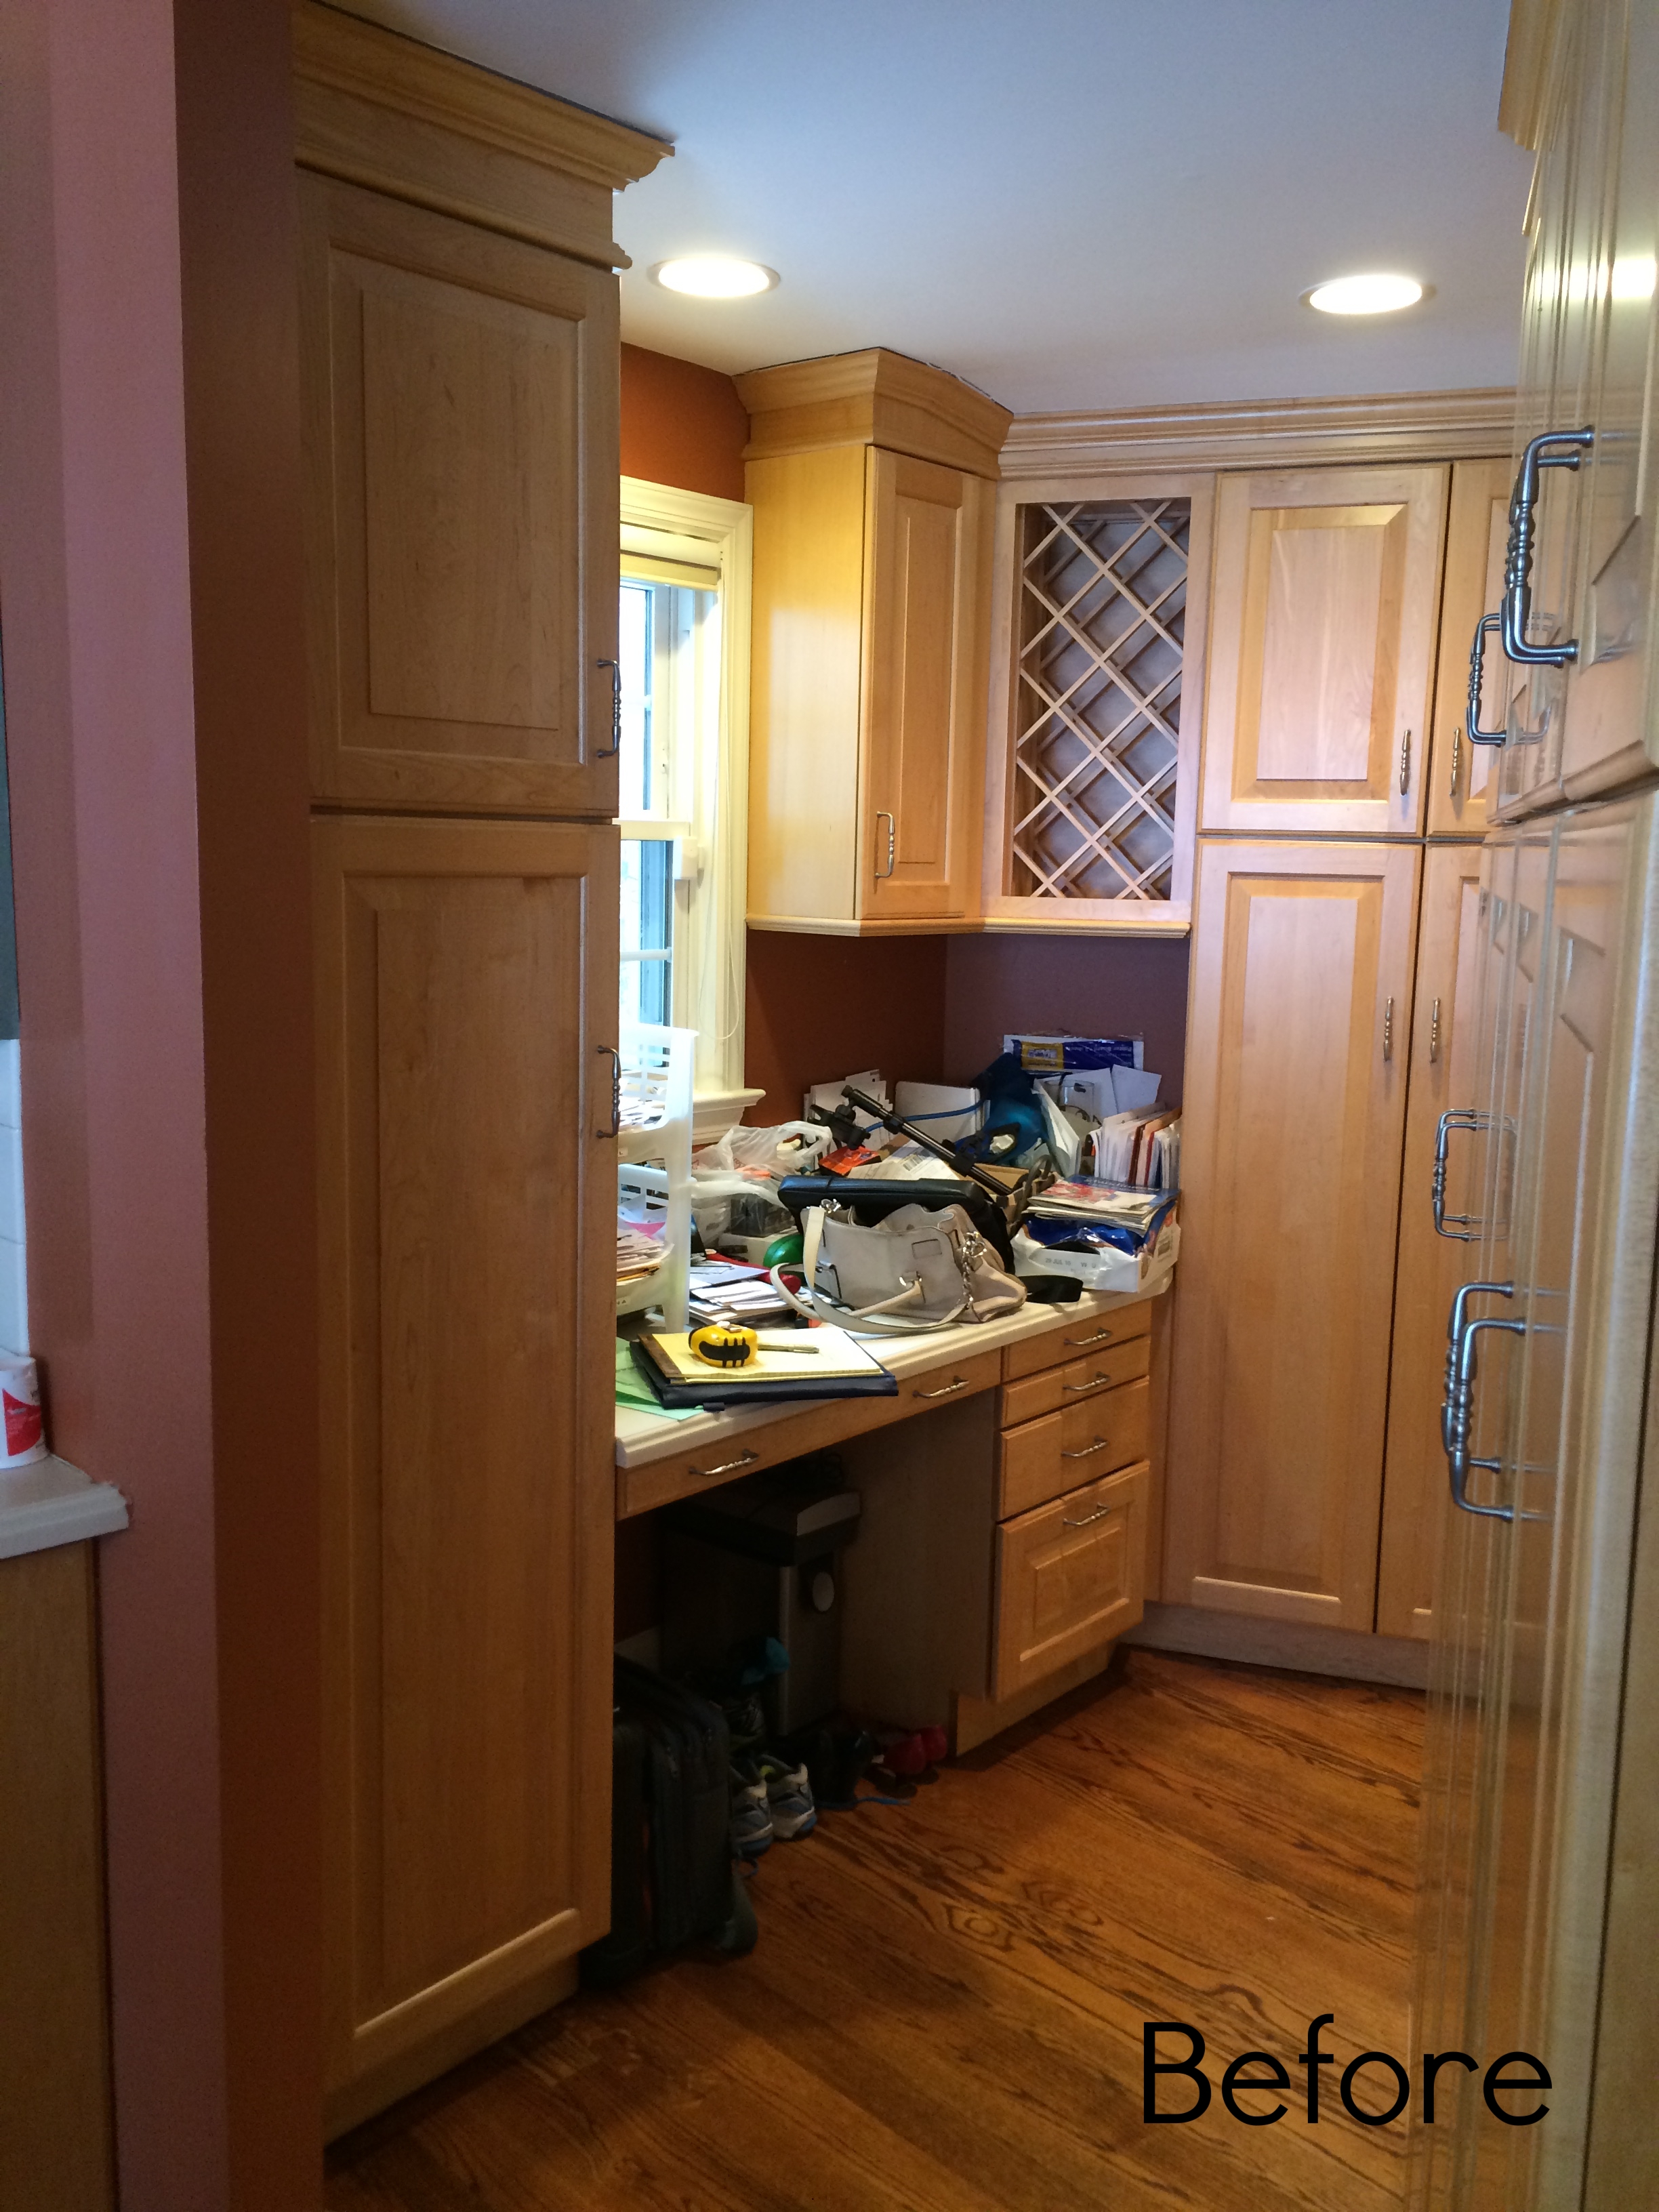
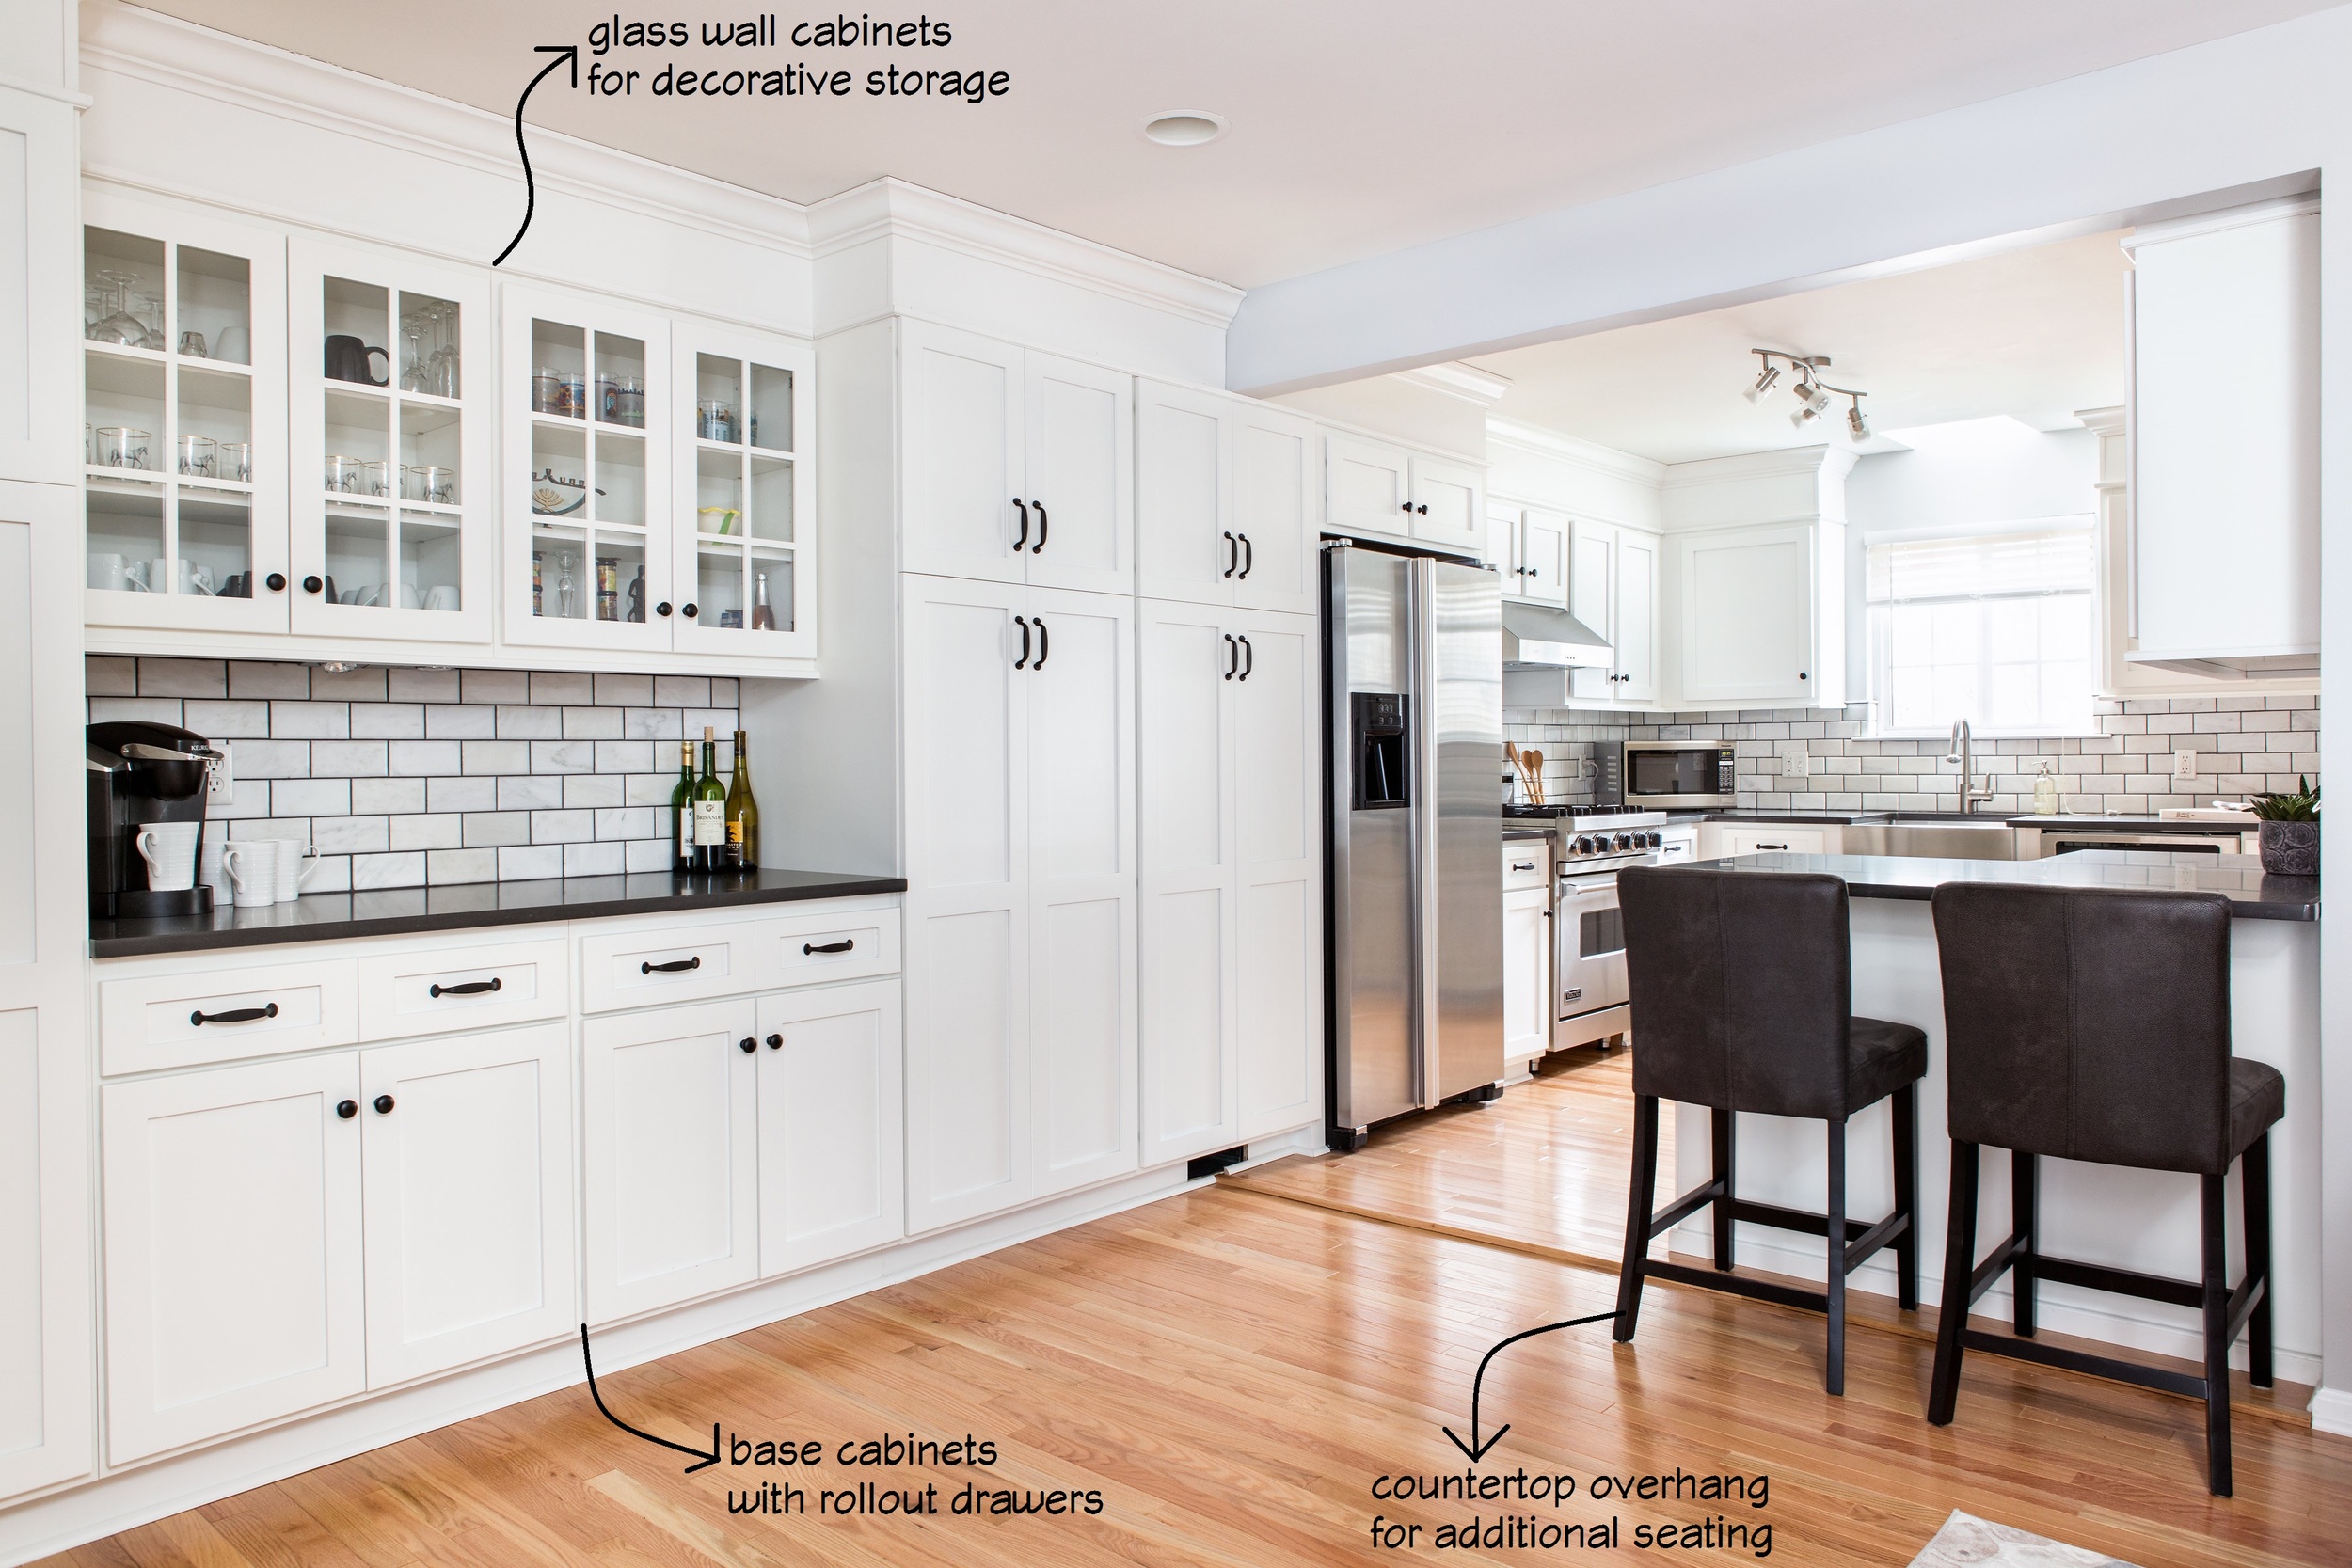
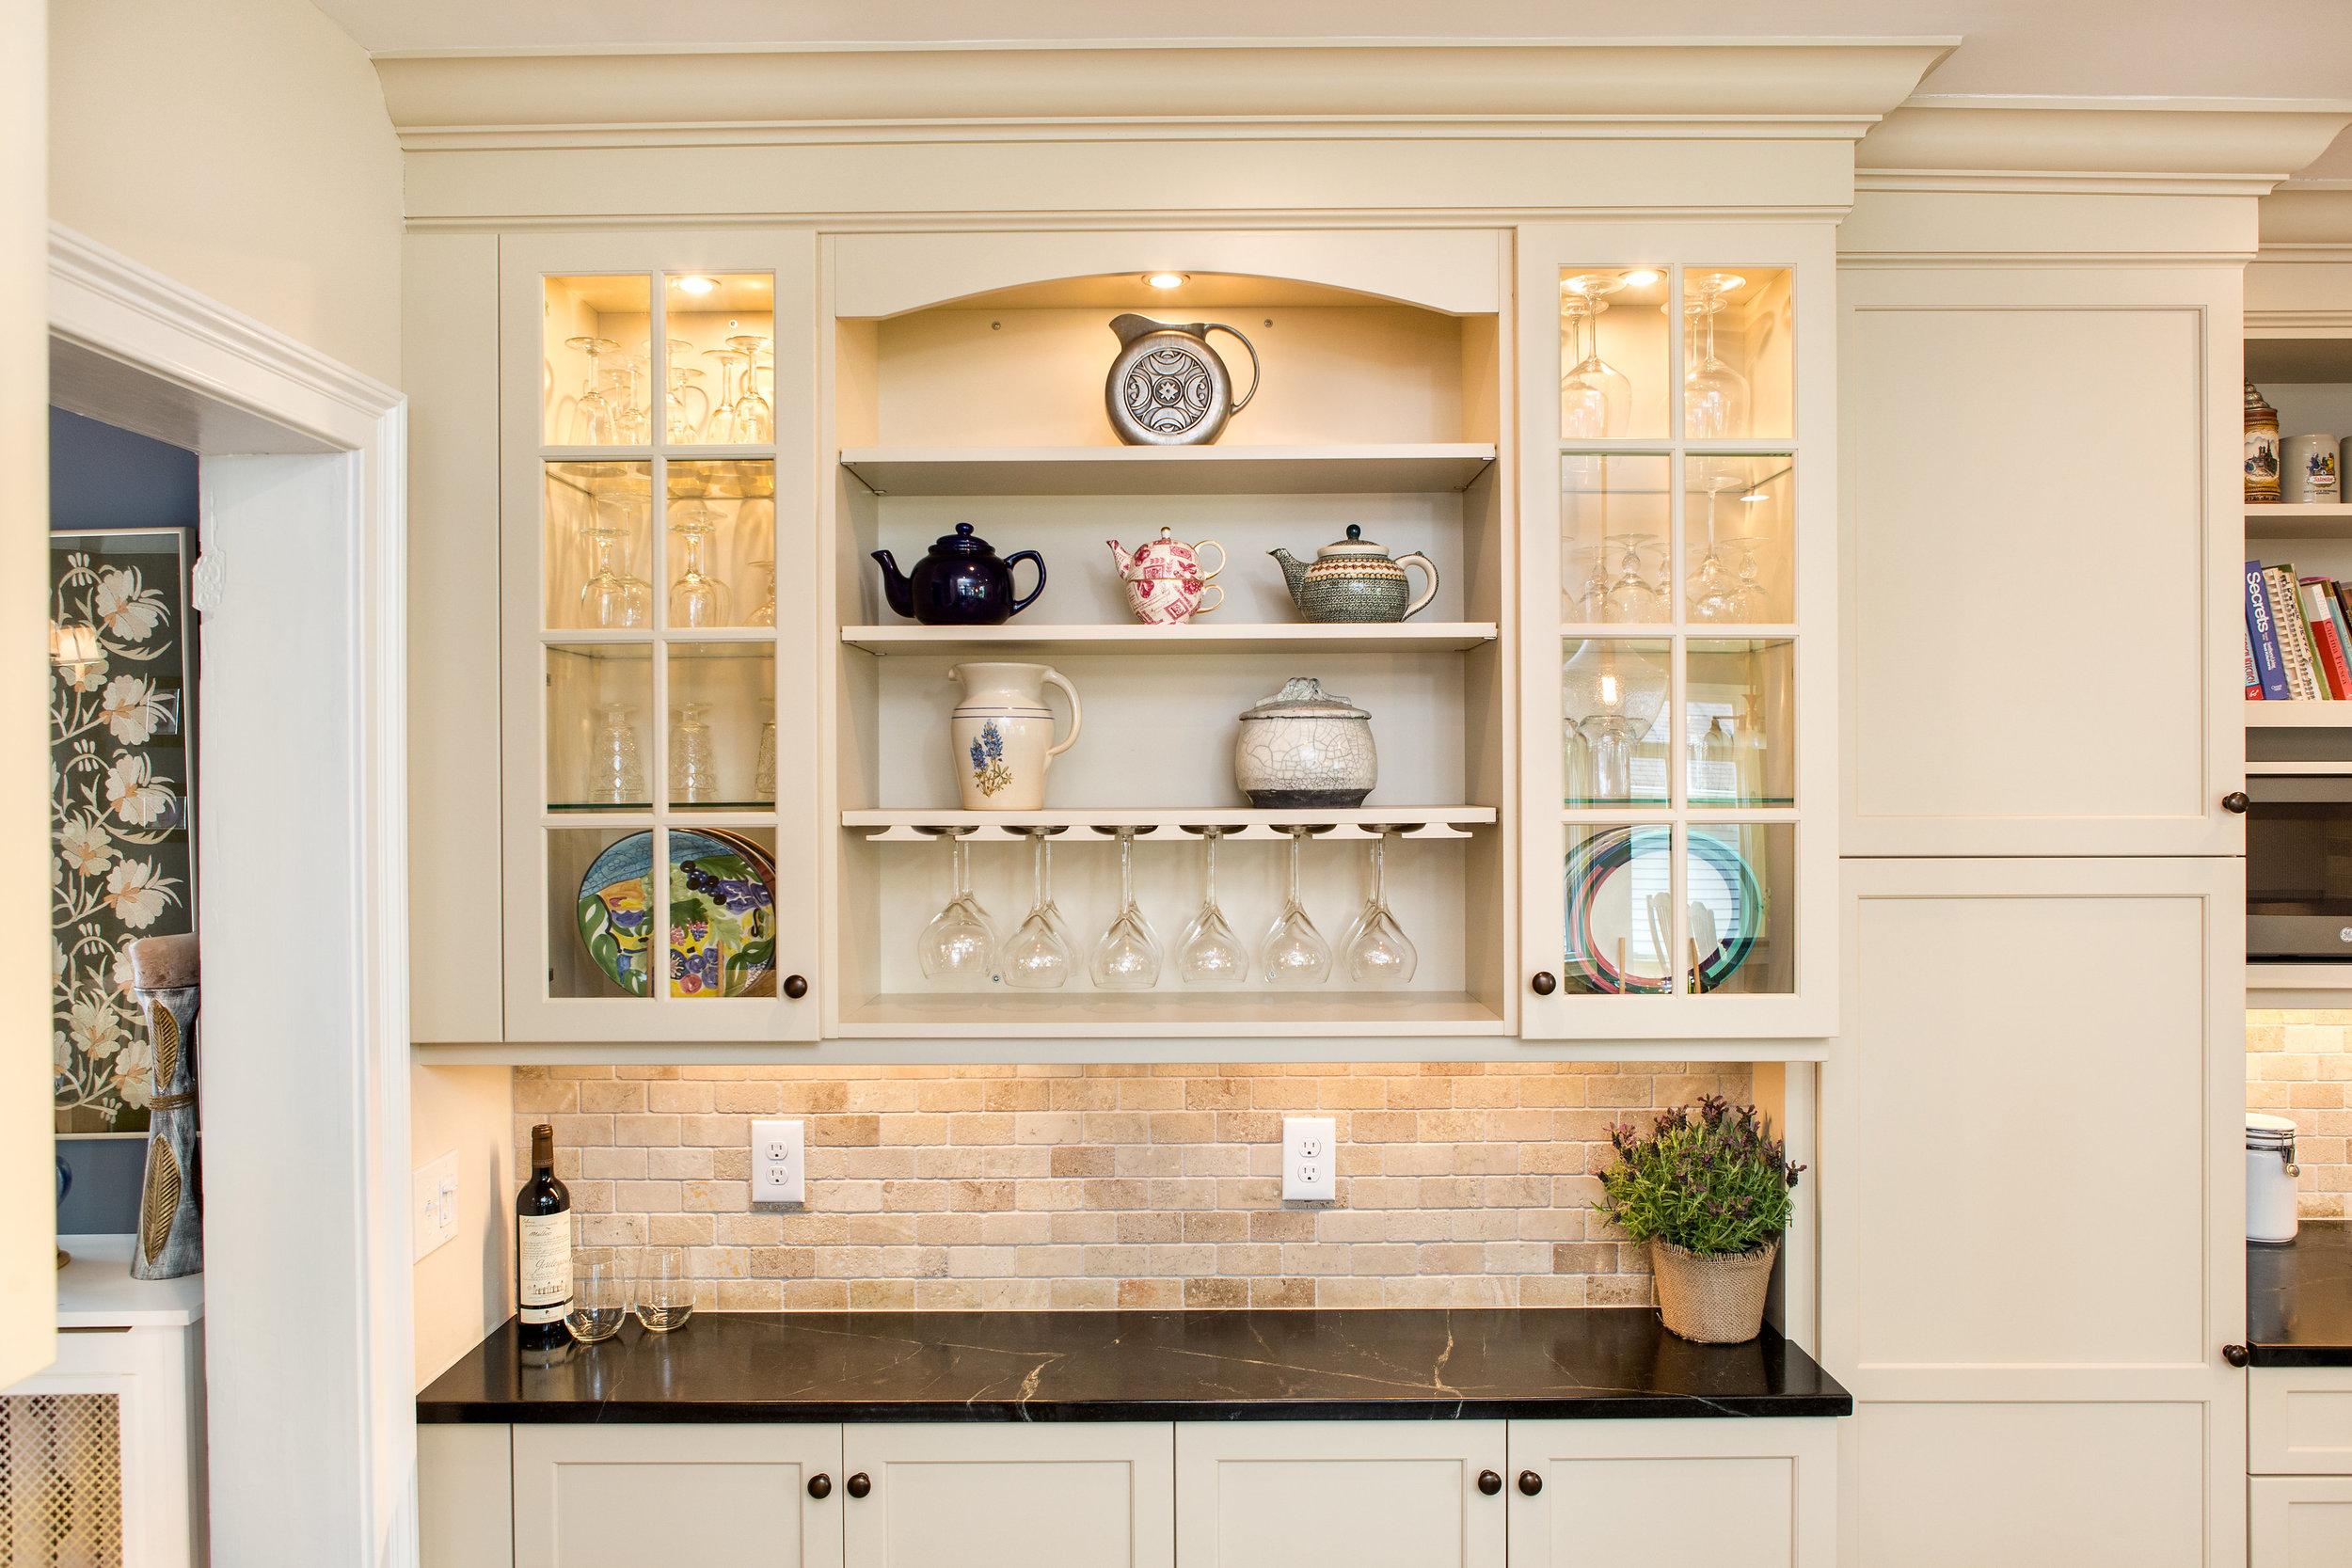
  • Open Shelving/Glass Cabinets for Display

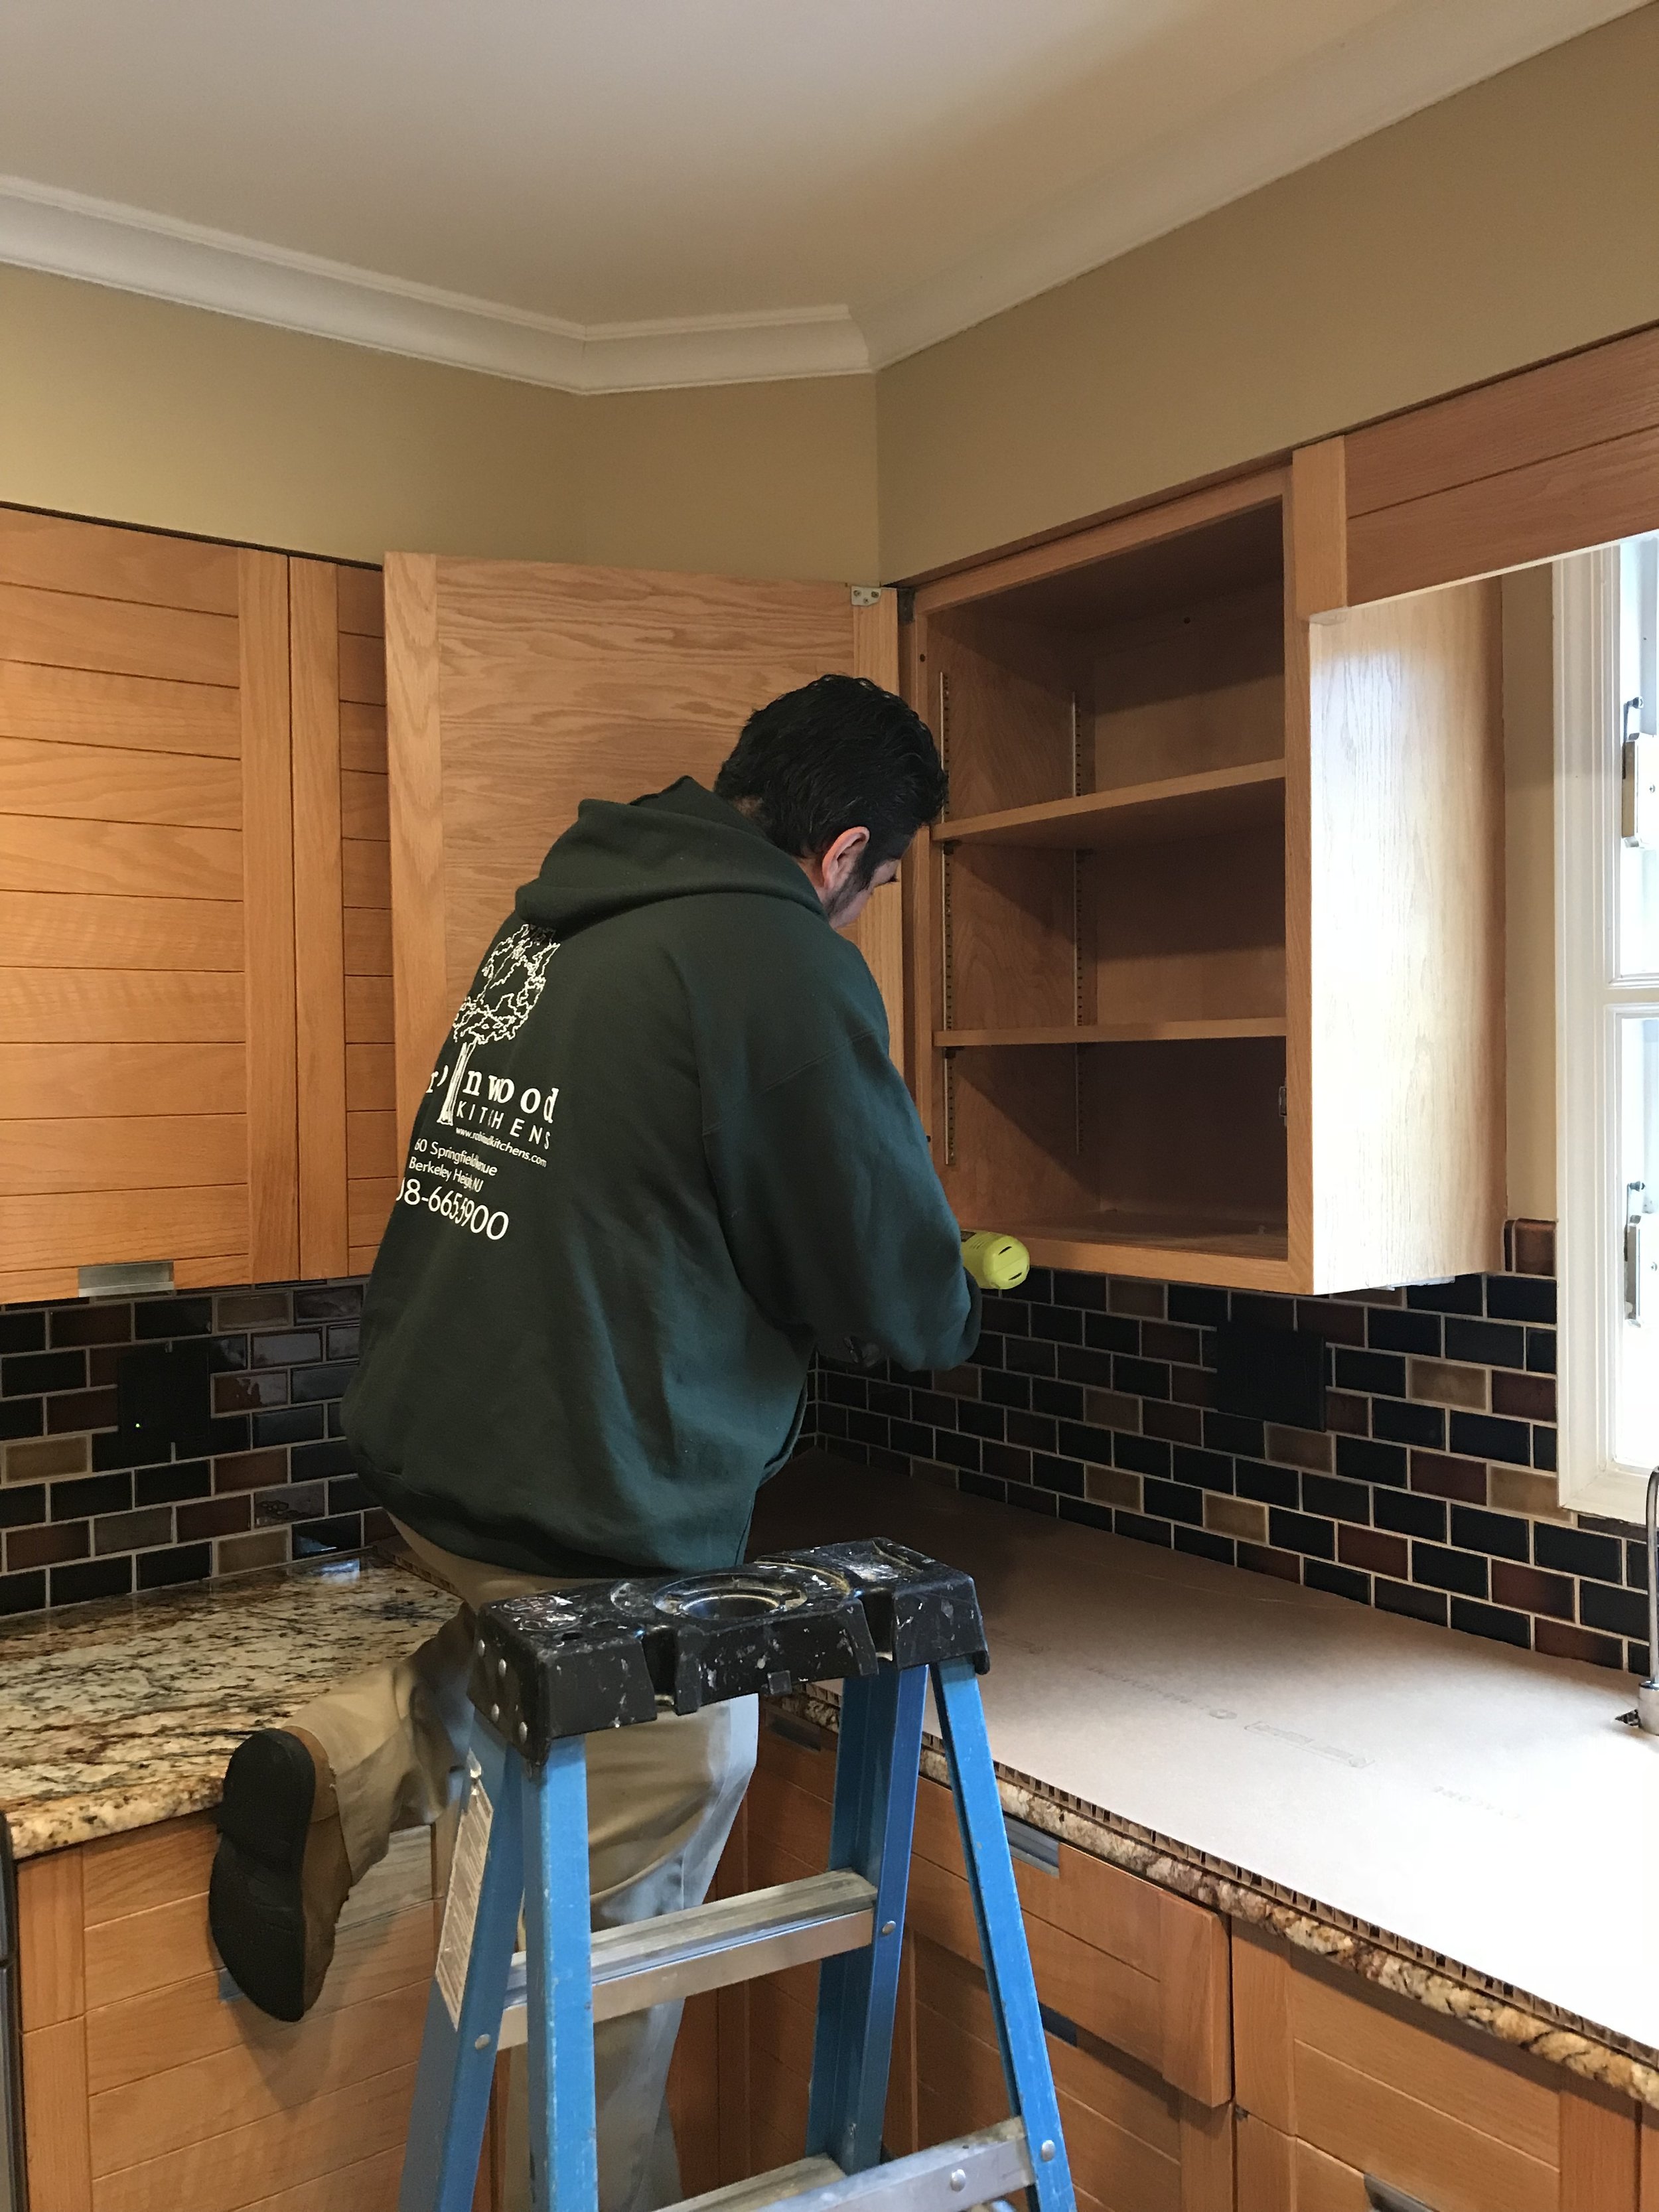
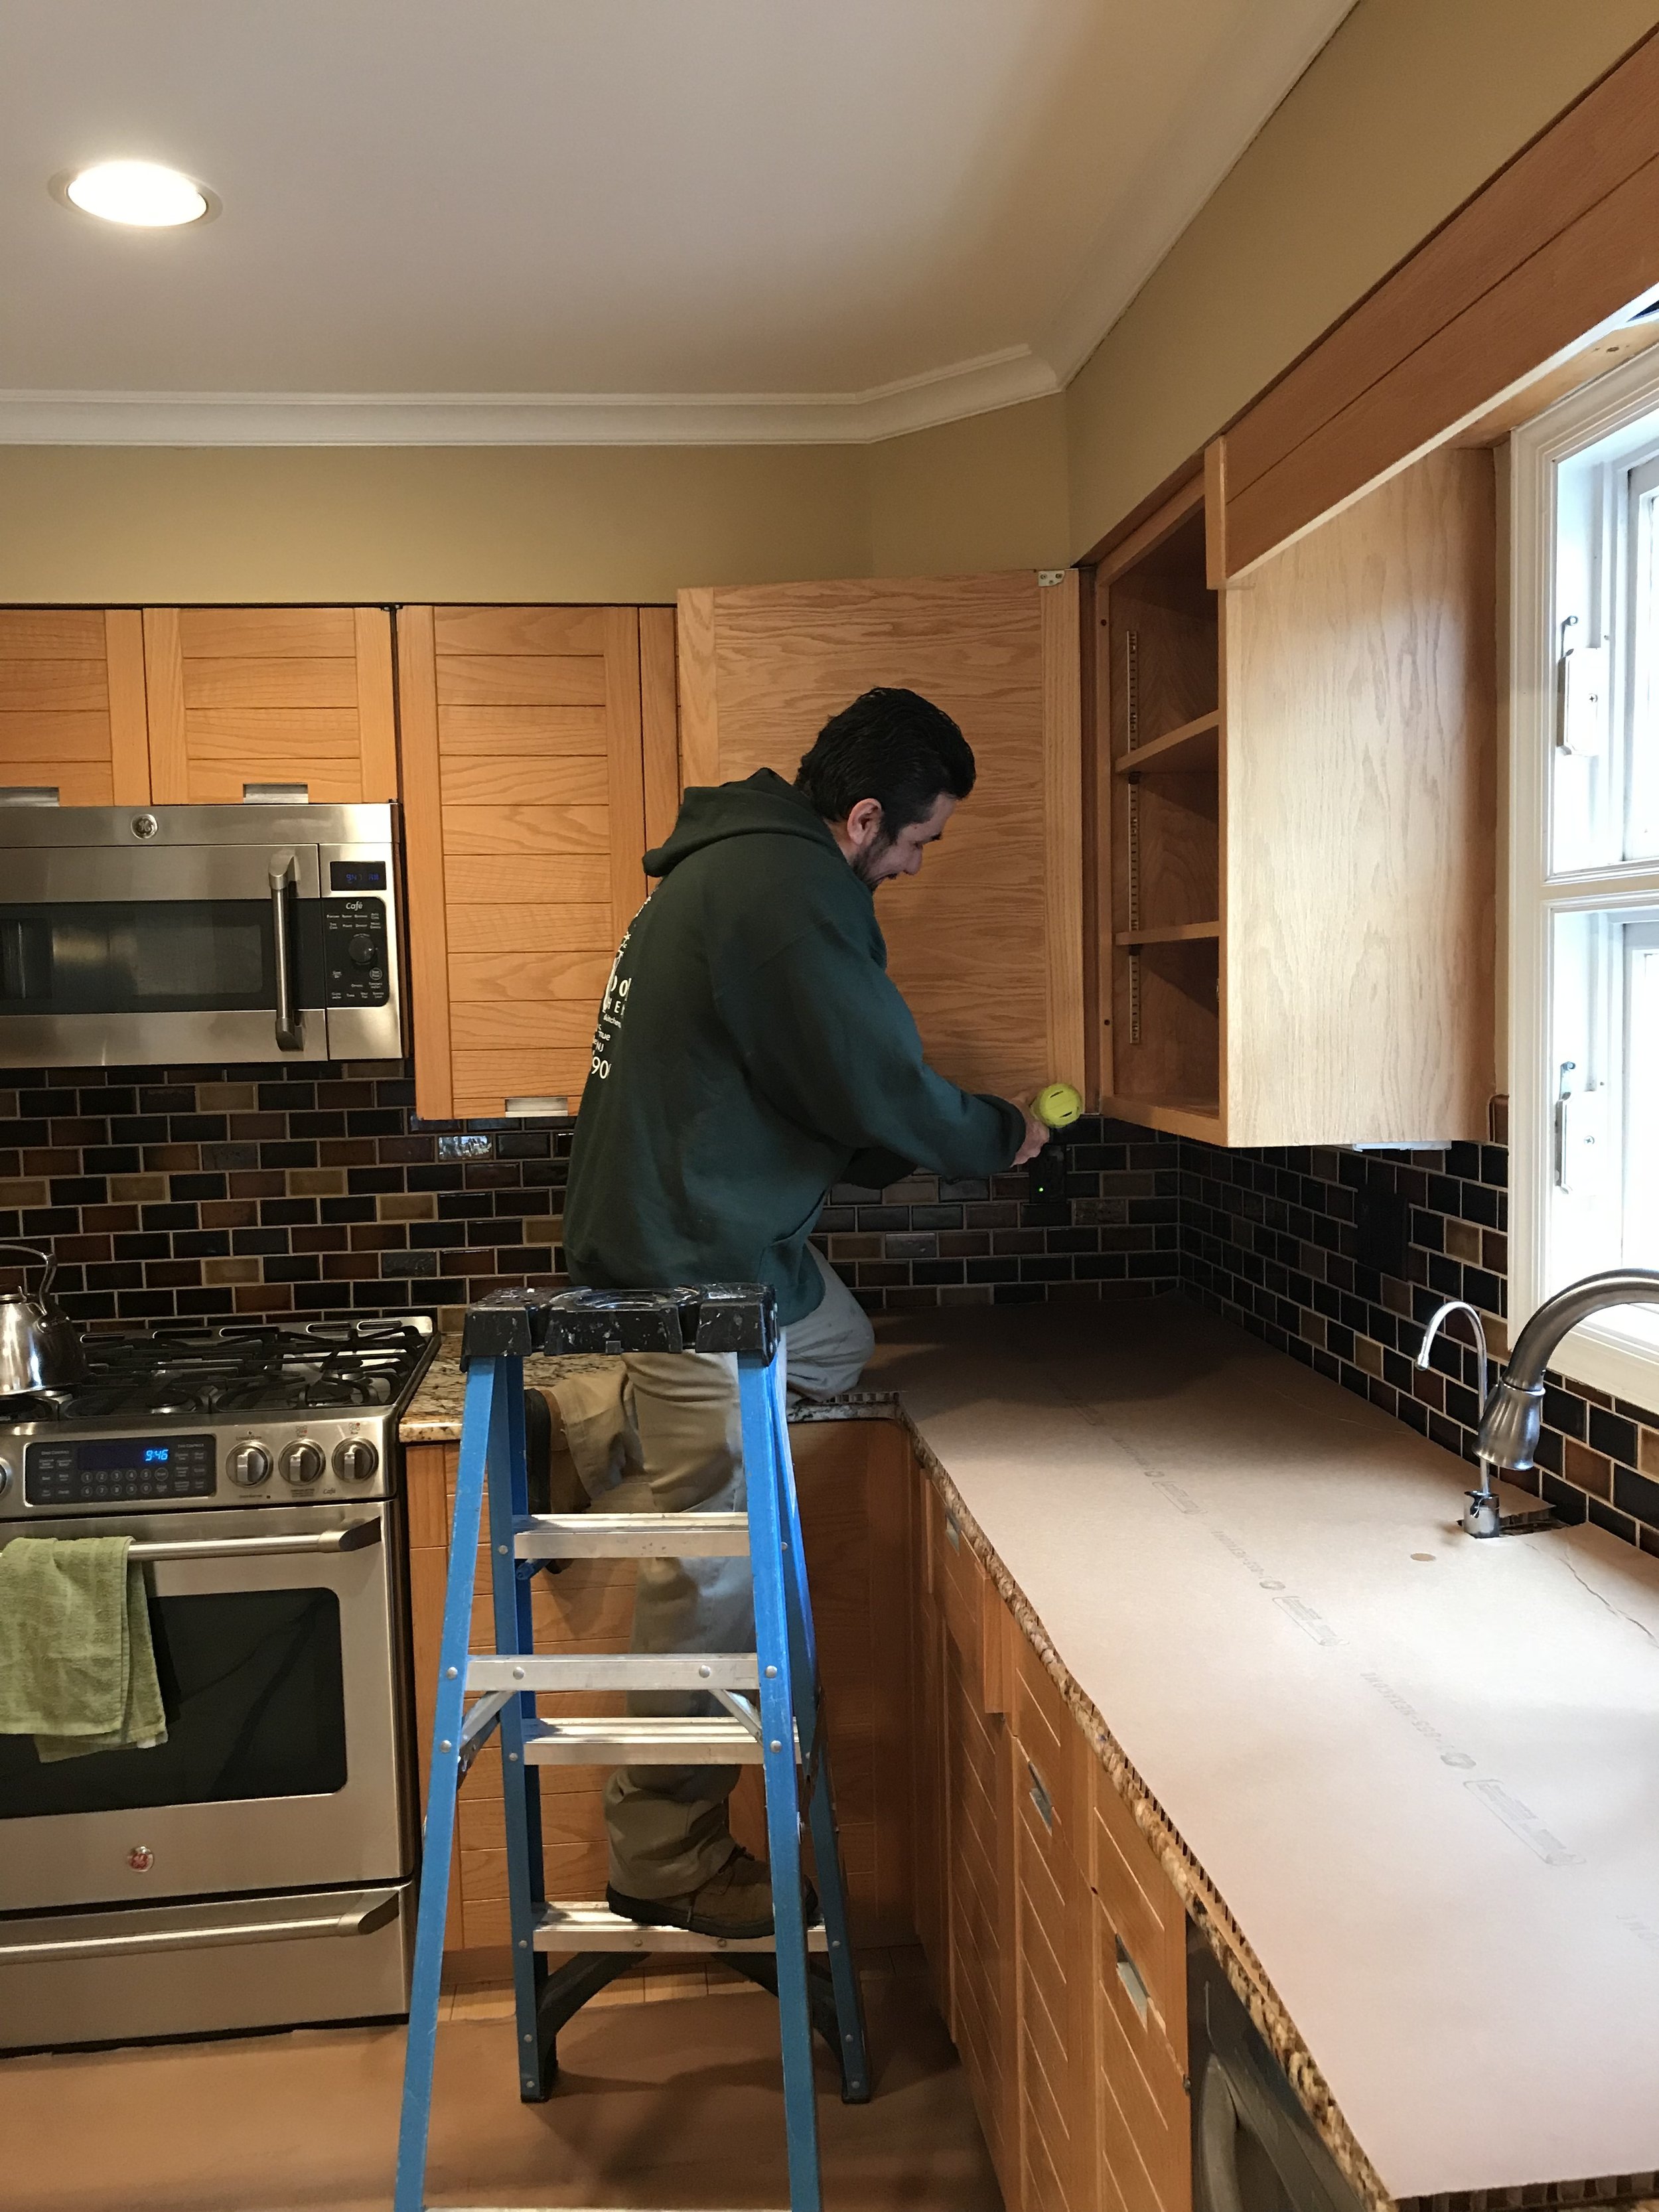
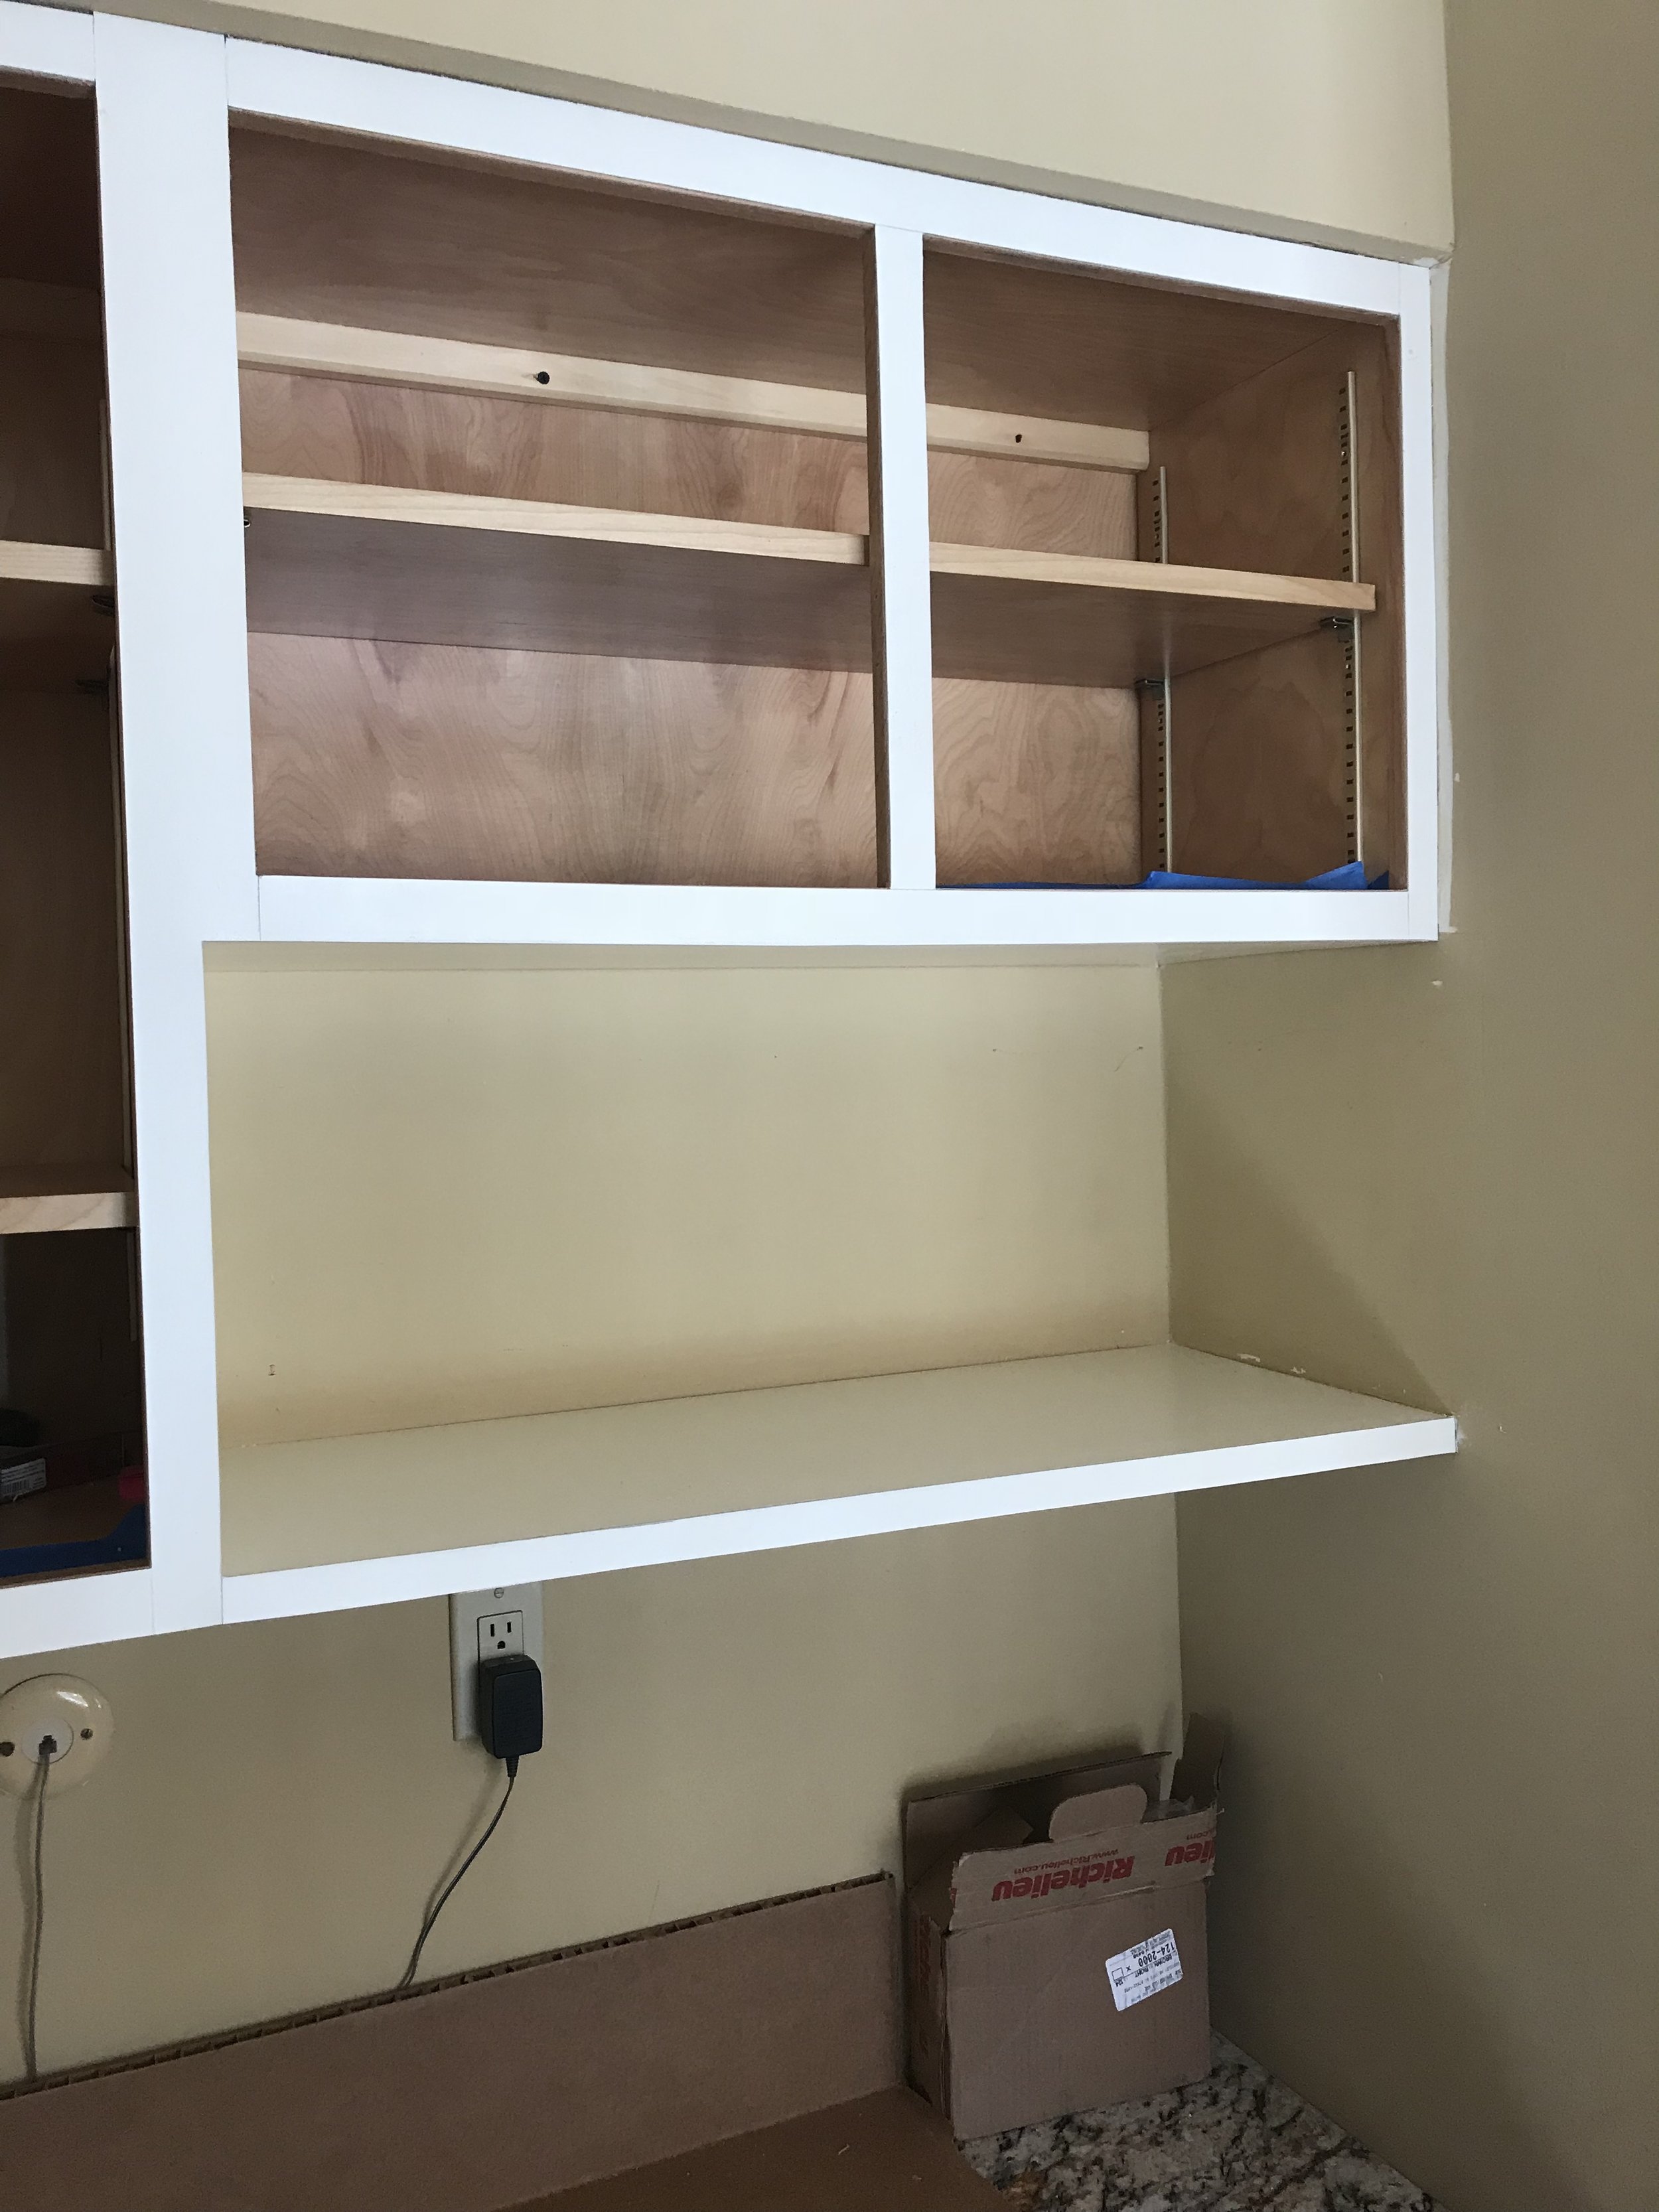
The original built in cabinetry in the kitchen had seen better days.  Typically, we’re all for salvaging original woodwork, but this was screaming for attention.  The homeowner requested a mix of open shelving and glass cabinetry for display of plates and miscellaneous pieces of importance to her.  This area also became a nice focal point of the space.


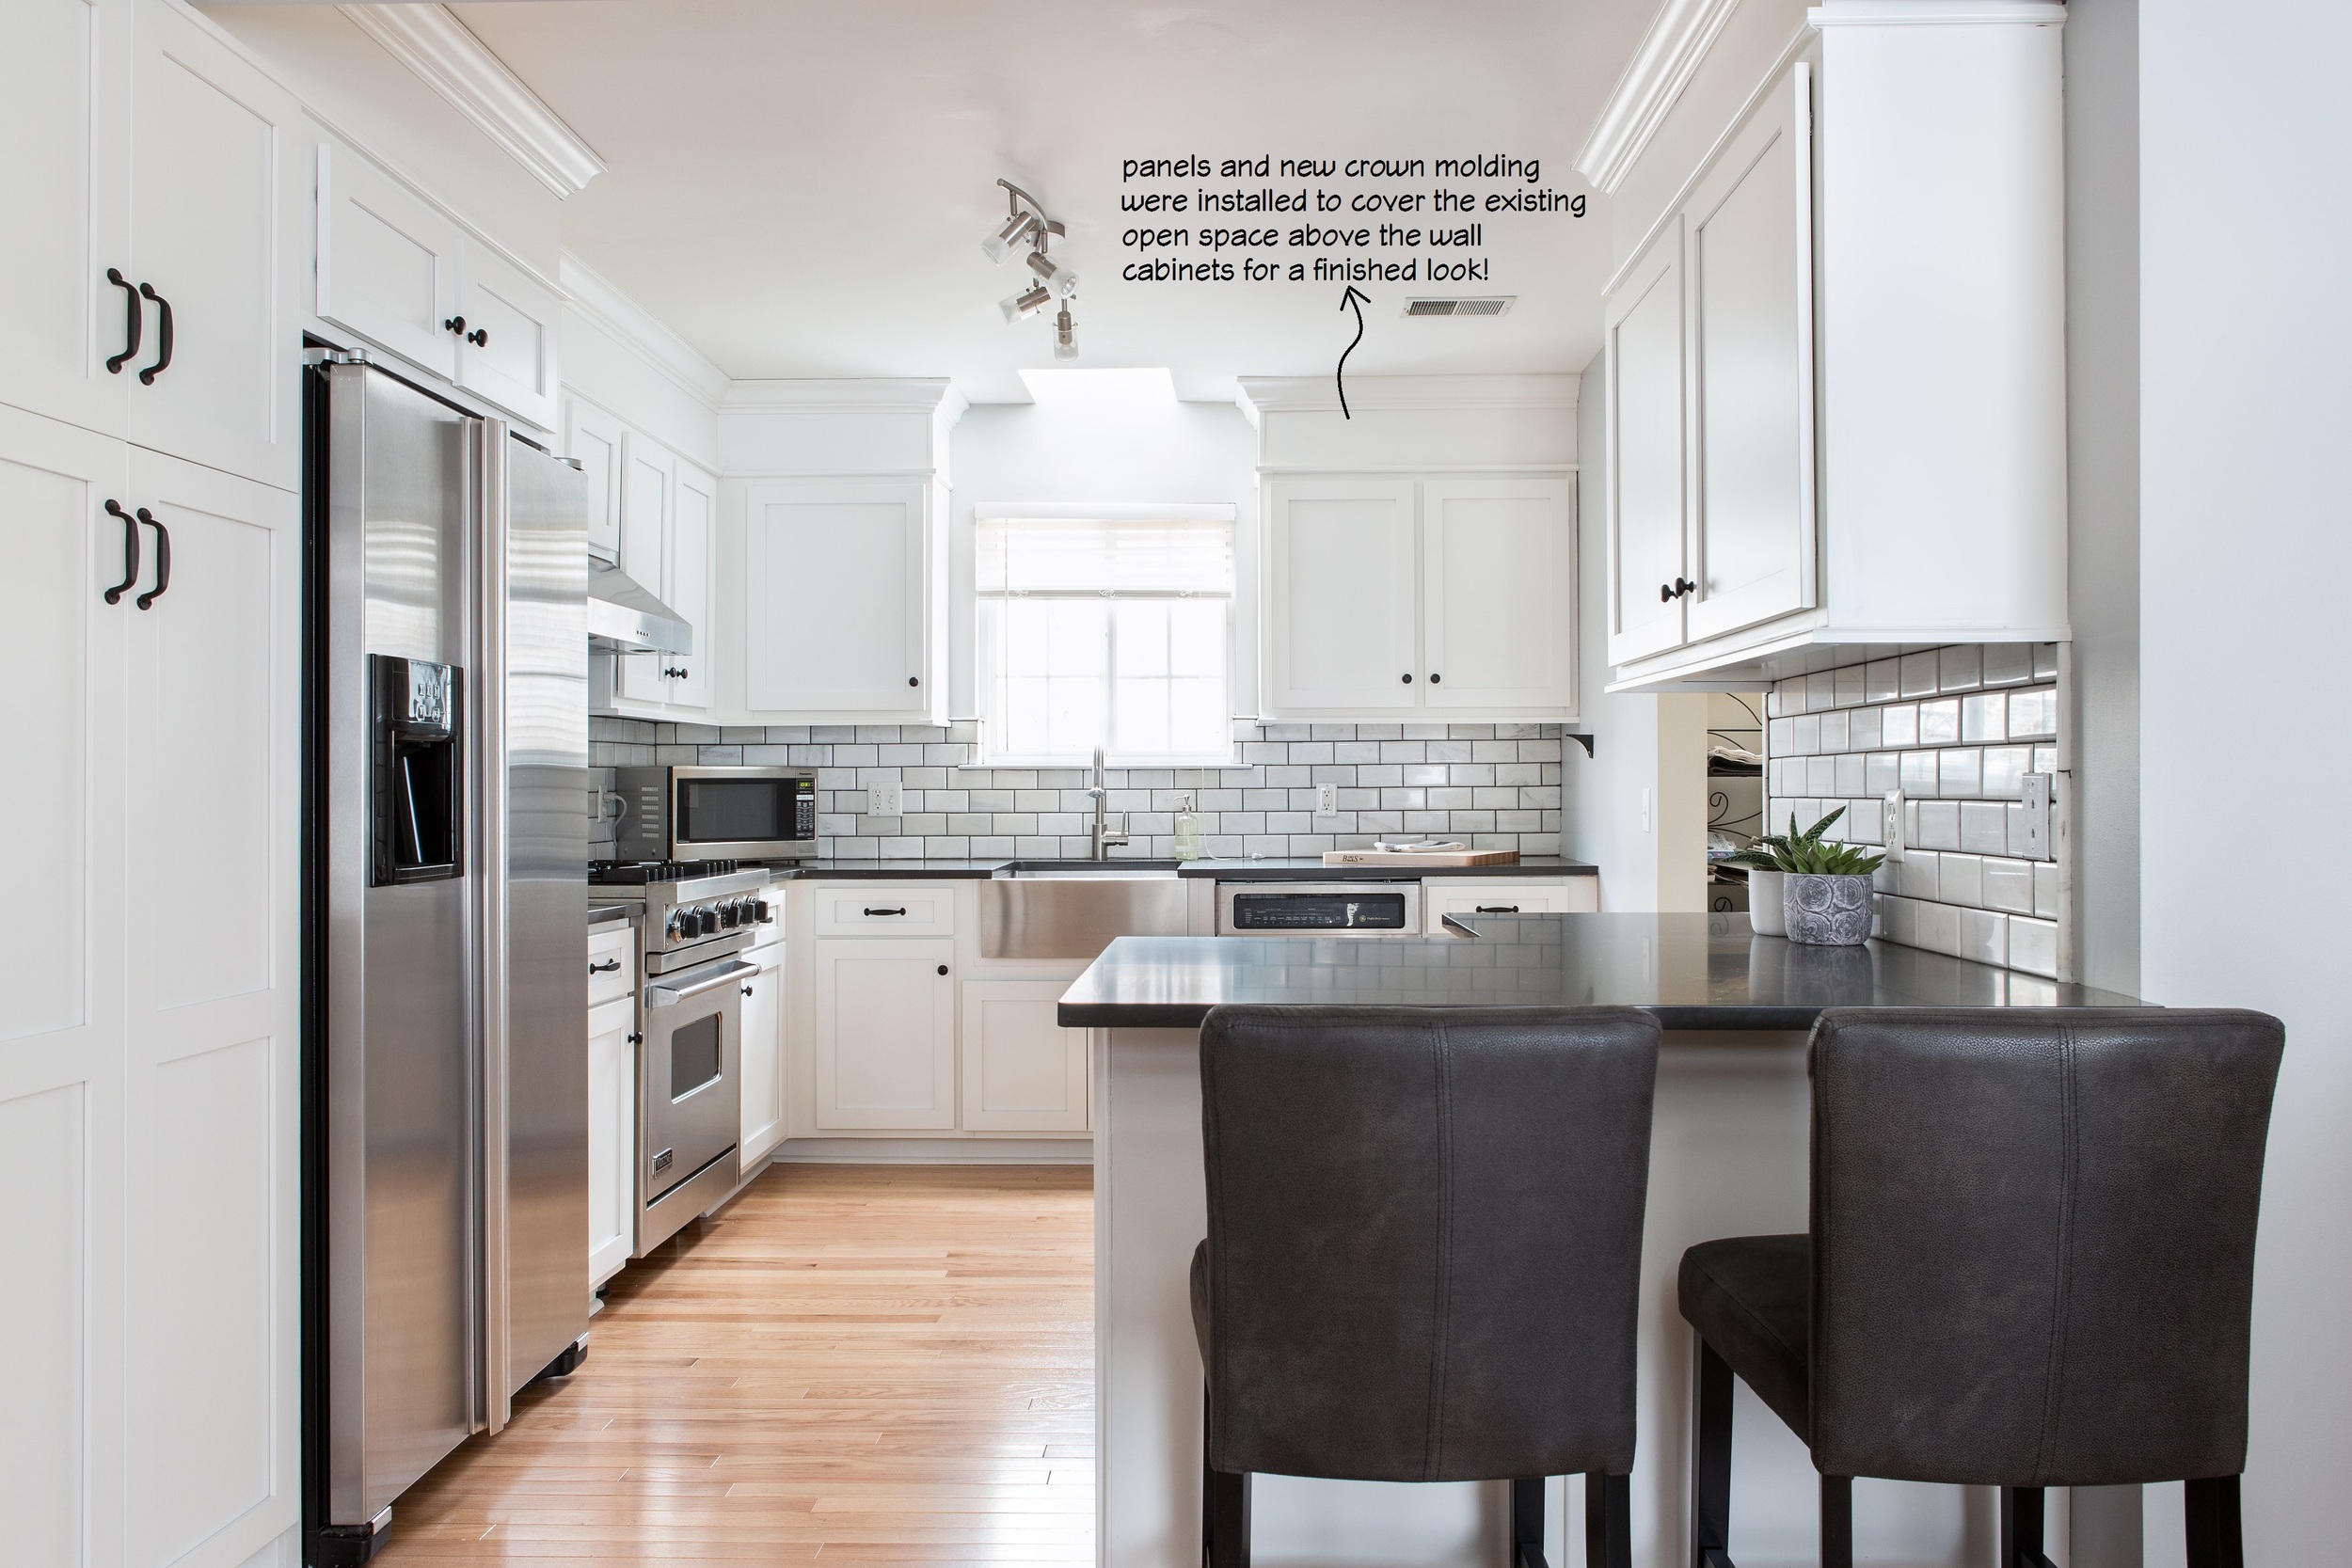
  • Cabinetry/Crown Molding to the Ceiling

Taking advantage of the extra space above the existing cabinetry was important for these homeowners.  The open space was wasted space that could be used for additional wall cabinet storage.
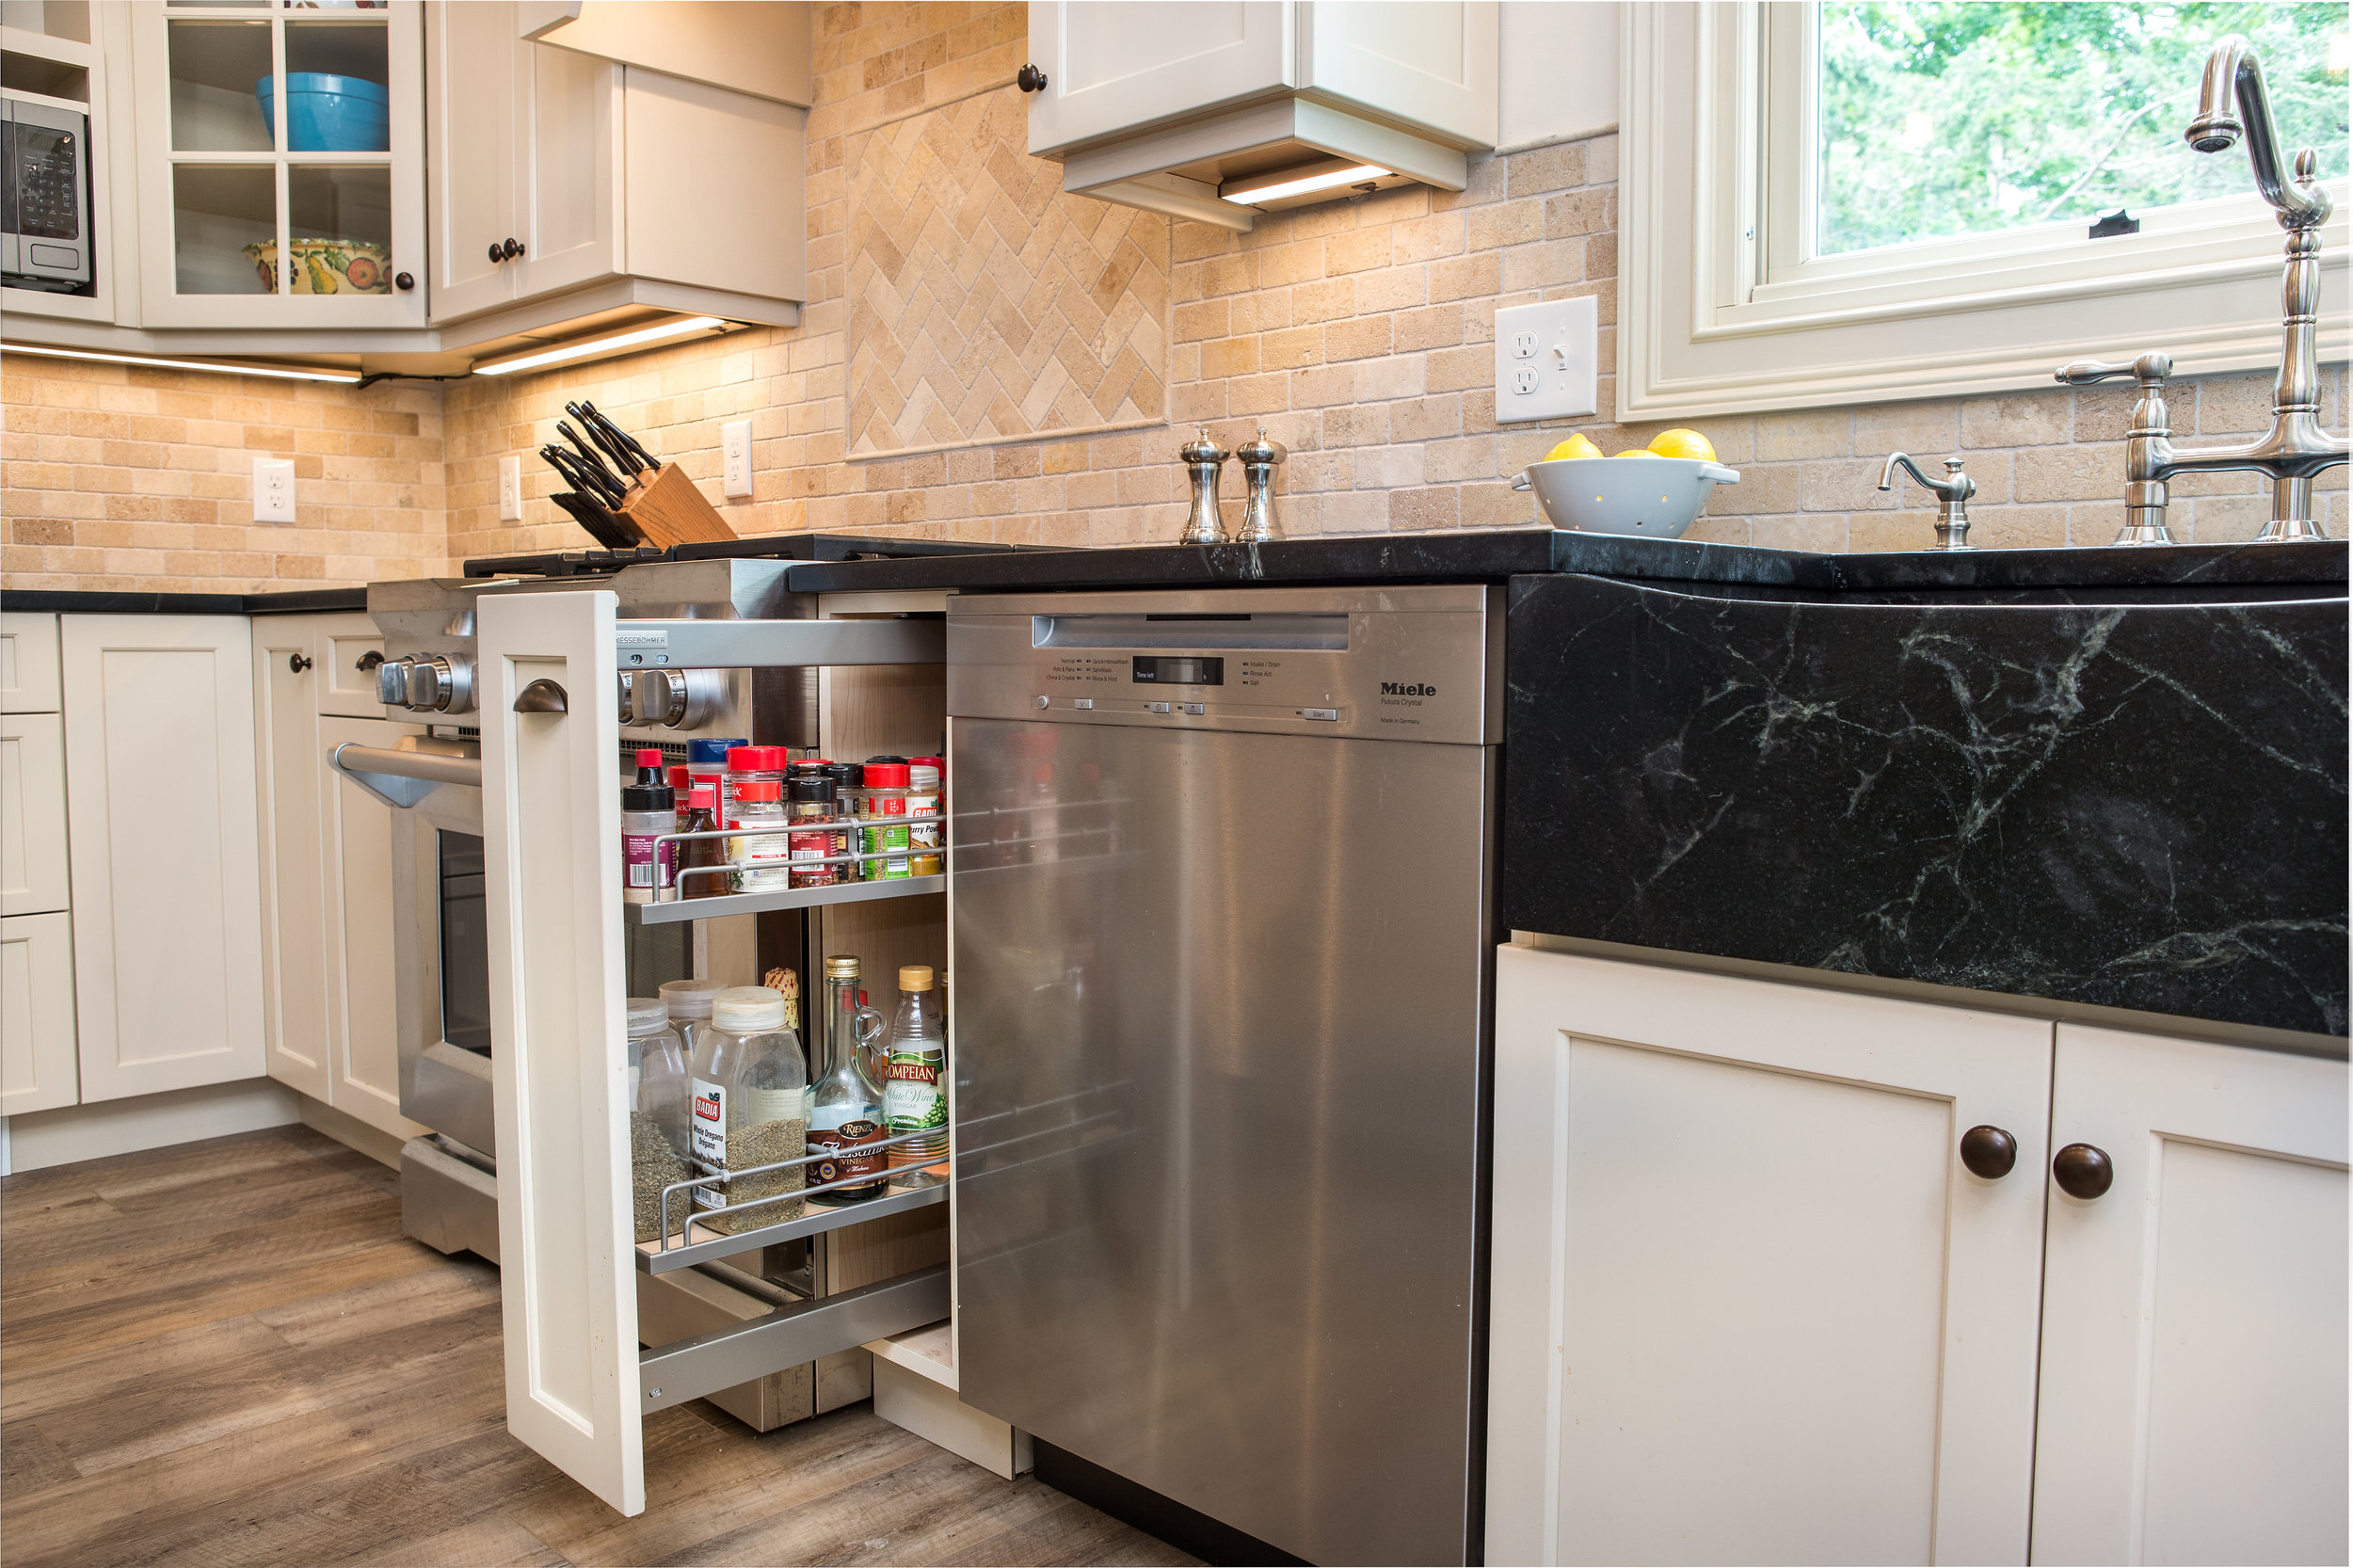
 

  • Storage for Spices

One of the most popular requests we receive, we incorporate a spice pullout (or two) into almost every kitchen.


  • Plain & Fancy Cabinetry

Last, but not least! We actually received this client as a lead through Plain & Fancy’s website.  The homeowner had always dreamed of having Plain & Fancy cabinetry in her kitchen, and we were able to make that dream a reality!

To learn more about Plain & Fancy Custom Cabinetry - click here!


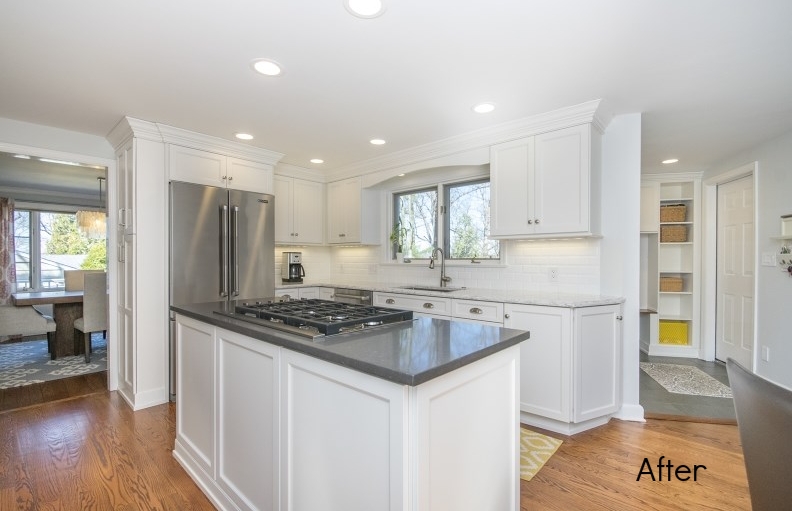
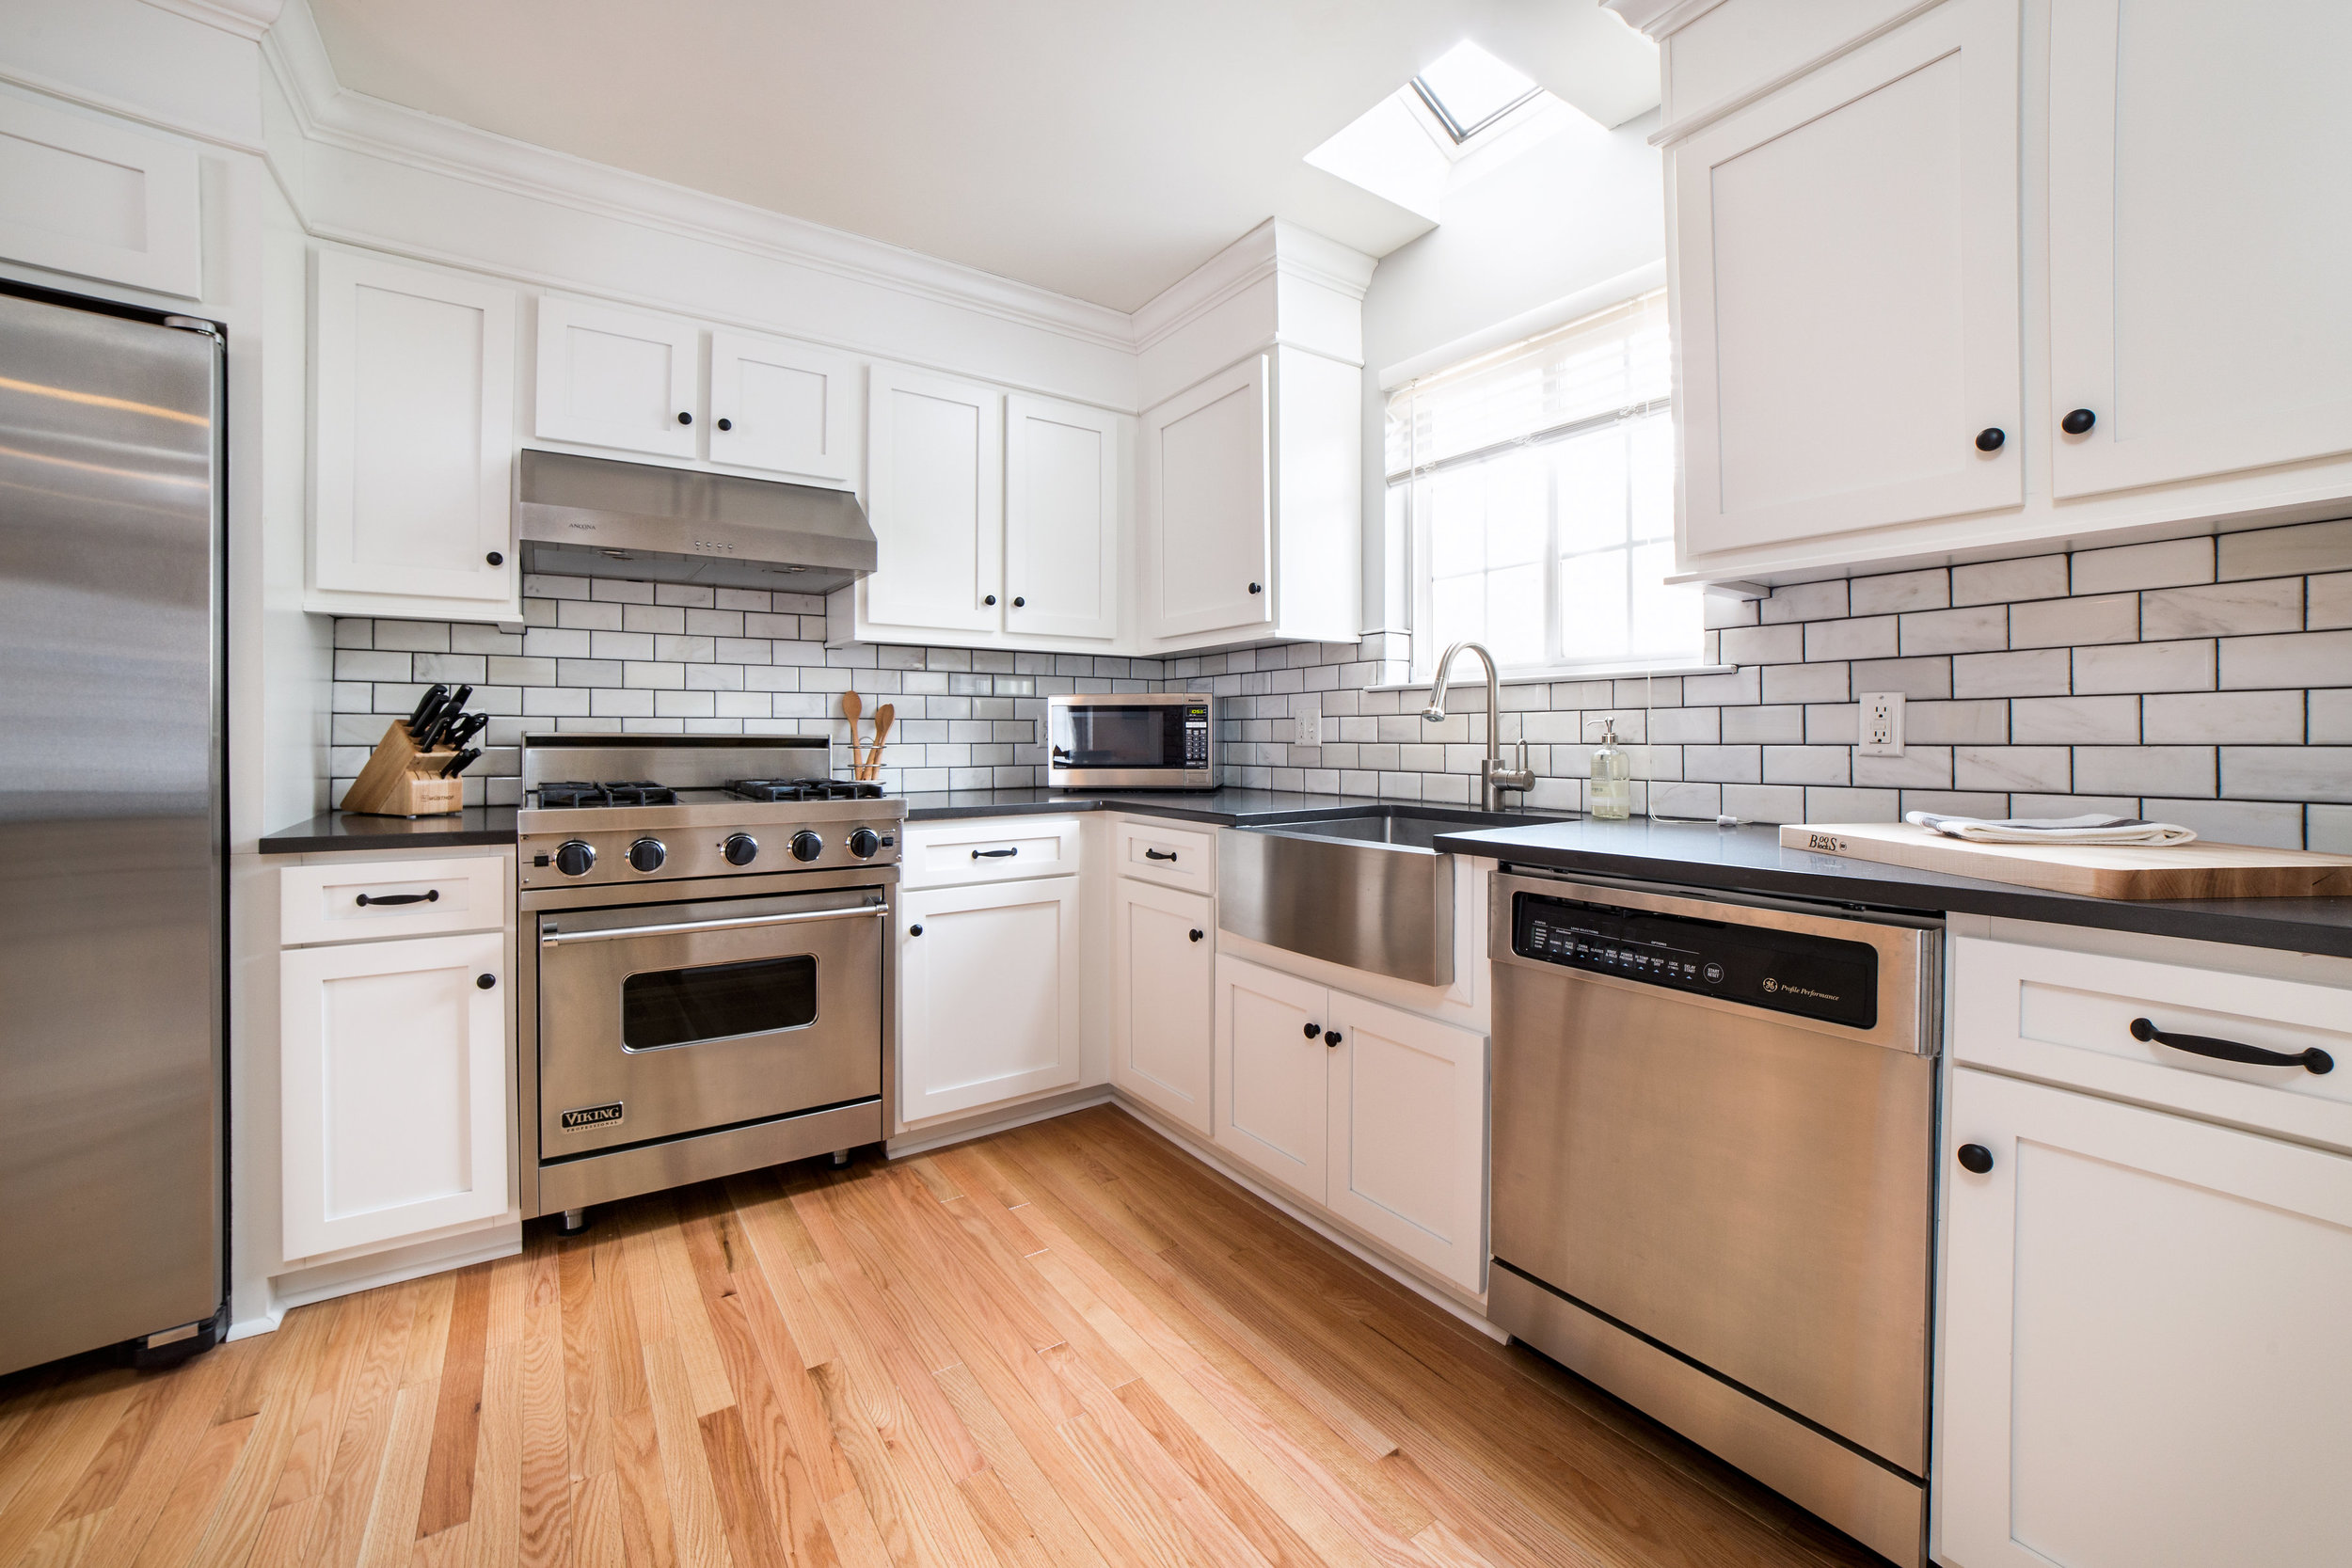
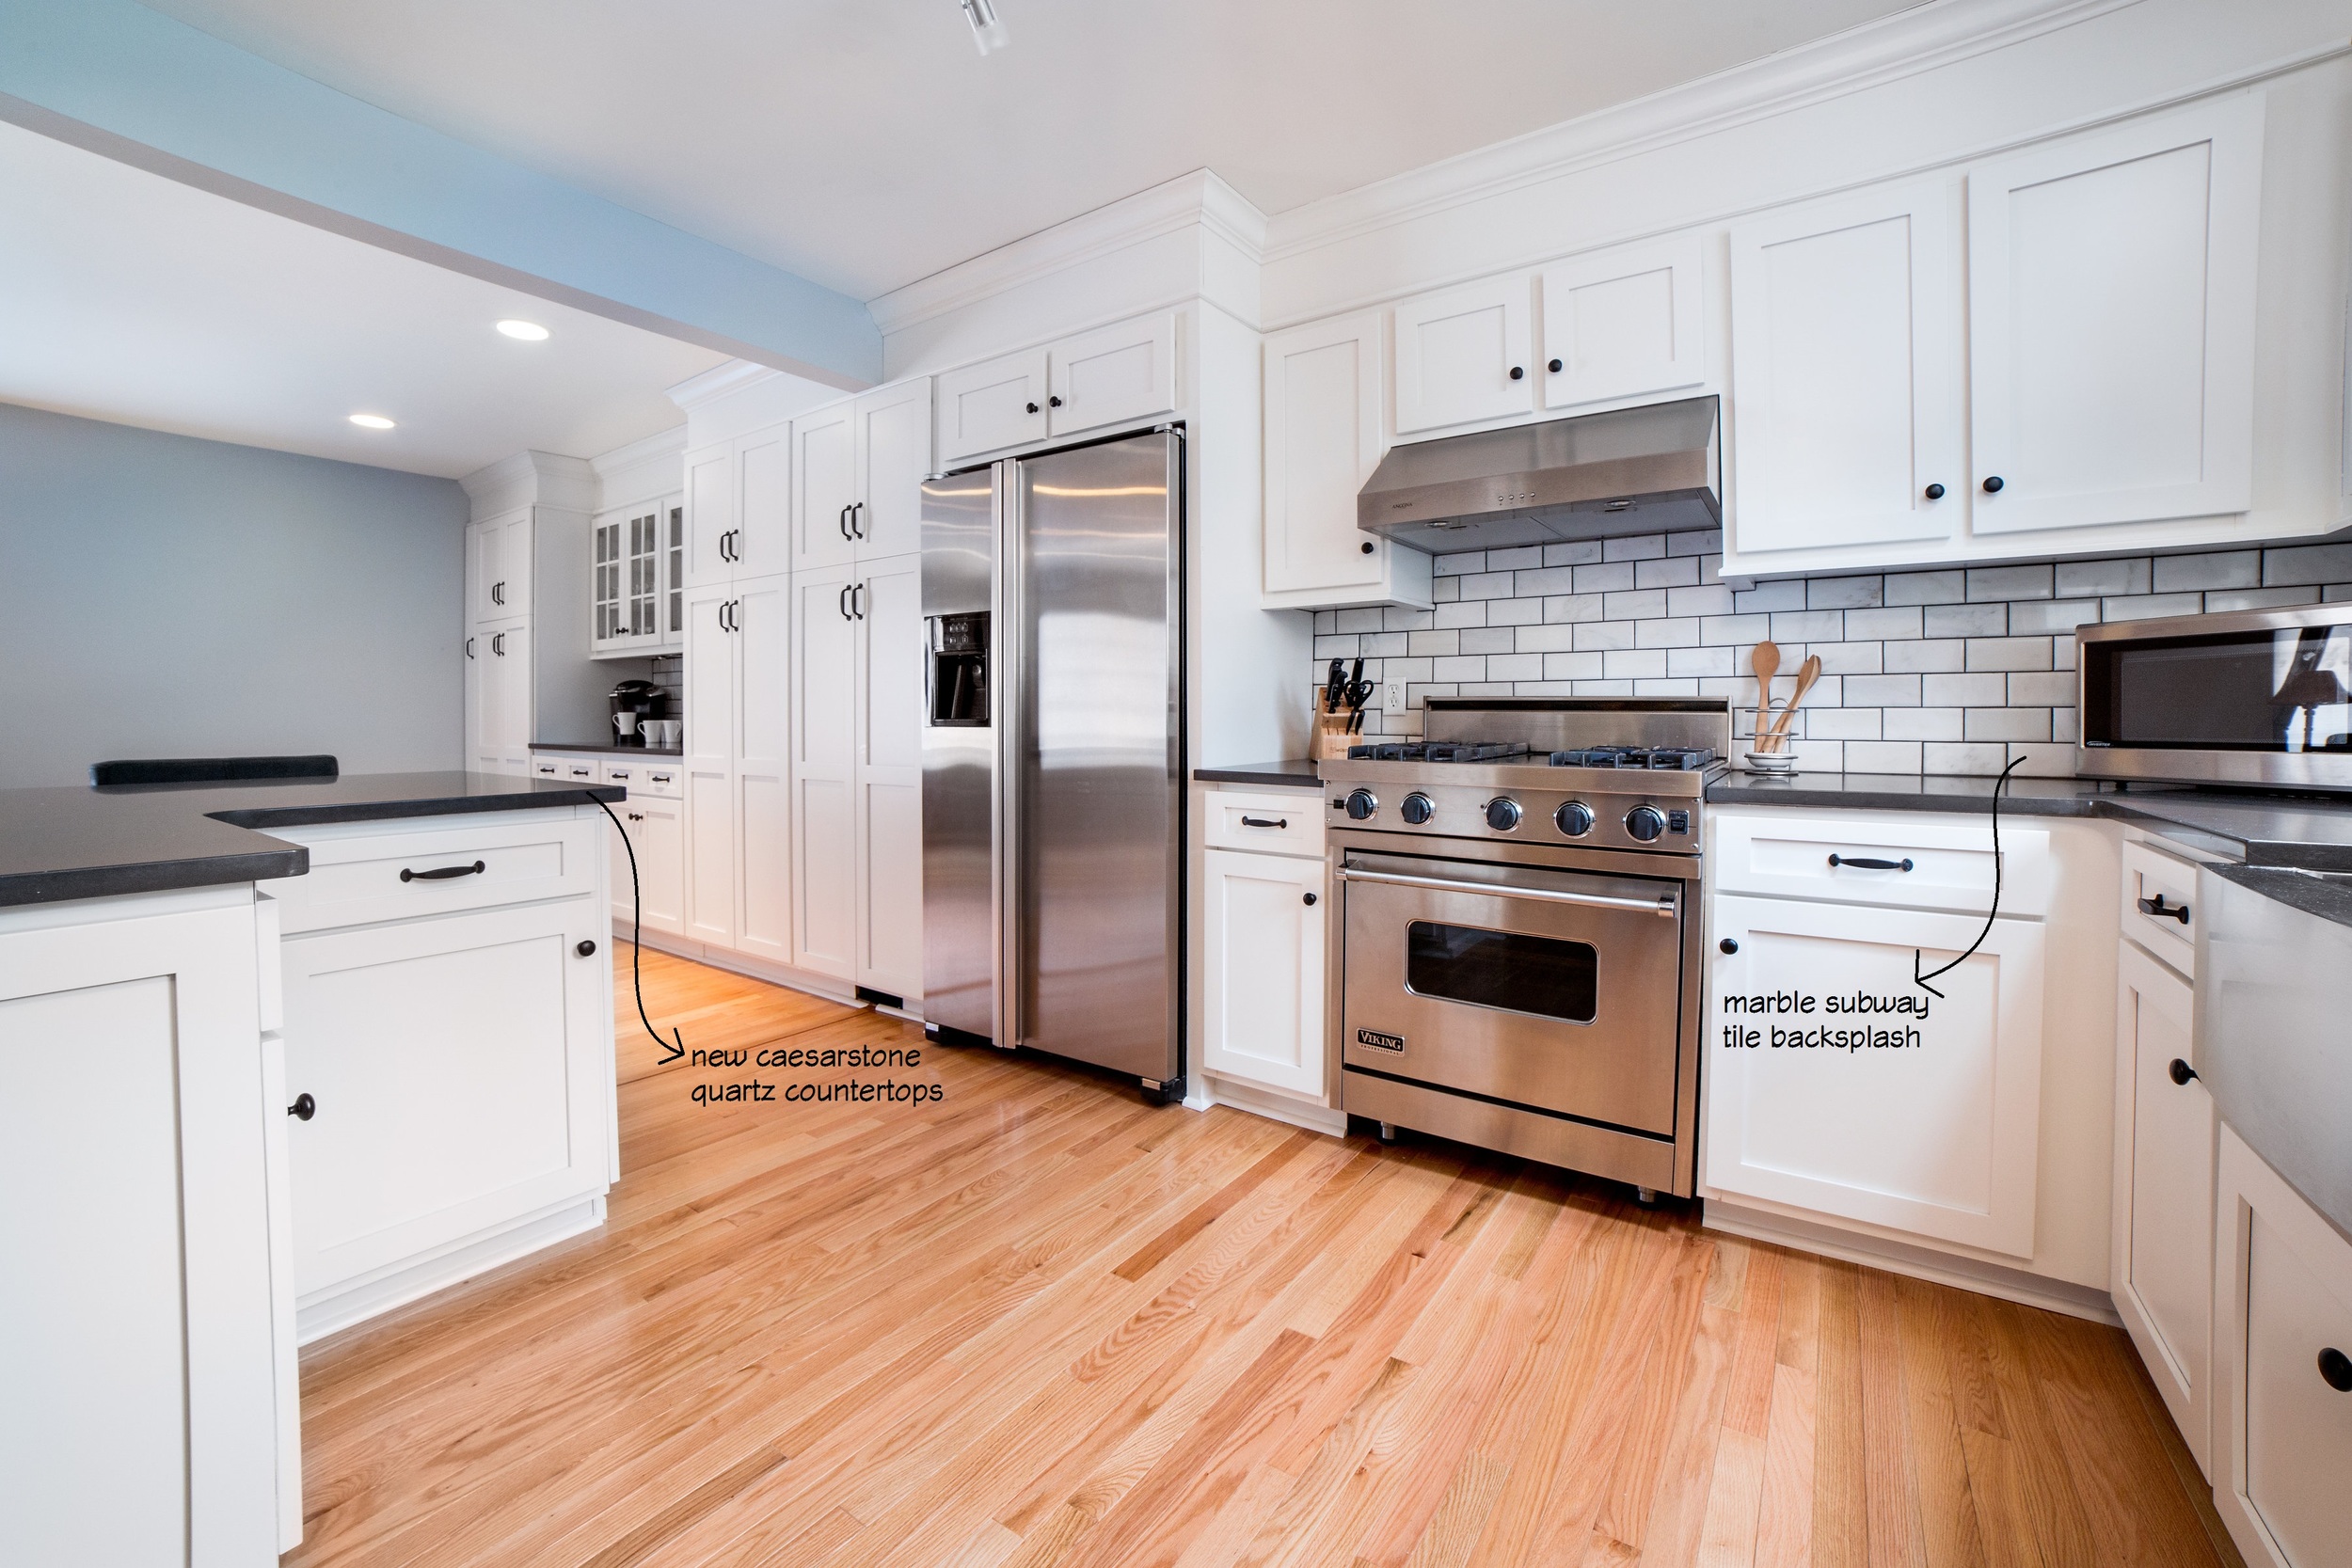
This project is a great example of how with a little creativity you can completely transform a kitchen within the existing space (without tearing down all the walls a-la Fixer Upper style!).  We hope you enjoy this kitchen as much as we do!           


Kitchen & Cabinetry Design by Robinwood Kitchens

Plain & Fancy Custom Cabinetry Provided by Robinwood Kitchens

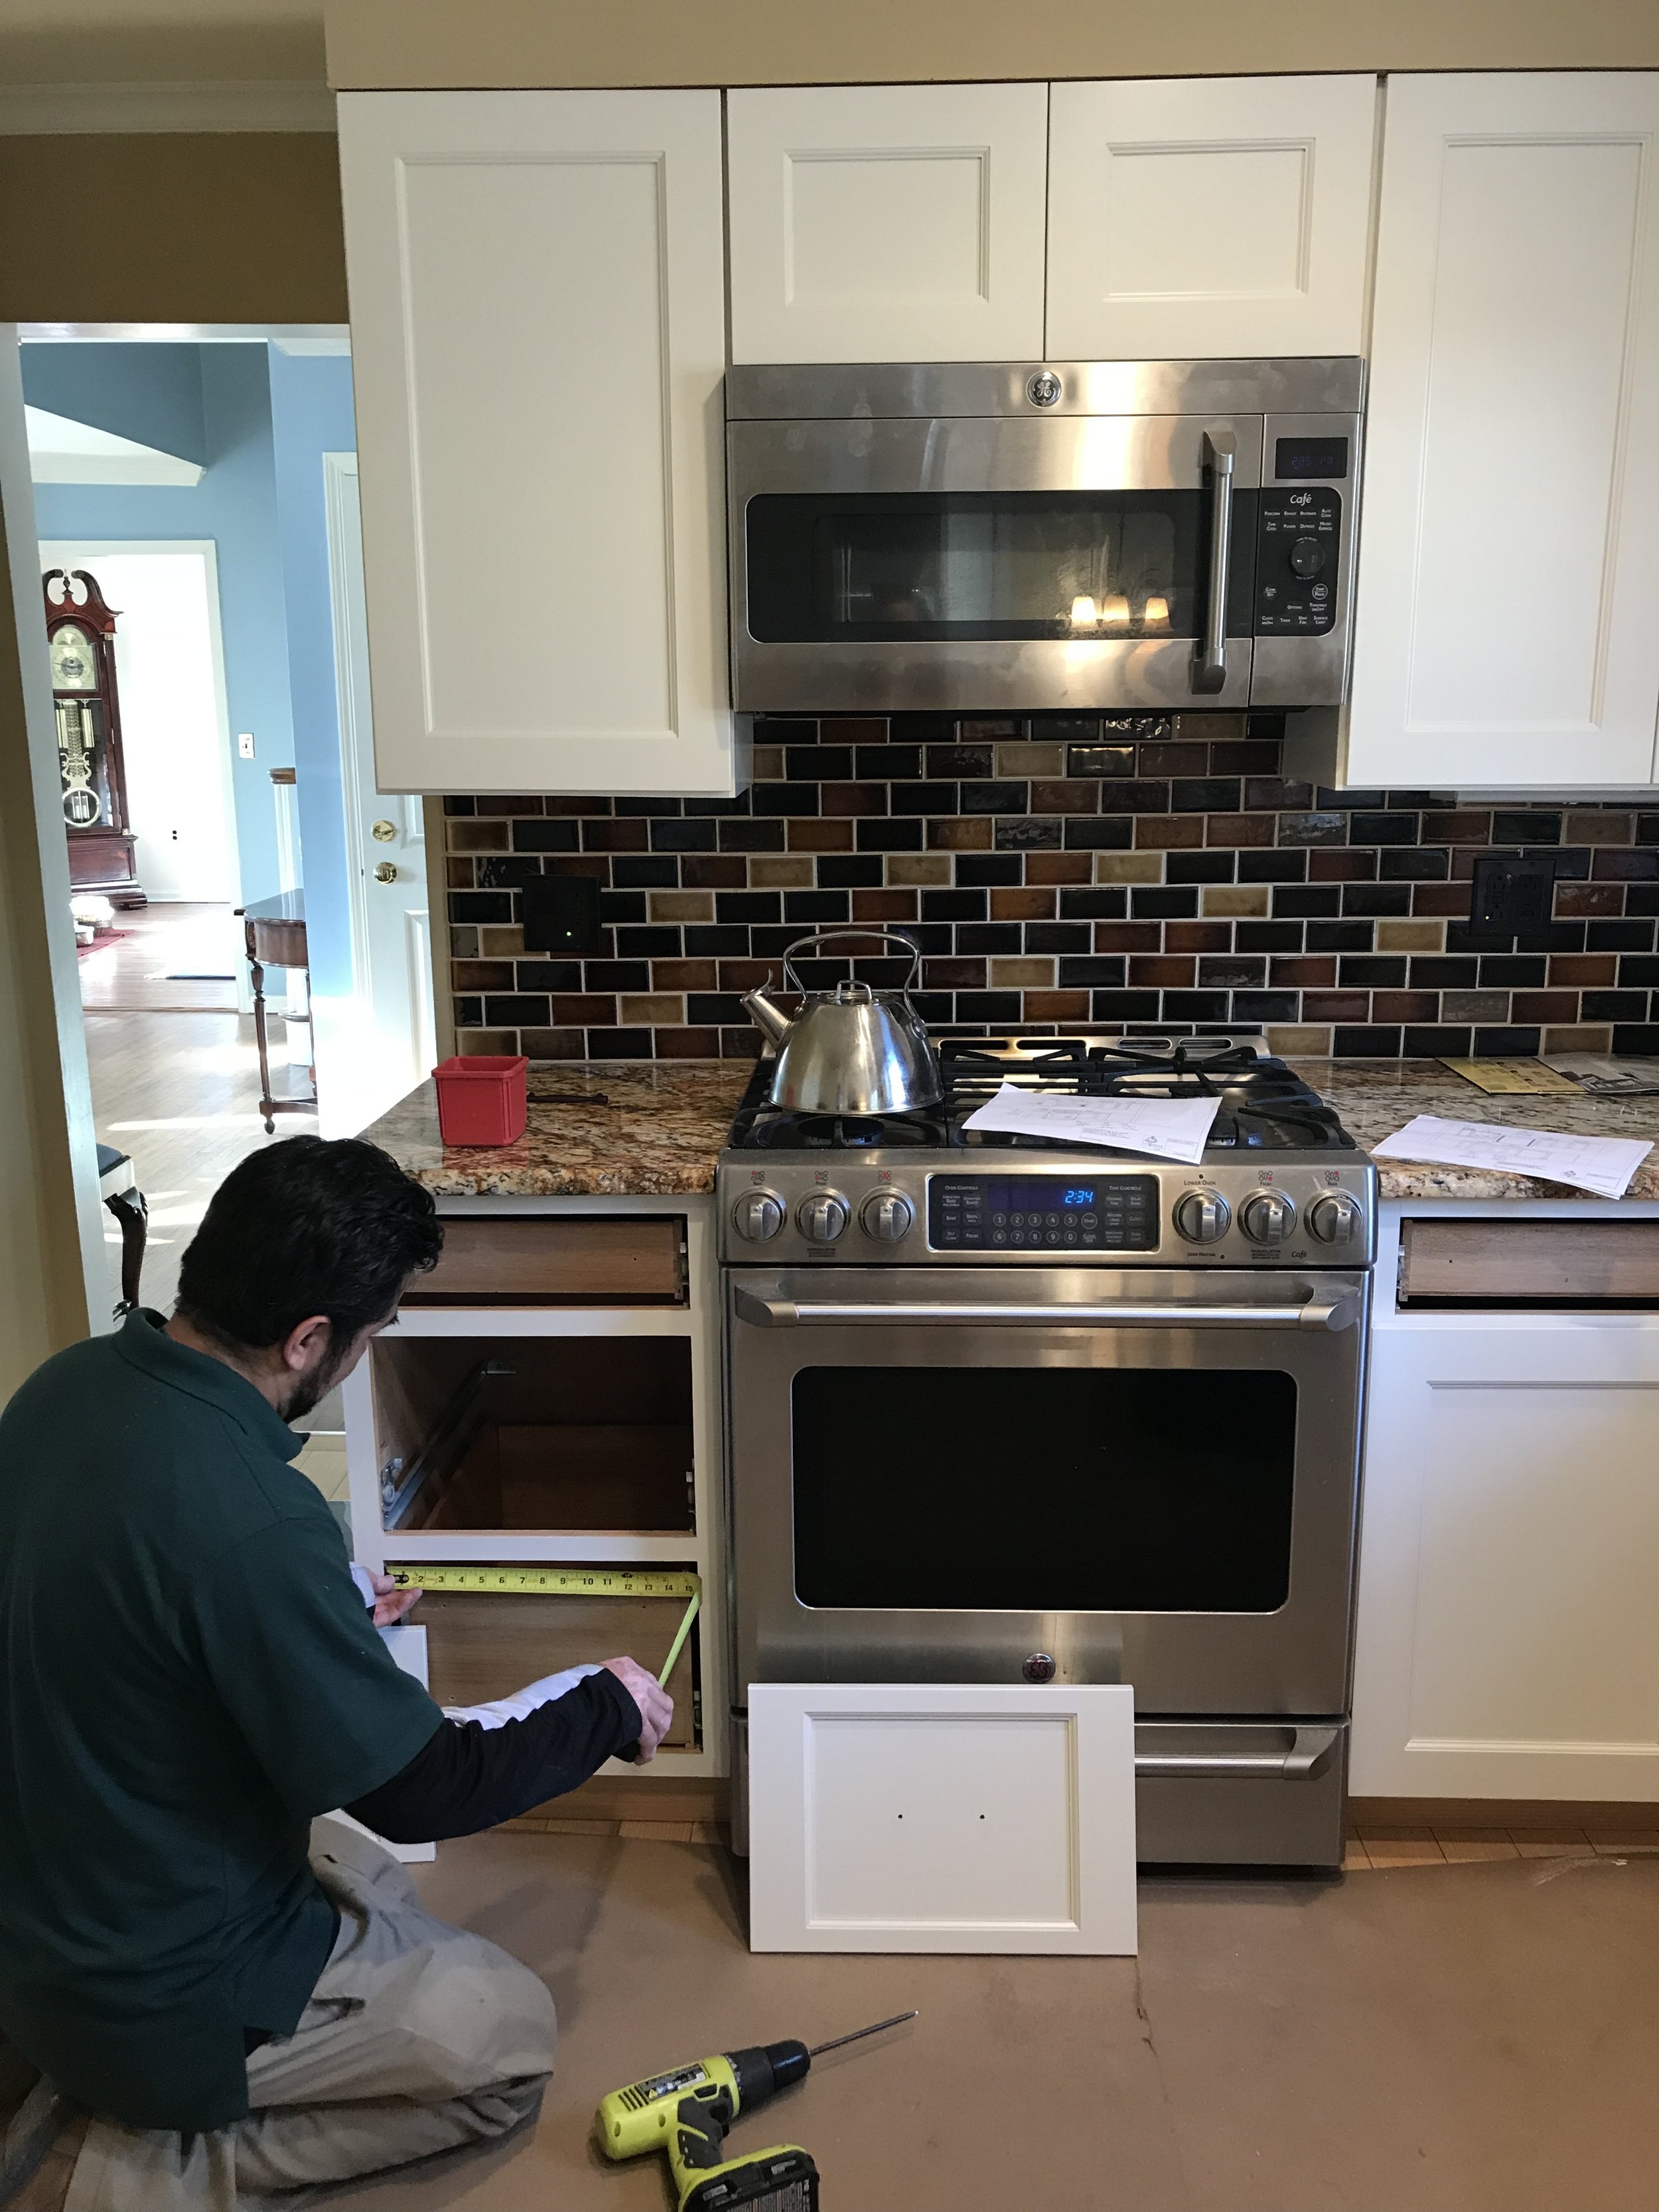
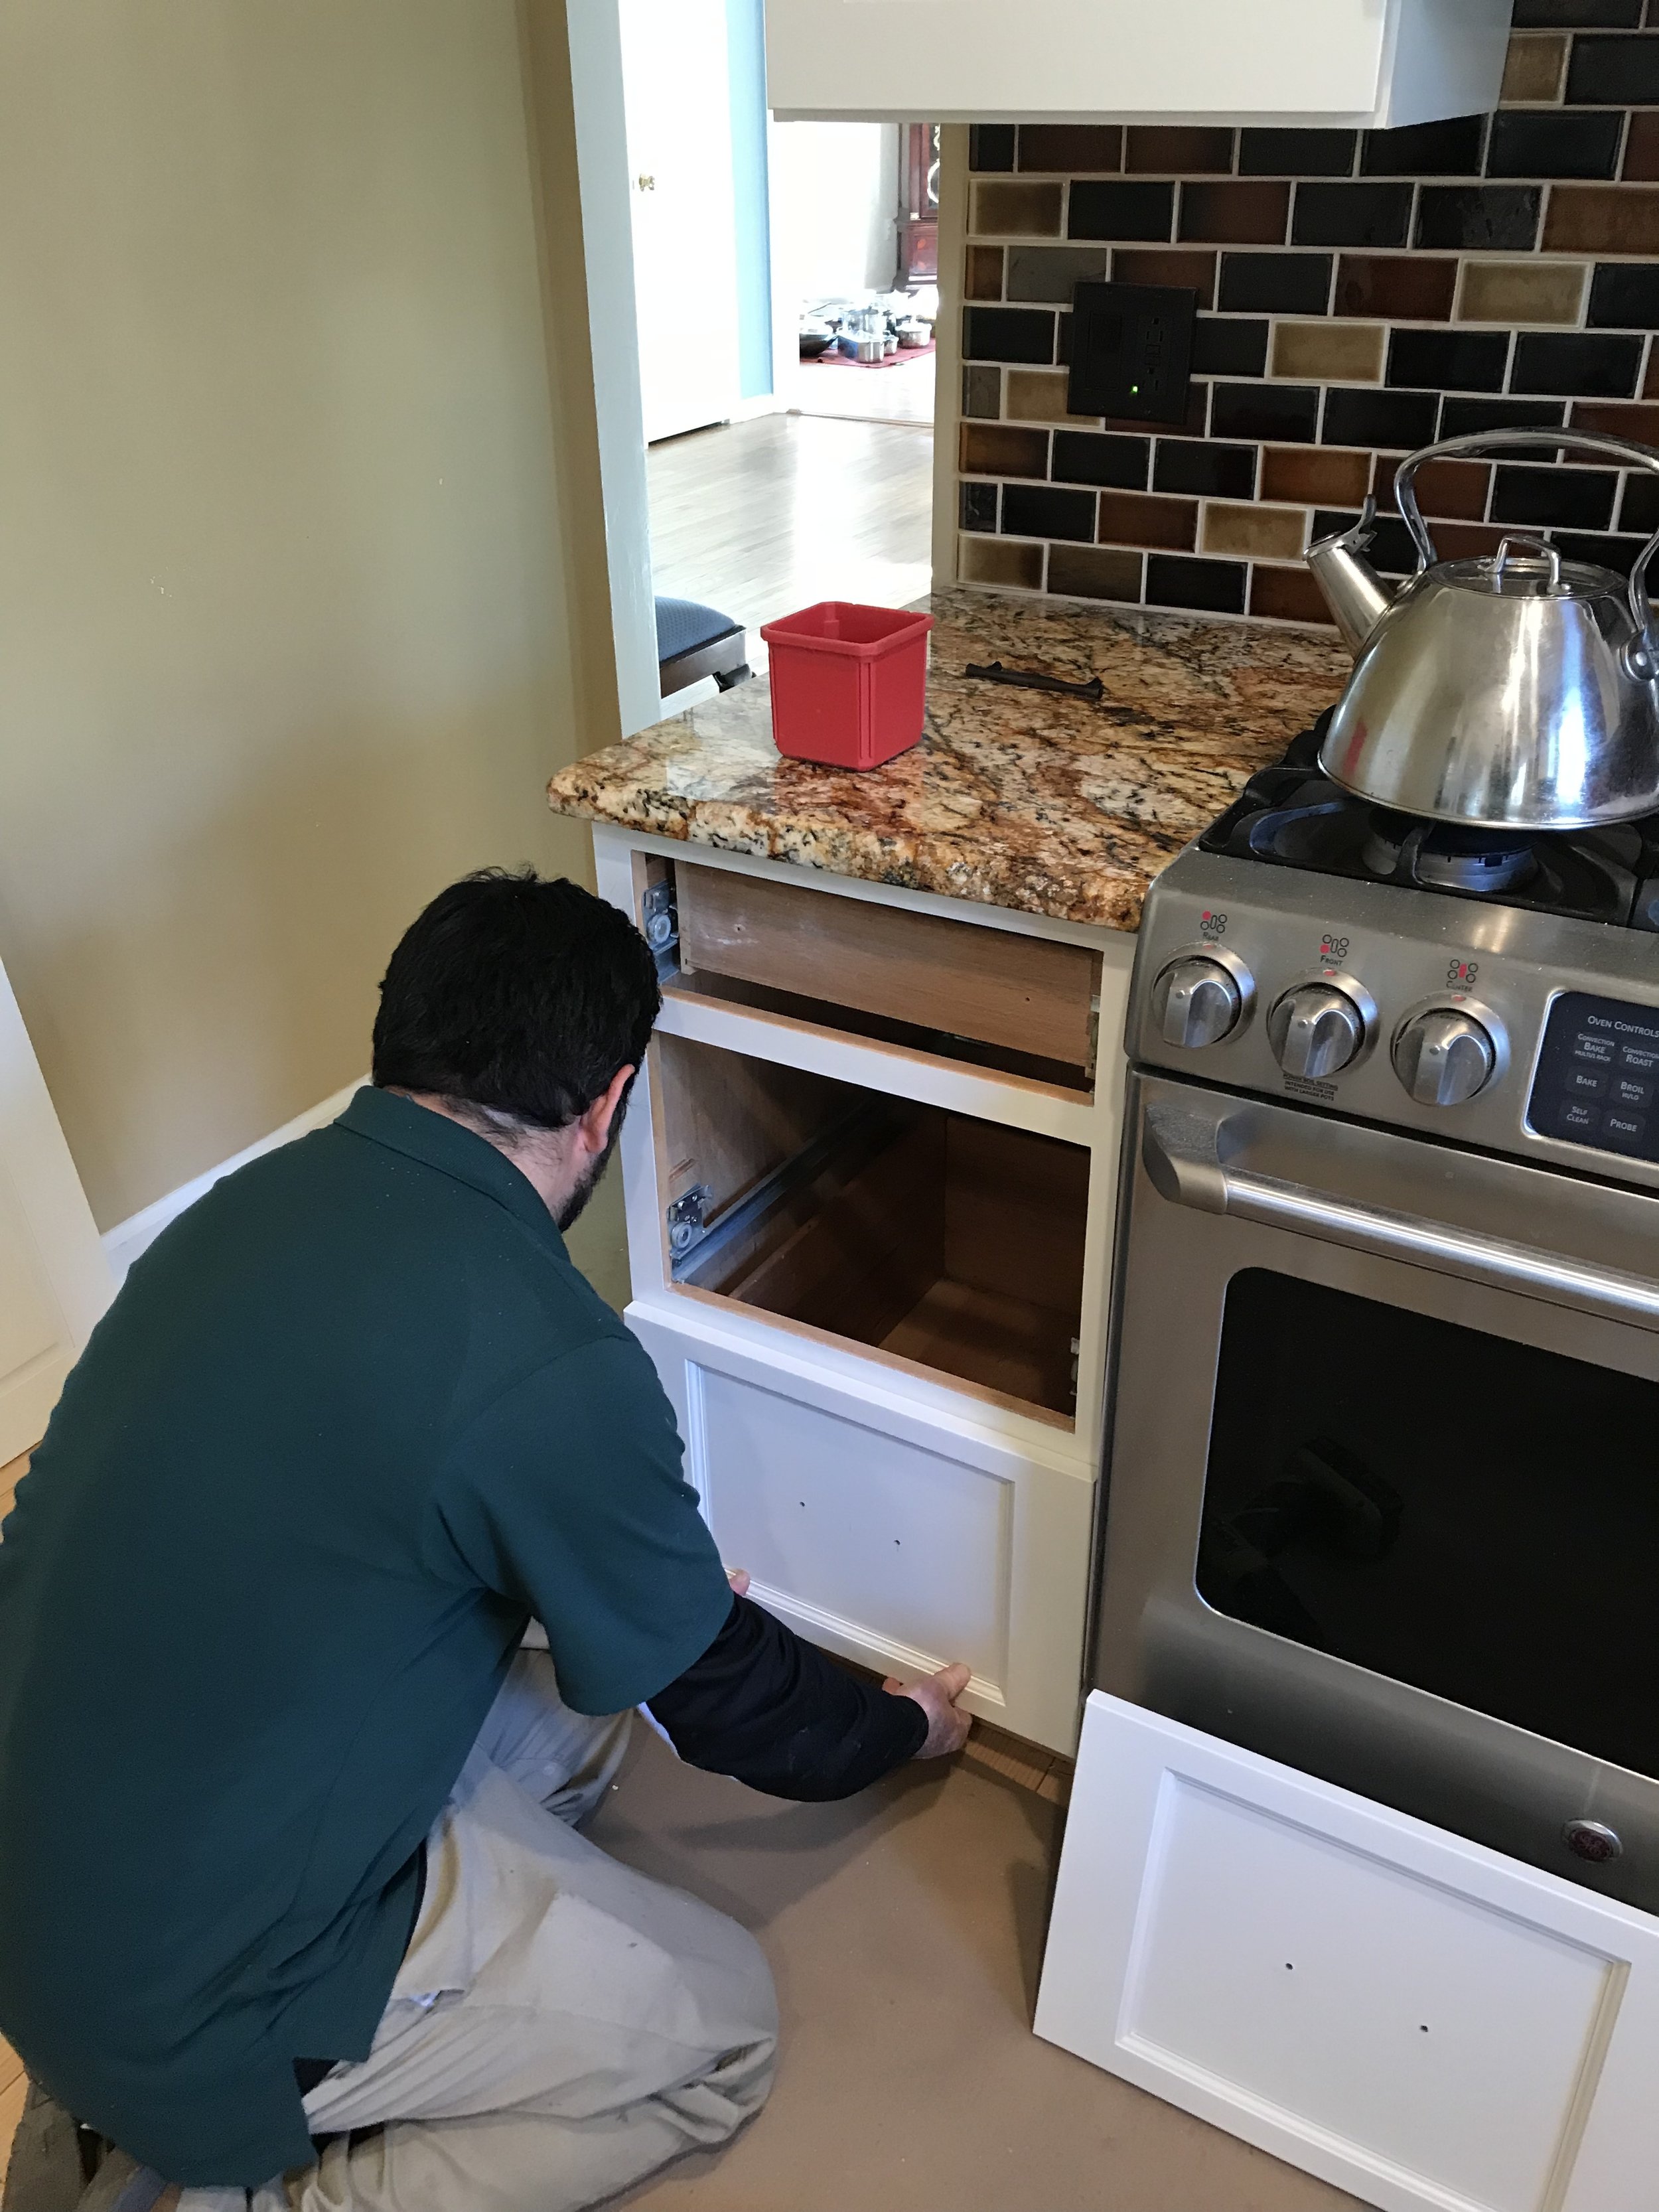
General Contracting & Cabinet Installation Services Provided by McManus Builders (Madison, NJ)

Photography by Andrew Pitzer Photography

Cabinet Refacing 101: Our Process

Cabinet Refacing is a unique service that Robinwood Kitchens has specialized in for over 40 years.  We take great pride in offering our clients an alternative option to completely remodeling without compromising quality and aesthetics.  Our secret is using the best quality refacing materials available from Conestoga Wood Specialties and employing our own installers that have refaced thousands of kitchen cabinets over the years.

Since cabinet refacing is a something that many are unfamiliar with, below is our step by step guide to the process.

Step One: Design & Details

The scope of a cabinet refacing project can vary depending on what modifications or changes the homeowner would like to make.  The project can either be very simple and the cabinets are refaced “as is”, or it can be more complex and may involve modifying existing cabinetry or adding new cabinetry. All these details are discussed in the very beginning for a few important reasons.  Modifications or additional cabinetry will affect the overall cost of the project and these details need to be hashed out so we can order the material and new cabinetry properly.  Often times we provide our clients with drawings of the modifications or new cabinetry to approve prior to ordering.

During this phase we also select the new door style and finish for the cabinet refacing project.  We have many samples to select from in our showroom.  However, our supplier, Conestoga Wood, is a custom company so there are hundreds (if not, thousands) or door style/finish combinations available.  If the homeowner is looking for something that we may not have in the showroom, we order door samples for approval before finalizing all the details and ordering.

Photo Feb 01, 3 10 12 PM.jpg


Step Two: D-Day

*Prior to starting the cabinet refacing project, it is important for the homeowners to clean out all cabinetry.  While the refacing process isn’t very messy, light sanding is still involved so it’s best to remove everything from the cabinetry while work is being performed.

 Demo Day for Cabinet Refacing is much less intrusive when compared to a complete remodel. Before we begin working, our installers protect the floors, countertops, and any other important areas of the kitchen.  The first step is to remove all the existing doors, drawer fronts, and moldings that are being replaced. 

If countertops are being replaced, they will also be removed at this time so a template for the new countertop can be completed.  Countertops typically take 7-10 days to be fabricated, installation can be expected towards the end of the project.

If the backsplash is being replaced, the removal of existing backsplash tile will occur during the demo phase.  The sheetrock will be patched in preparation for the new tile, and the tile installed after the countertop installation.

Step Three: Prep the Cabinets

To prep the cabinetry for the new refacing material the cabinets are cleaned with solution and lightly sanded.  This is done to ensure the new skins and veneer will adhere to the existing cabinetry.  Wood filler is also applied to the cabinetry frames as needed.

If new cabinetry is within the scope of work it will also be installed during this phase.


Step Four: Installation of Skins, Veneer, and Molding

This part of the process is the most time consuming and requires skill and patience from our experienced installers. This attention to detail results in a beautiful finished product.

Skins are an 1/8” finished end that we use for the sides of wall, base, and tall cabinets, and also to finish the bottom of wall cabinets. Each one is cut to fit the individual cabinetry from a large 24” x 96” piece. They are attached to the cabinetry with construction adhesive and small pin nails.

Veneer is a thin material, approximately 1/32”, that we use for the front frames of all the cabinetry.  Robinwood prefers to use all wood products for our refacing work, which results in a long lasting and durable finish.  The veneer is wood-back and comes with a pressure sensitive adhesive coating.  Similar to the skins, veneer is cut to fit the individual cabinet frames from a large sheet of veneer.  Before applying the veneer, we coat the cabinetry with additional adhesive.  This adhesive in combination with the PSA wood-back veneer, ensures proper adhesion and performance.

The addition of crown, light rail, and base moldings will also bring the kitchen to the next level.

Step Five: Installation of Doors, Drawers, Hardware, and Accessories

Once the actual “refacing” part of the project is complete, we install the new doors, drawerfronts, and cabinet hardware.  Until this point the kitchen may not look like much, but this is when the space comes to life and vision becomes reality.

We install all new hinges with a soft closing feature, a nice addition that you will see in all new cabinetry today.  Another option many homeowners take advantage of is accessorizing their kitchen.  This may include new wood drawer boxes, a trash pullout, and cutlery dividers, etc.  All of these additional features enhance the functionality of the kitchen without having to completely replace your cabinetry.

To see more Before and Afters of our previous cabinet refacing photos, click through the gallery below!

Before & After: Cabinet Refacing Transformation

Cabinet Refacing is a service we’ve been specializing in since the 1970’s.  We often call it our “bread and butter” because refacing is what eventually led to Robin’s transition from cabinet refinishing to complete kitchen design and remodeling.  Cabinet Refacing is a great way to give a kitchen a face lift.  It provides the opportunity to completely transform the aesthetic of a kitchen without having to embark on an entire remodel.  The high quality materials we use from Conestoga Wood paired with the craftsmanship of our installers allows us to provide a service that is unique in the kitchen and bath business.


It’s especially rewarding when we’re able to transform a space that not only fits the personal style of the homeowners, but also functions better for their family and lifestyle.  In this particular project, Cabinet Refacing was the best option for a young, growing family of three. The existing layout of the kitchen worked well for the couple, but they knew with a baby on the way that extra storage would be a necessity.  By installing all new doors and drawer fronts in a fresh door style and bright white finish, the kitchen looks brand new compared to the original condition of the oak cabinetry.  An adjacent empty living area that was occupied by a lonesome shelving unit was not living up to its potential for the homeowners.  Through a collaborative effort, we designed and installed additional pantry cabinets that are the perfect place to store food and baby items.  During family get togethers the central base and wall cabinets can act as a coffee bar and buffet.  For a closer look into the changes we made to transform this kitchen, see our before and after photos below!